


Linear rib installation – wall
The Capax installation system for Linear RIB is a user friendly aluminum grid, offering installation reliability and a perfect visual result. No tools are needed to assemble the interlocking components. A demountable version is available, ideal when access to the ancillary systems is required.
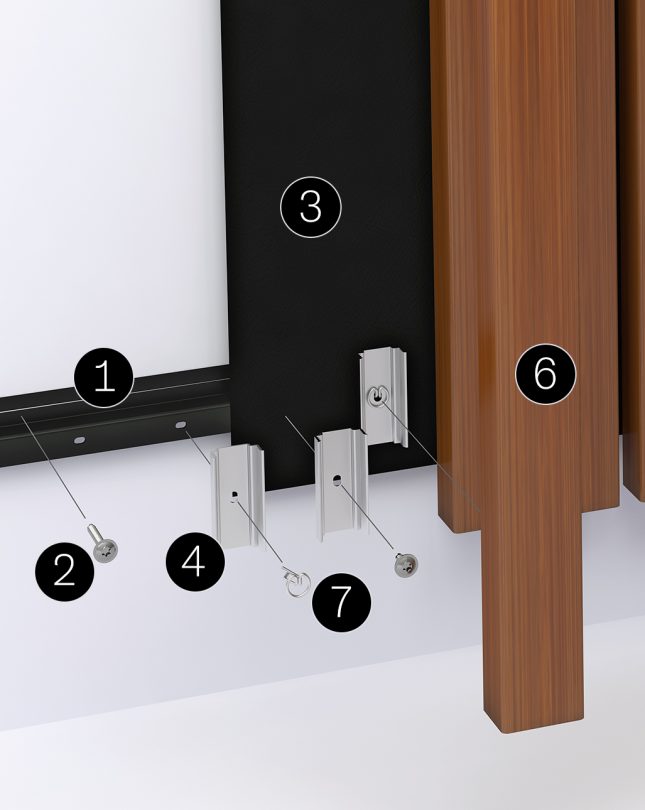
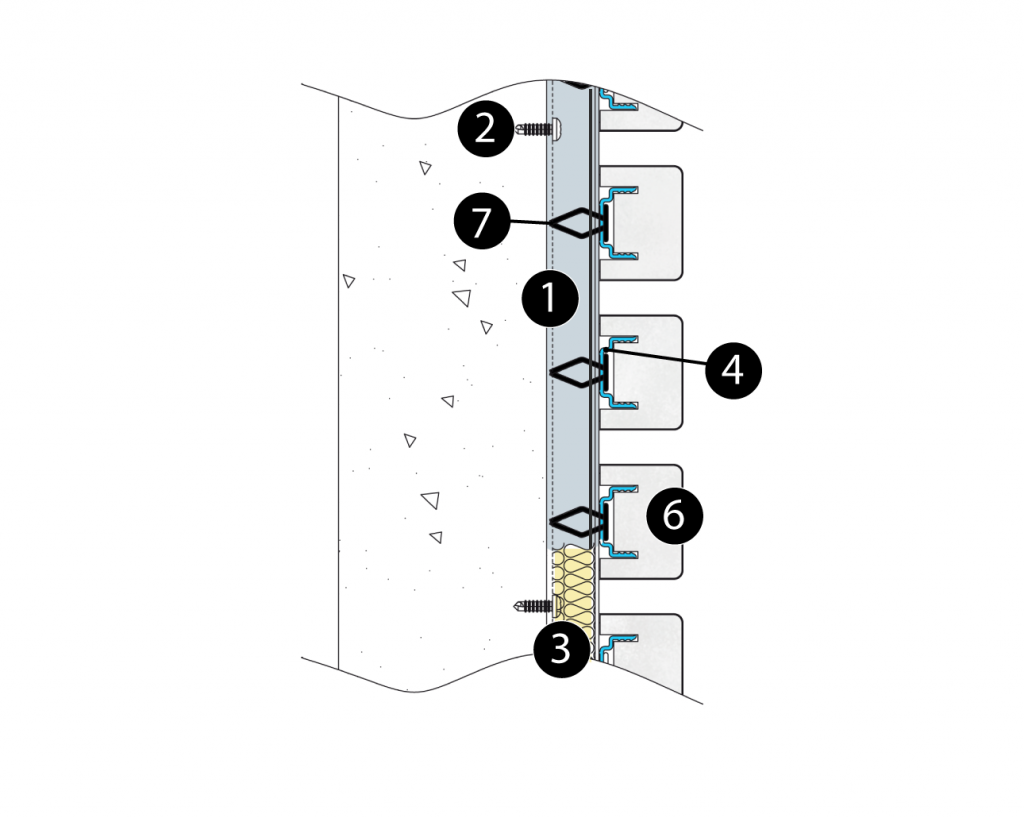
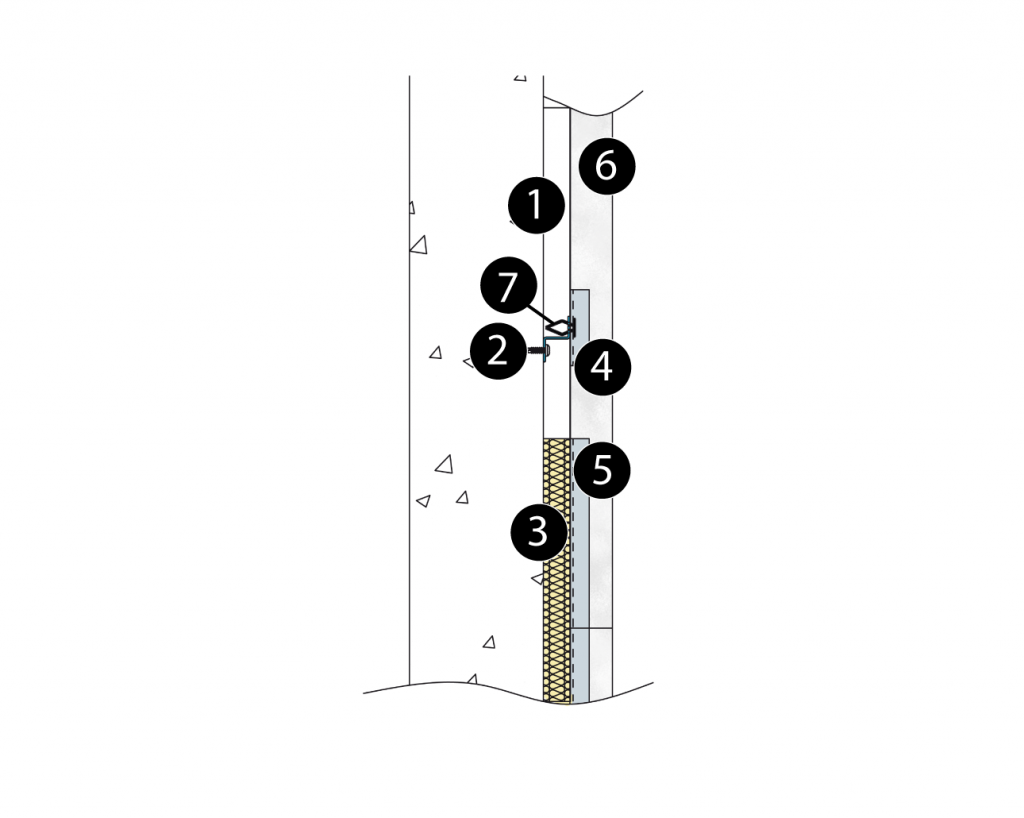
Capax wall installation
- Capax Base-W
- Wall fixing screw
- Air gap or insulation
- Capax U-FIX
- Capax in-line connector
- Gustafs ribs
- Spring Clips
Customised installations
These instructions refer to our standard installation. For other solutions such as curved walls, closures and door liners, contact our support.
CONTACT SUPPORT
When the Ribs are installed with the spring clips, they can be demounted by gently pulling close to all the points of connection (U-FIX + spring clip), starting at one of the ends. Do not try to pull down the whole Rib by pulling at one of the ends only.
Re-installing
In the case of a re-installation of a removed Rib, be sure all spring clips are properly aligned with the center of the holes in the BASE-C or BASE-W profiles before pressing firmly home.
Downloads
download