Panel System – Wall installation

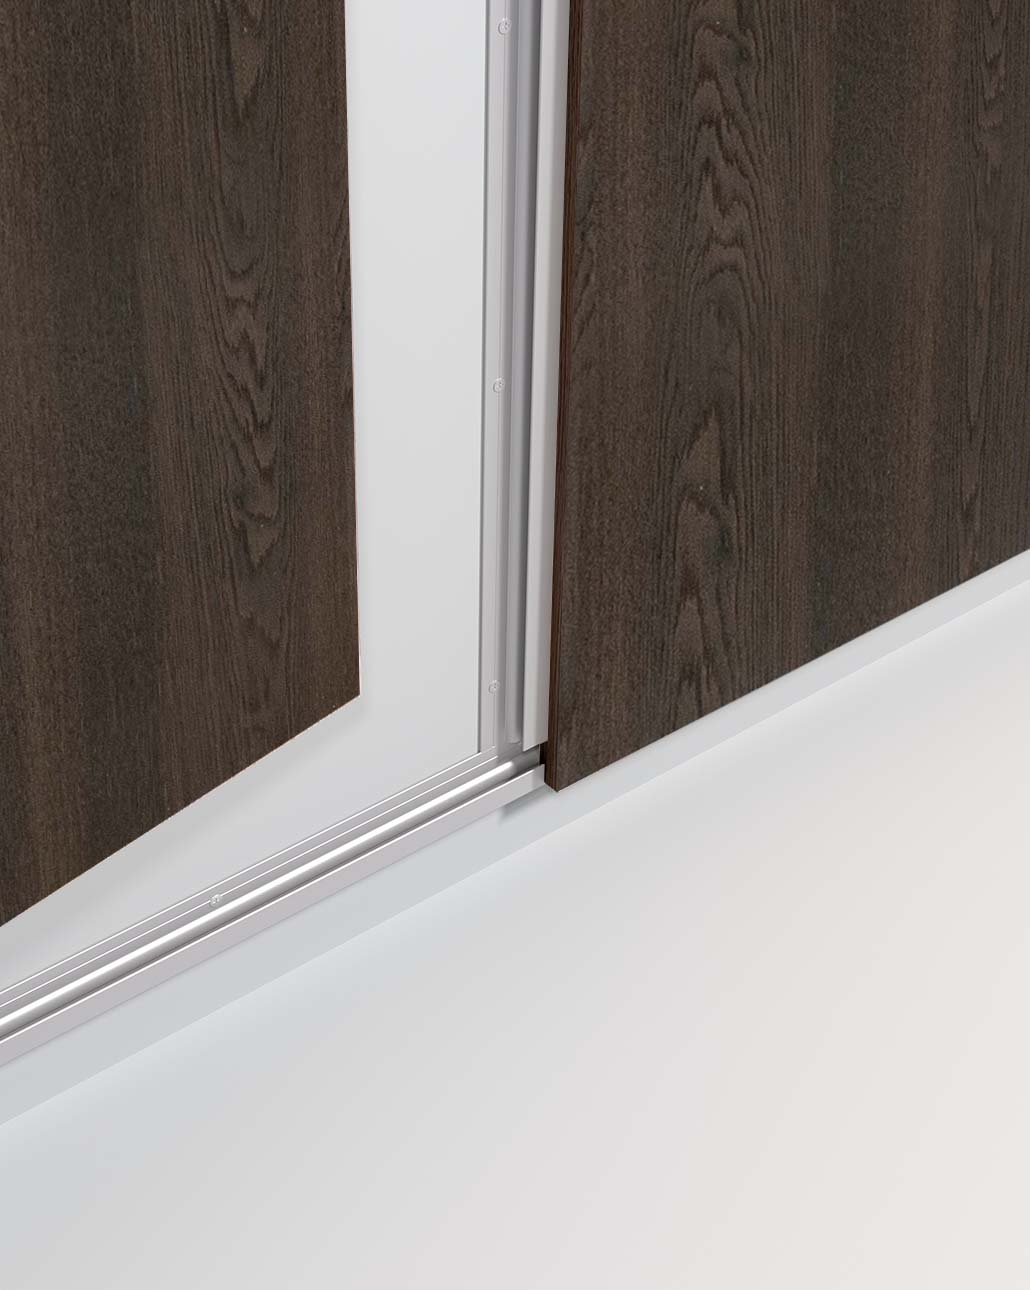
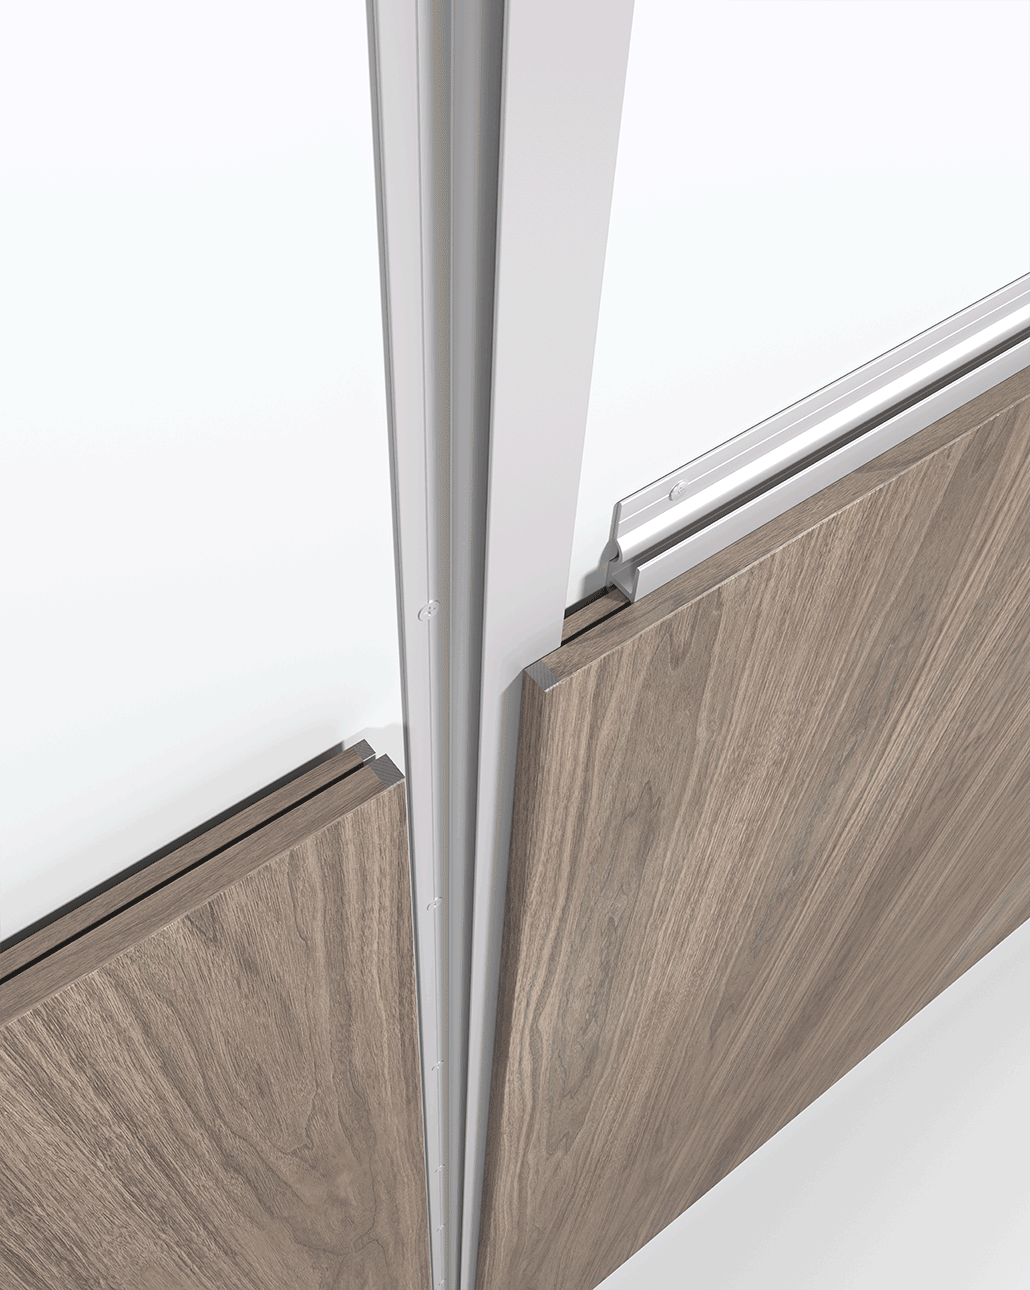
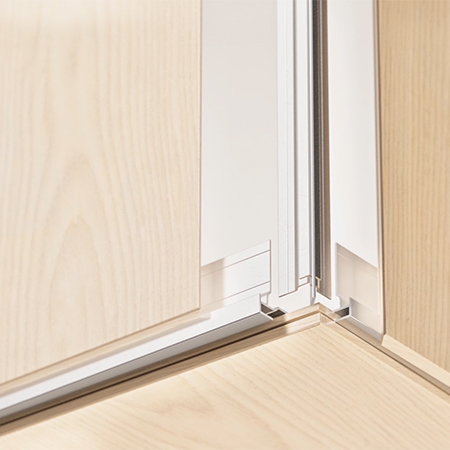
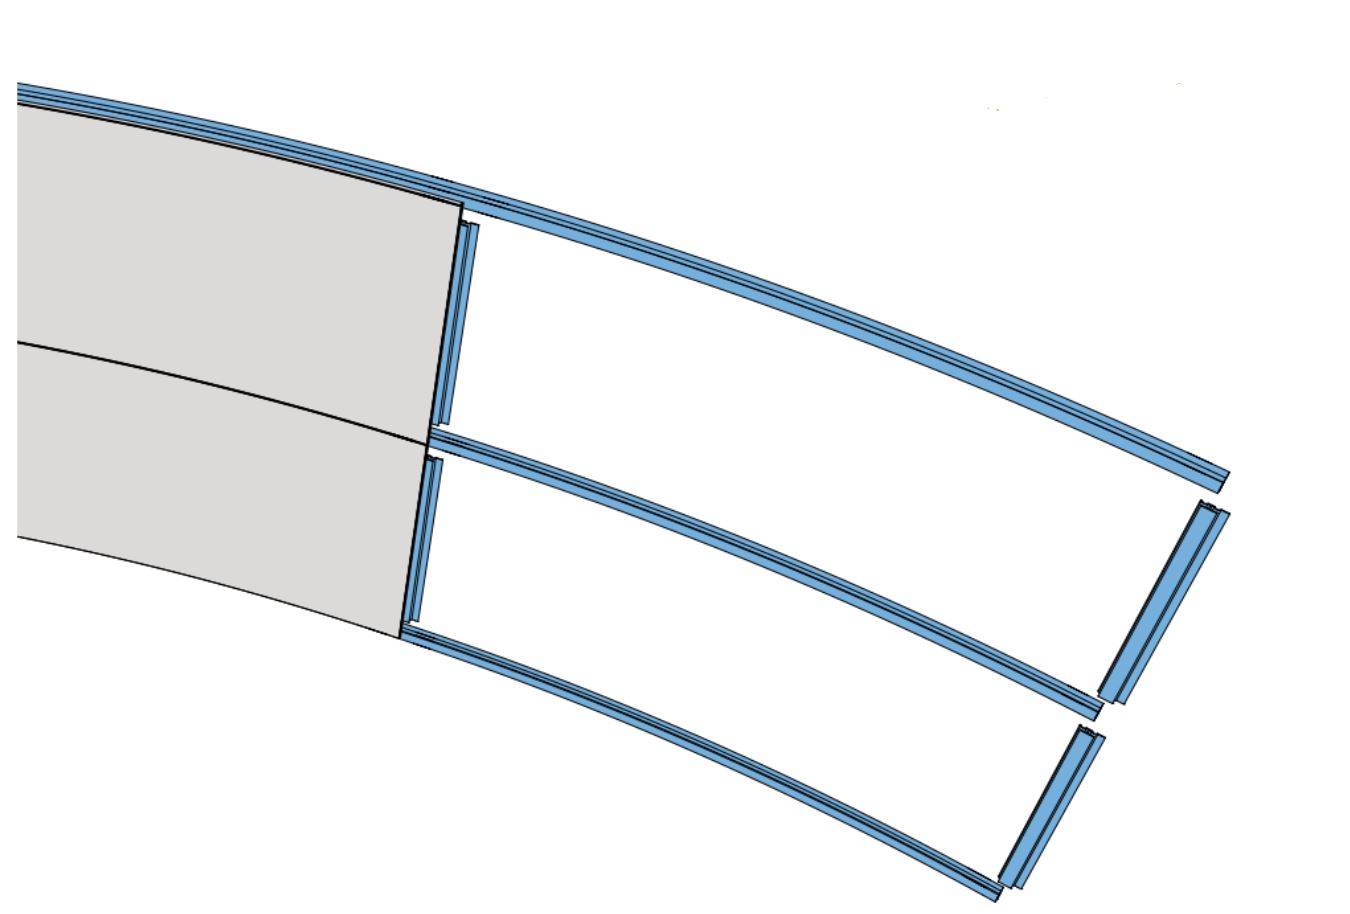
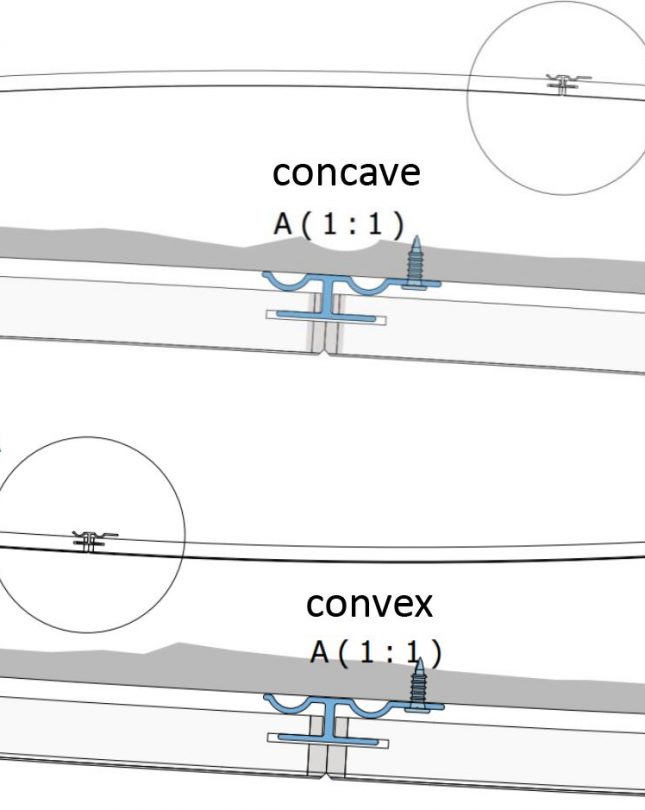
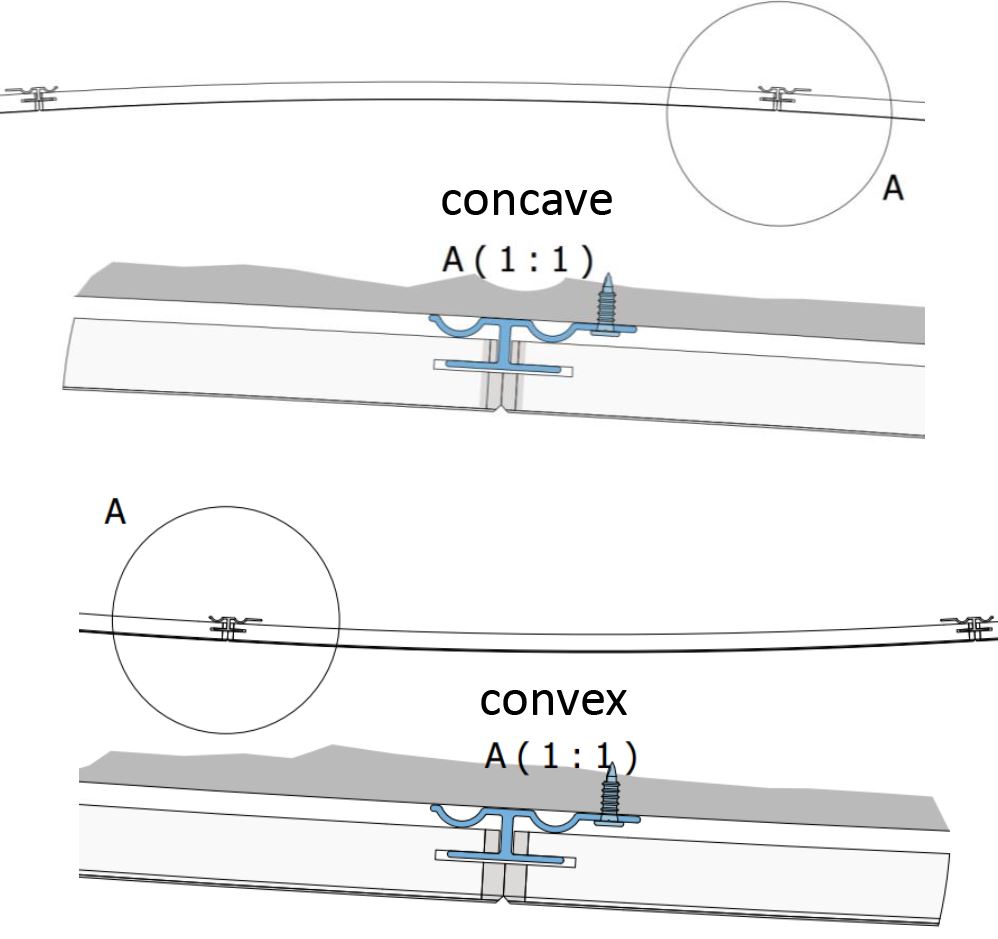
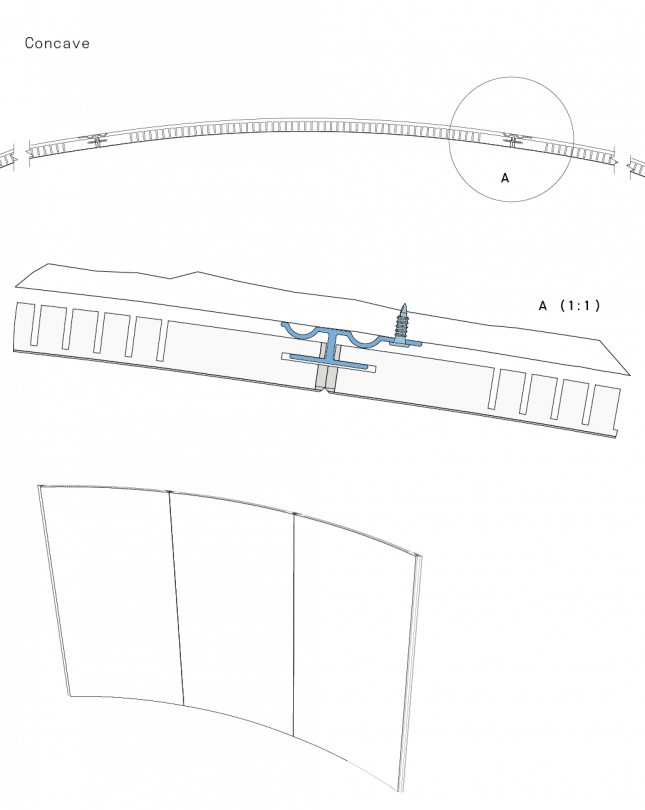
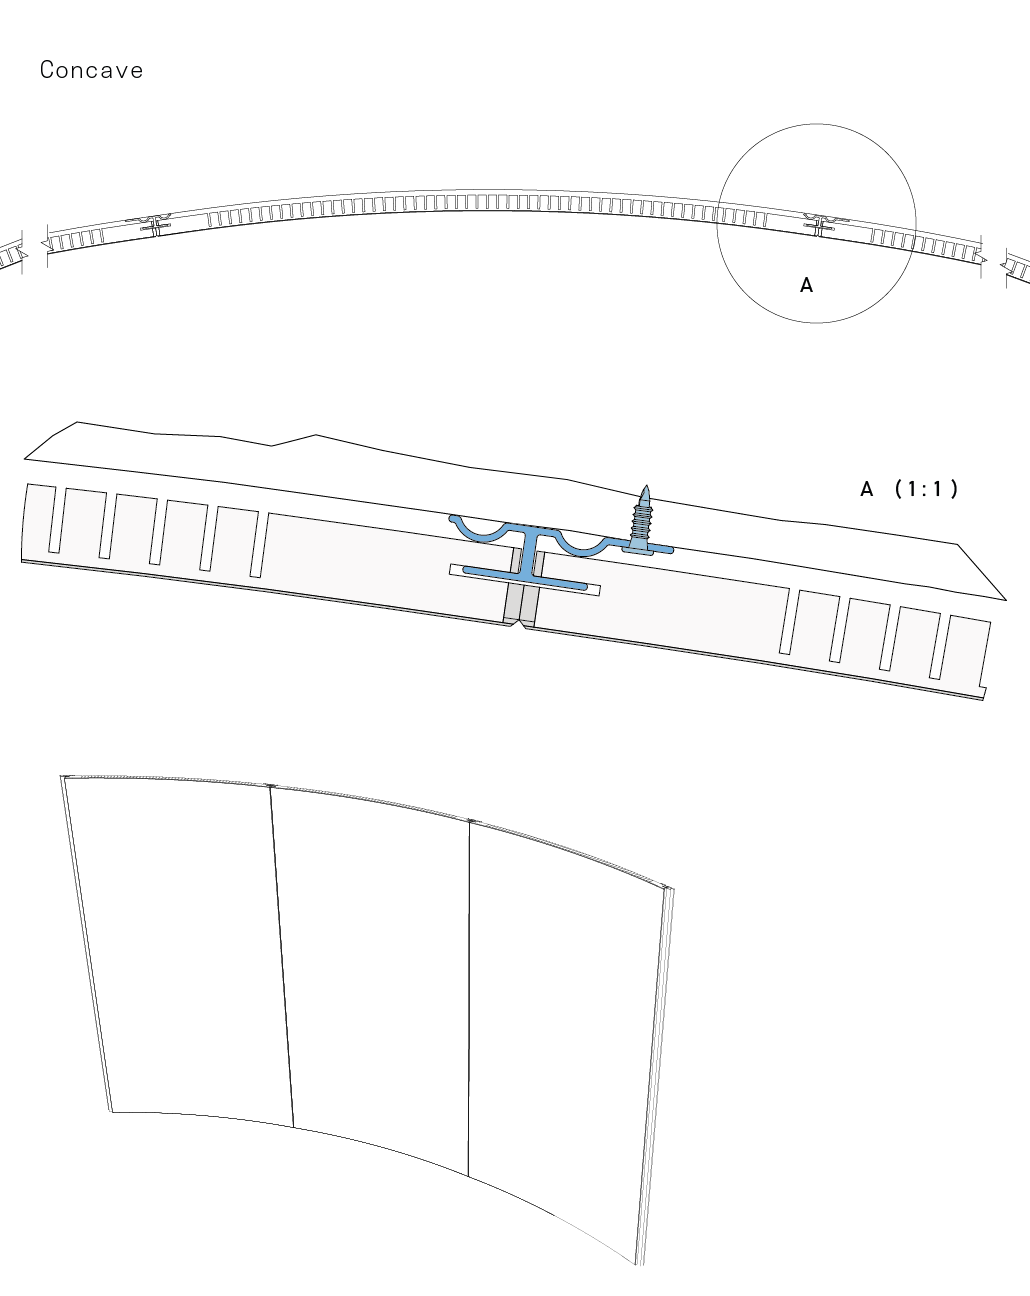
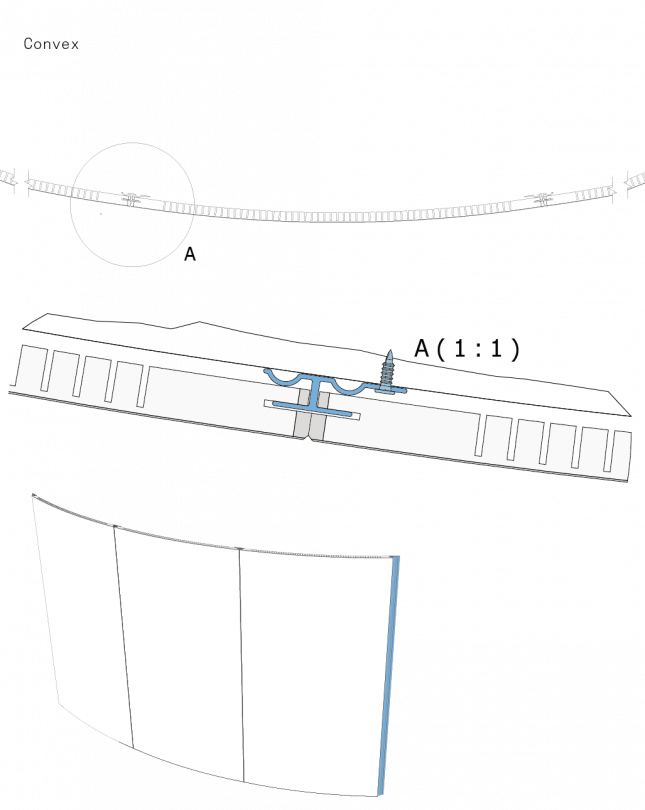
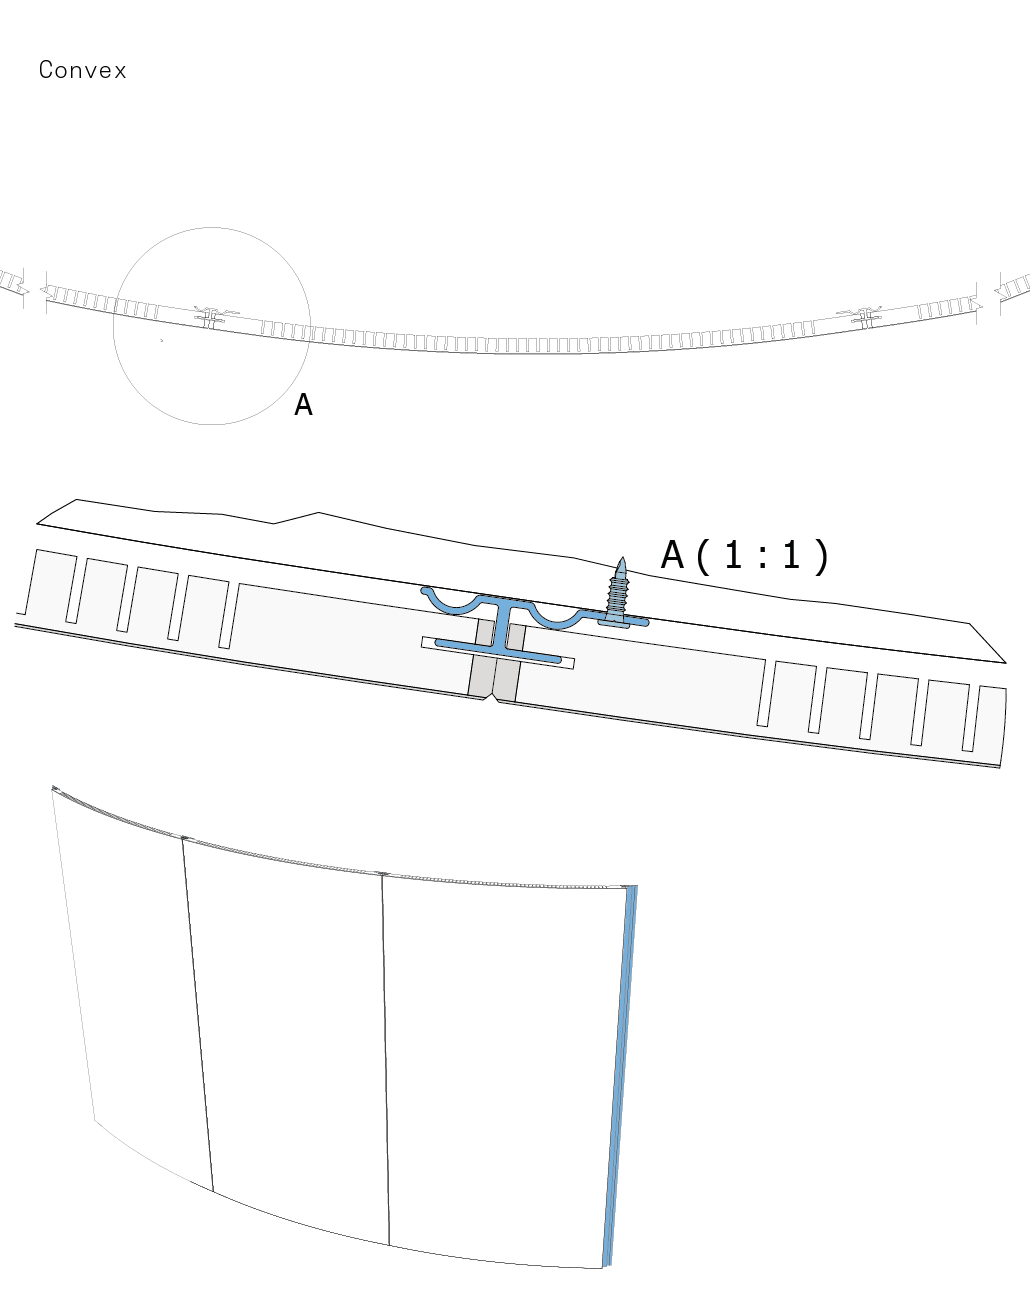
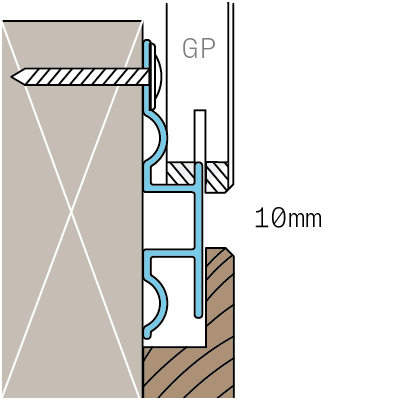
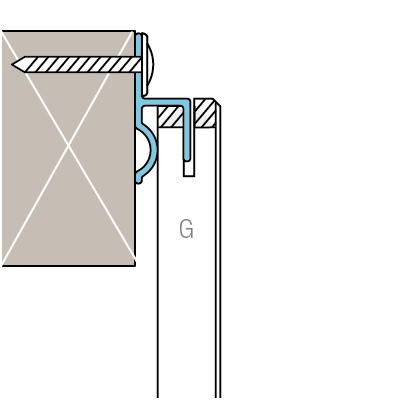
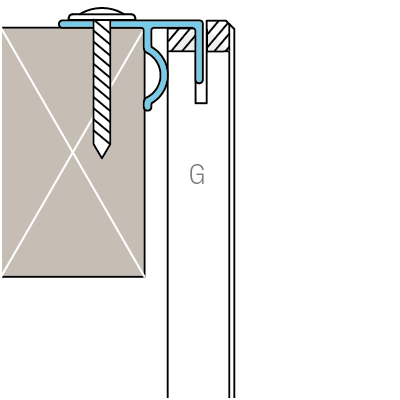
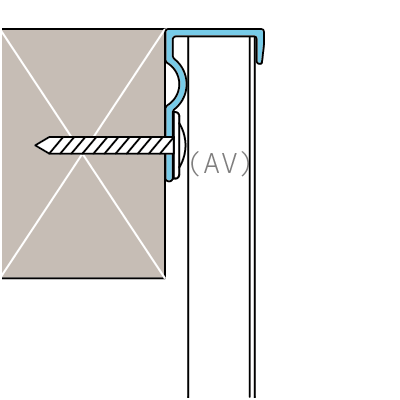
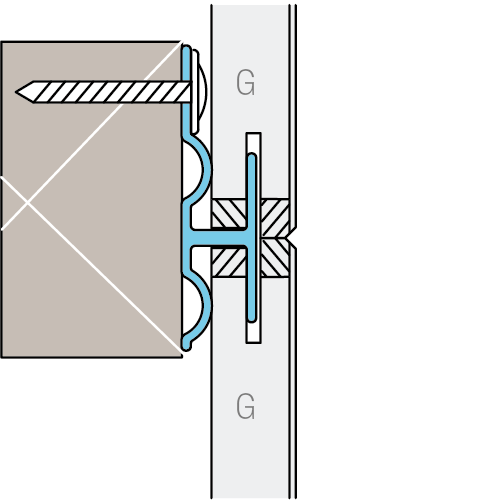
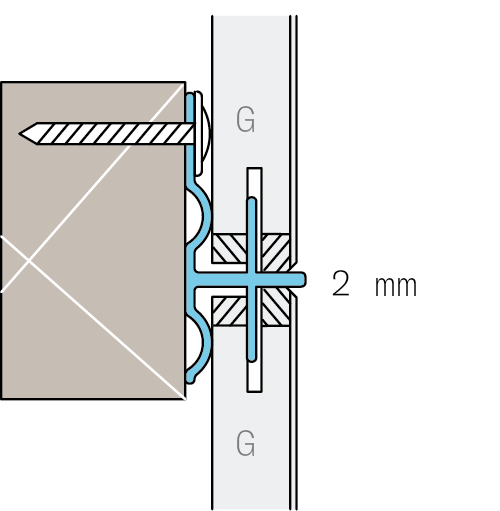
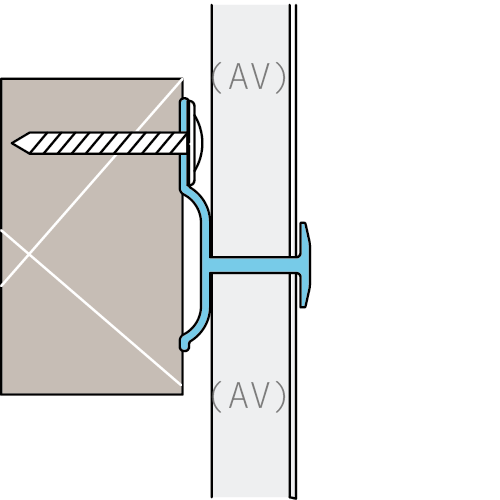
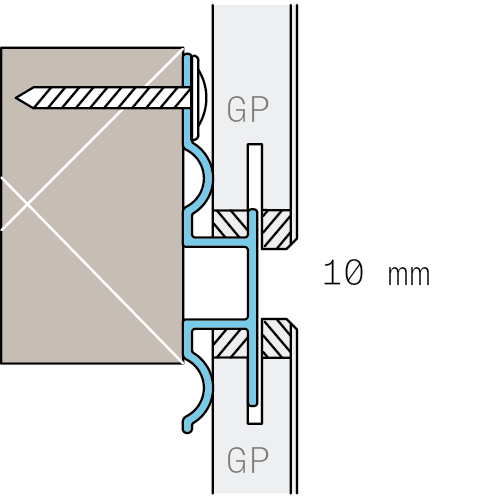
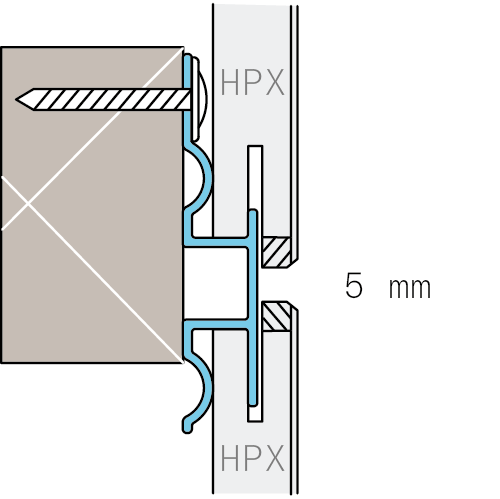
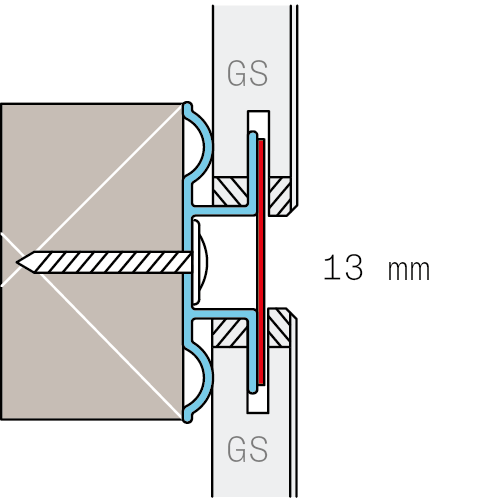
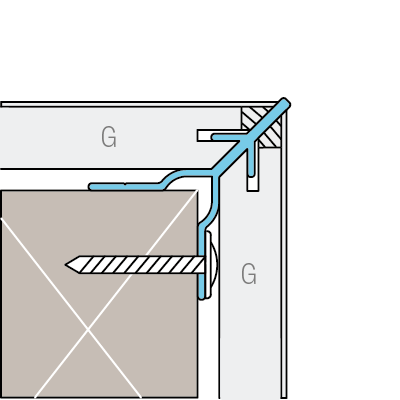
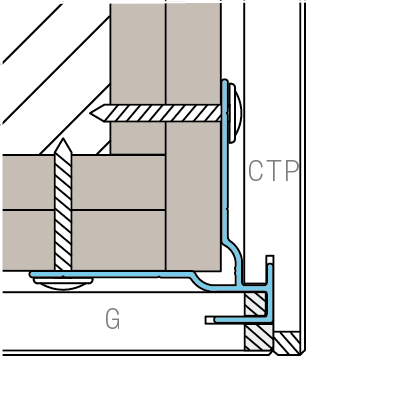
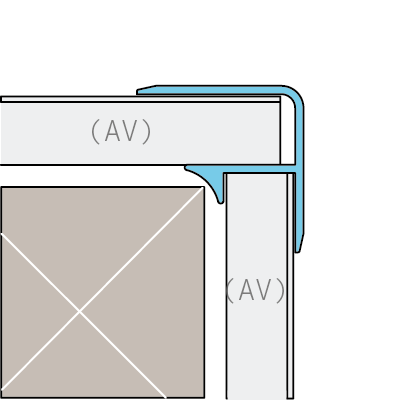
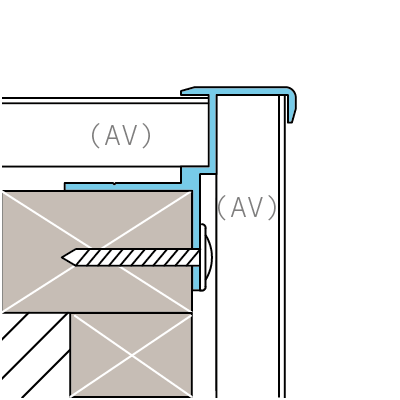
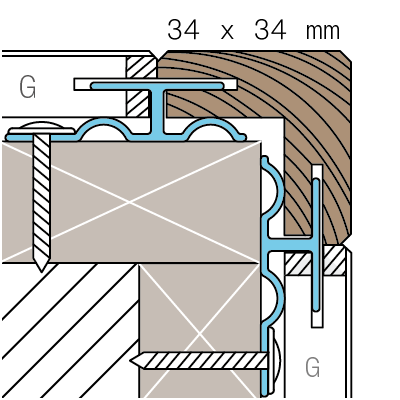
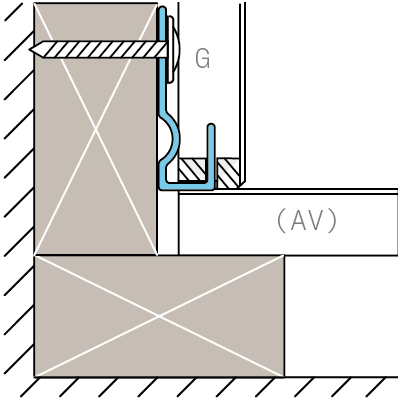
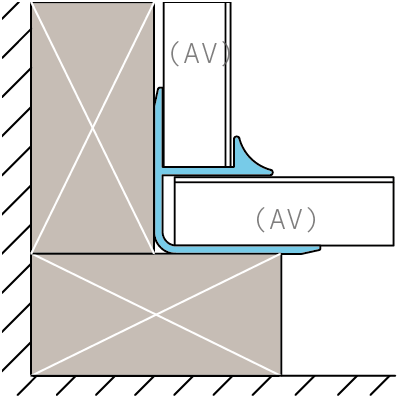
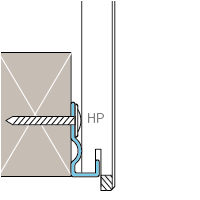
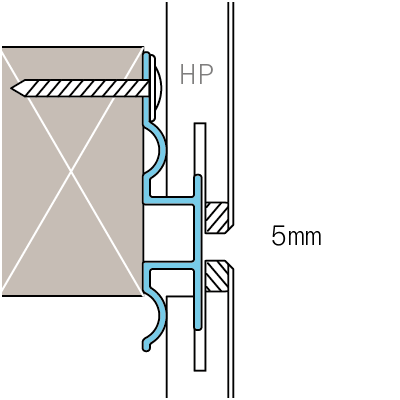
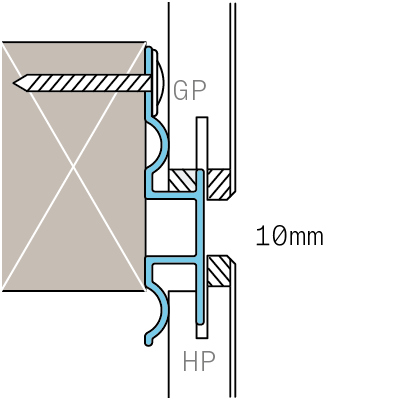
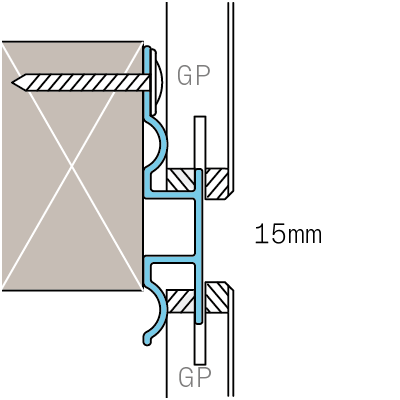
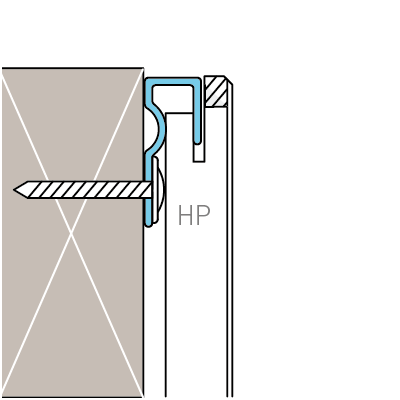
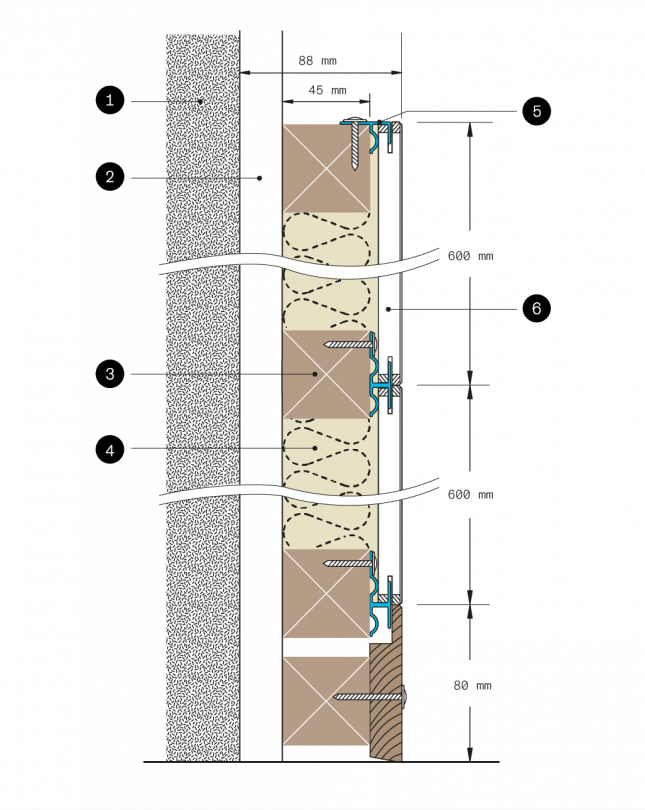
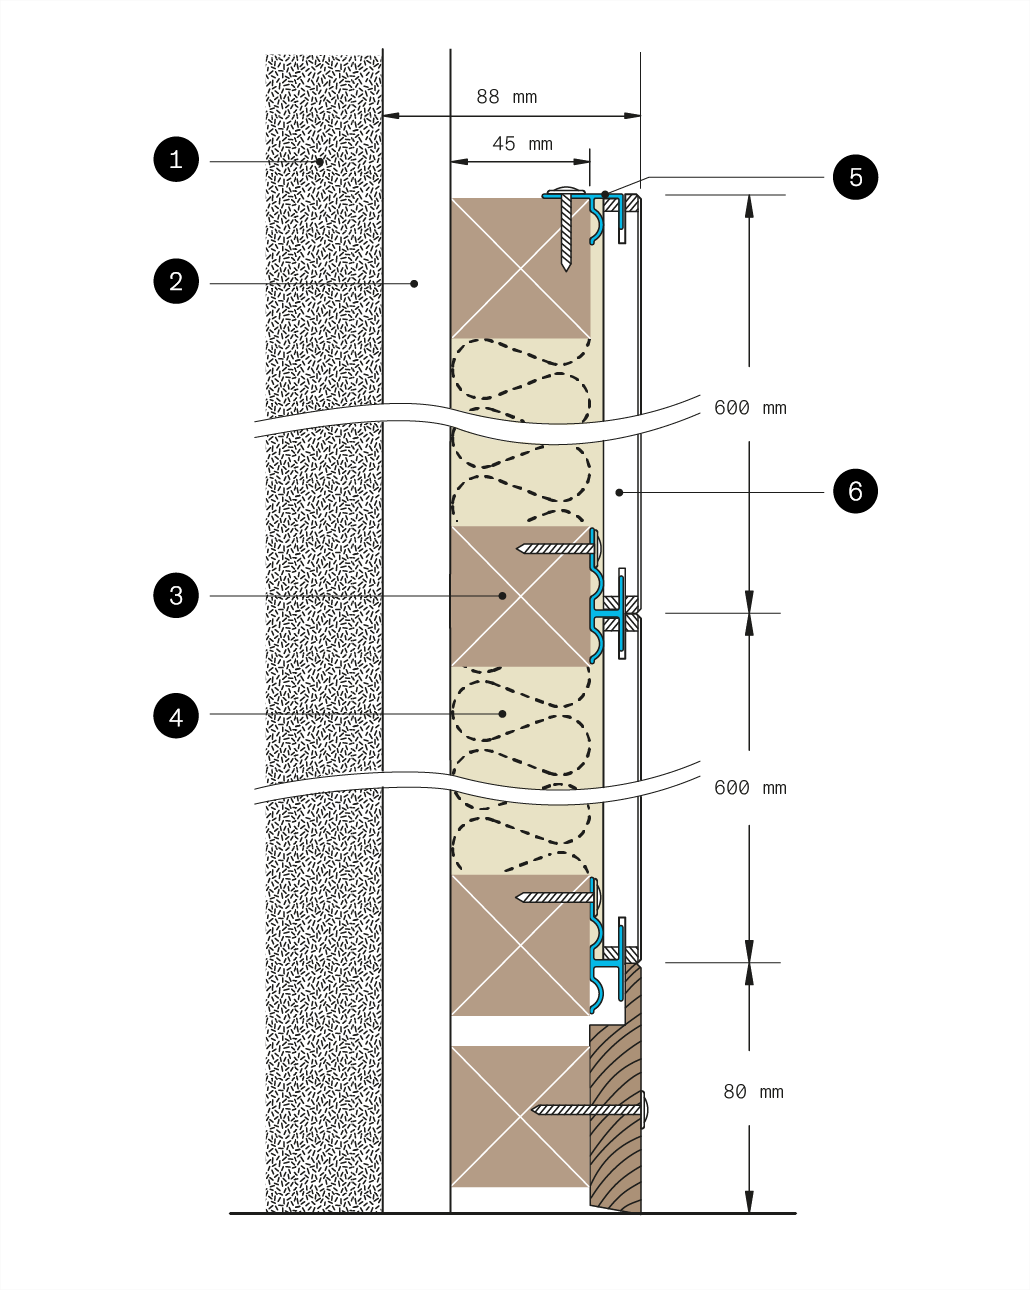
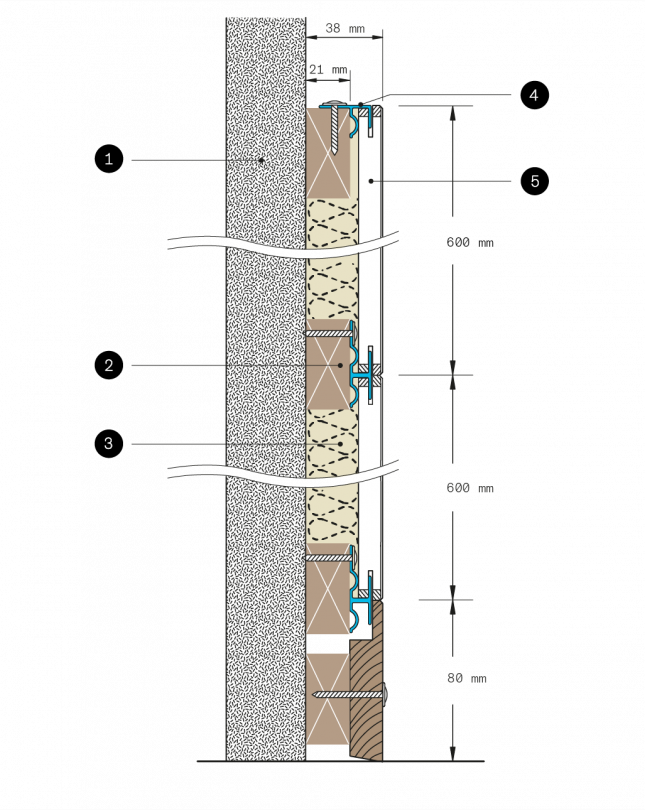
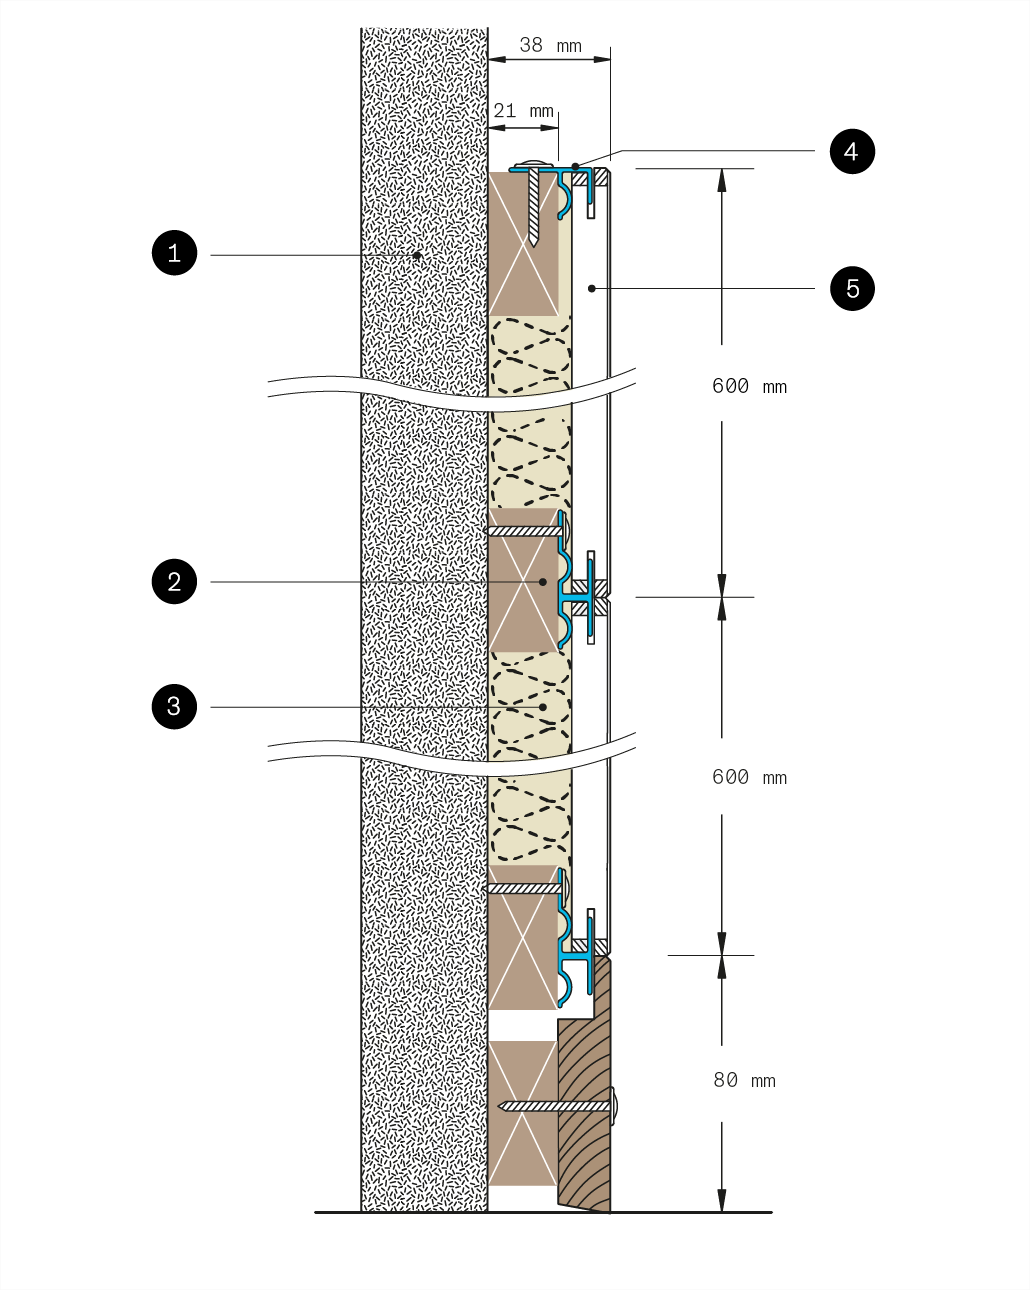
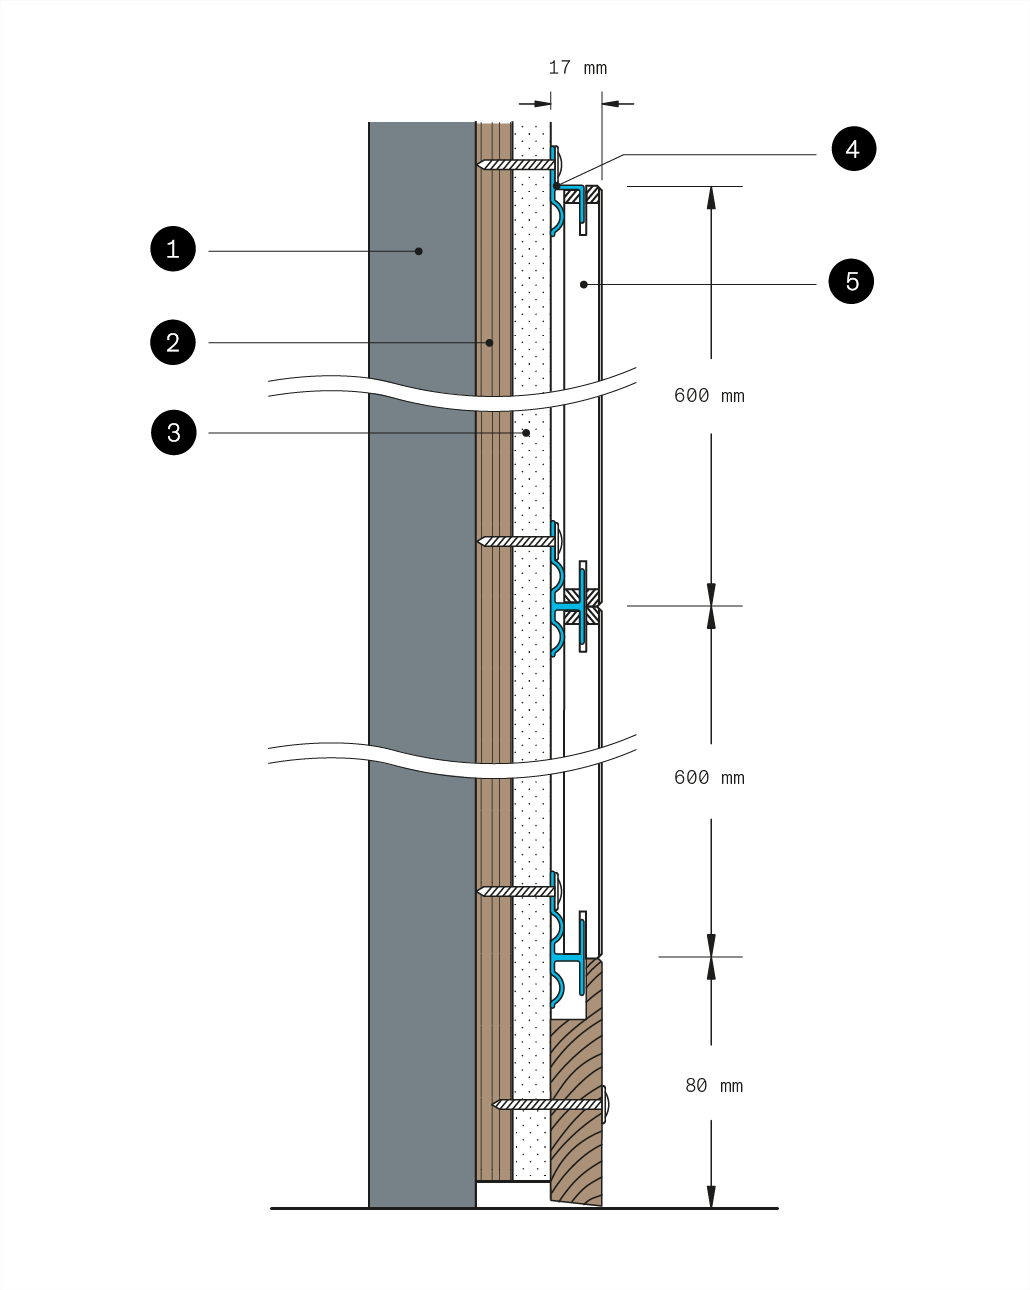
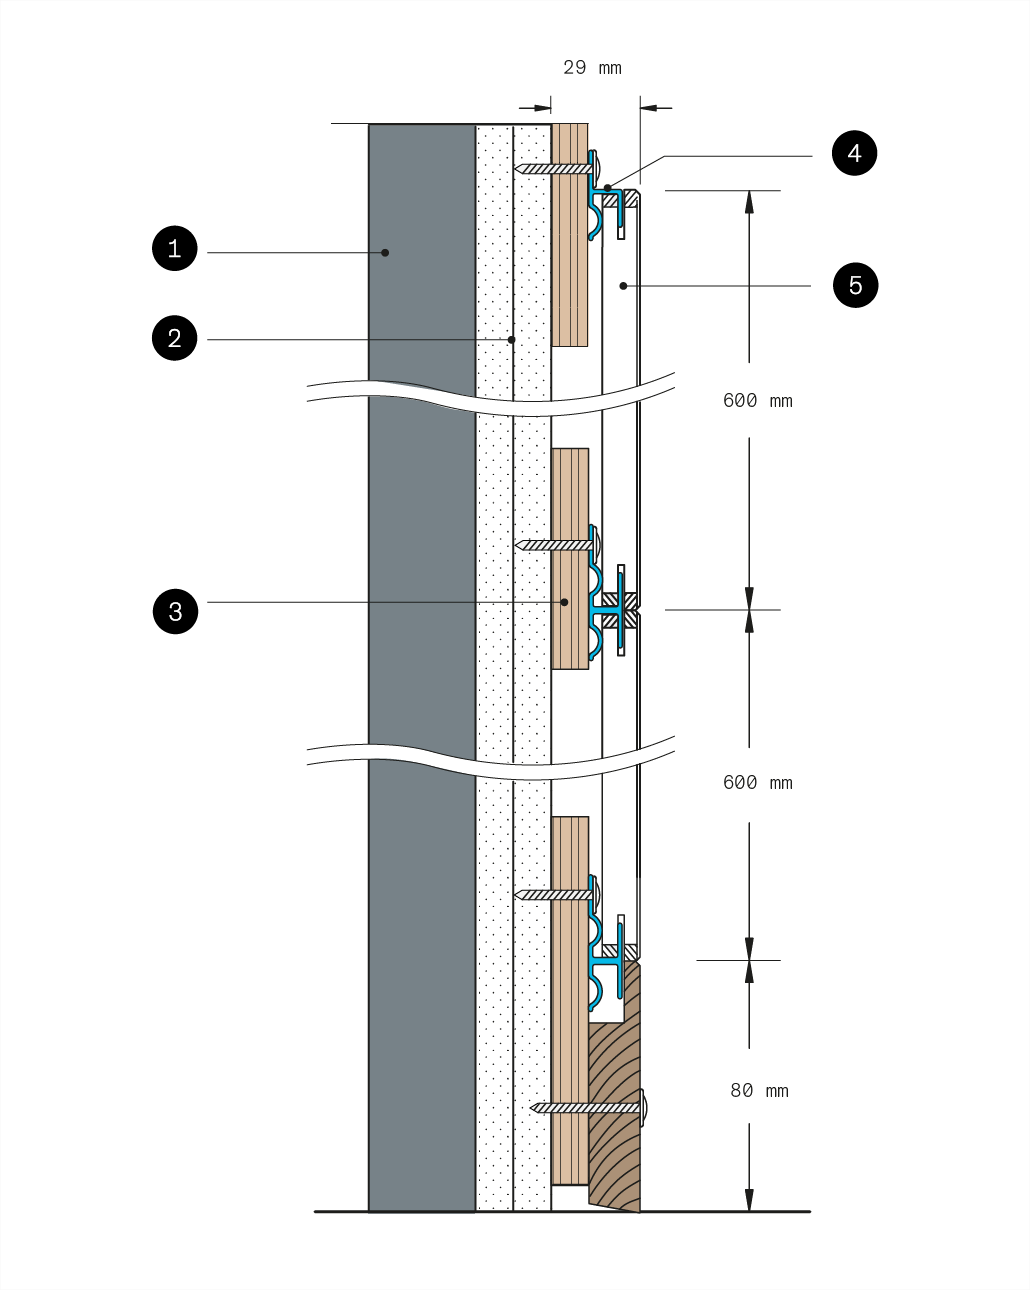
Gustafs Panel System is fitted on to walls by means of Capax mounting profiles so that each panel is individually locked on all four sides. The Capax installation system is fully integral with the panels, concealed, time saving and reliable.

Wall construction 17 mm

1. Batten
2. 12 mm Plywood n.b. board
3. 12 mm gypsum board
4. Capax profile
5. Gustafs panel

Wall construction 29 mm

1. Batten
2. 2×12 mm gypsum board
3. 12 mm Plywood strips
4. Capax profile
5. Gustafs panel

Acoustic construction 38 mm

1. Battens
2. Insulation
3. Capax profile
4. Gustafs panel

Acoustic construction 88 mm

1. Batten
2. 2 x 12 mm gypsum boards
3. 12 mm plywood strips
4. Capax profile
5. Gustafs panel

Important to consider during installation
+

Fire

Please note that the fire classification for perforated panels only is valid if mineral wool insulation is used behind Gustafs Panels. Thickness 45 mm density, 28 kg/m3 and have euroclass A1 or A2 classification.

The construction

Gustafs Panel System can be fitted on most types of underlay. Before the fitting commences the fitter must ensure himself that the construction behind is well anchored and dimensioned in order to bear the weight of the panel wall. This applies in particular to high walls and large areas.

In order to achieve a fully satisfactory result it is important for the underlay to be well balanced vertically and horizontally. If the panel wall is perforated or slotted and is to serve as a sound absorber, the under-construction is extended so that a space is created for mineral wool insulation and air gaps. The mineral wool shall always be placed tight behind the panel.

Storage, installation and use conditions

Only for indoor use and not in wet rooms. Storage, Installation and Use at 18-50 C° and 25-60% humidity. The humidity in the under laying construction (concrete) should not be higher than 15%.

Installation, step by step
+

1. Mount the battens on a well anchored wall using a laser alignment.
2. Check that the battens are fully levelled, vertical and horizontal, adjust if necessary.
3. (For acoustic installation) Install the insulation between the joists.
4. Install the first capax profile. Remove any debris that may have fallen into the profile.
5. Sort the panels by colour and wood texture.
6. Mount the first panel on the first profile. Then attach the panel by fitting the next profile.
7. Then continue with the next panel, etc. You can also saw the panels on site if necessary. Be sure to polish the edges of the panel after cutting.
8. Finish with mouldings and corner solutions

Customised installation

These instructions refer to our standard installation. For other solutions such as curved walls, closures and door liners, contact our support.

CONTACT SUPPORT

Downloads

downloads. installation

pdf.
installation
Generic filters
Exact matches only
Search in title
Search in content
Search in excerpt
This site is registered on wpml.org as a development site.