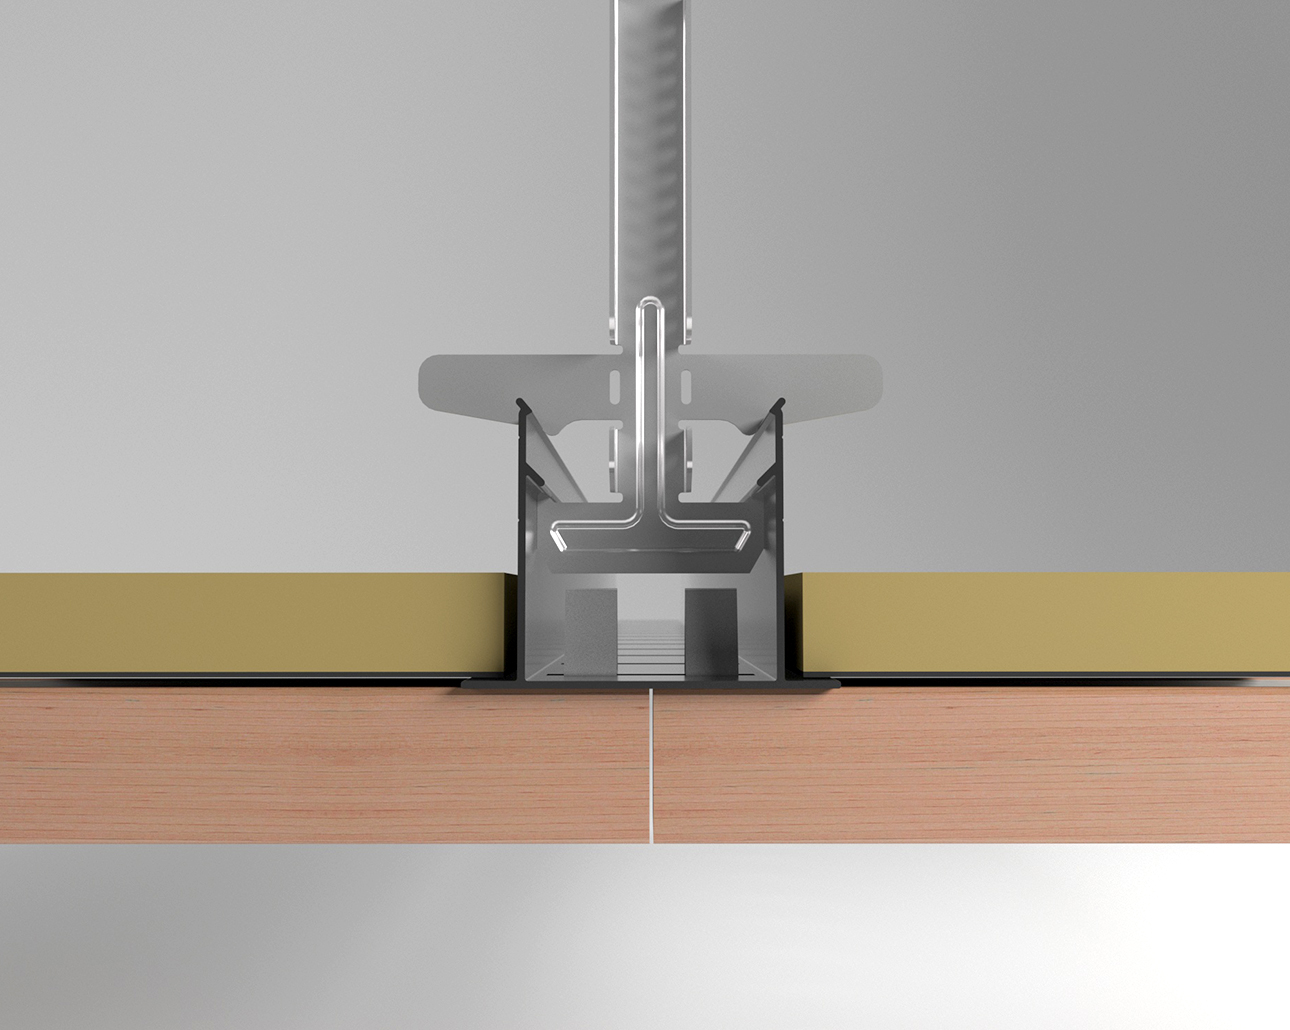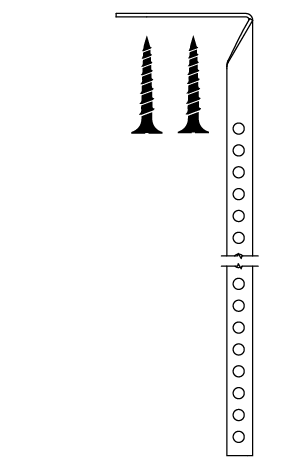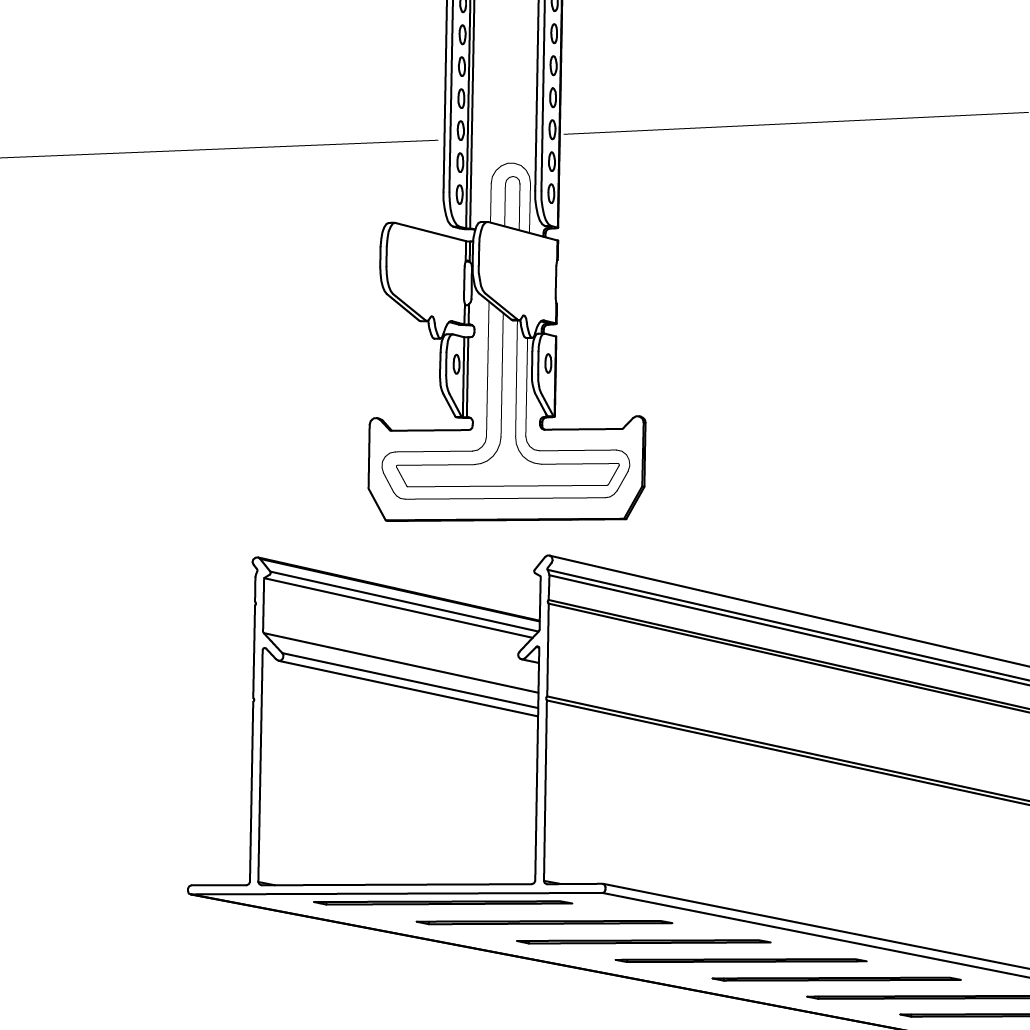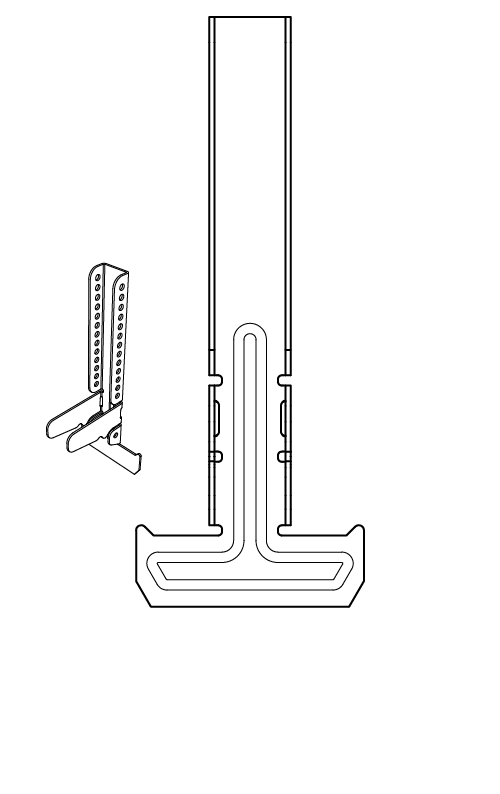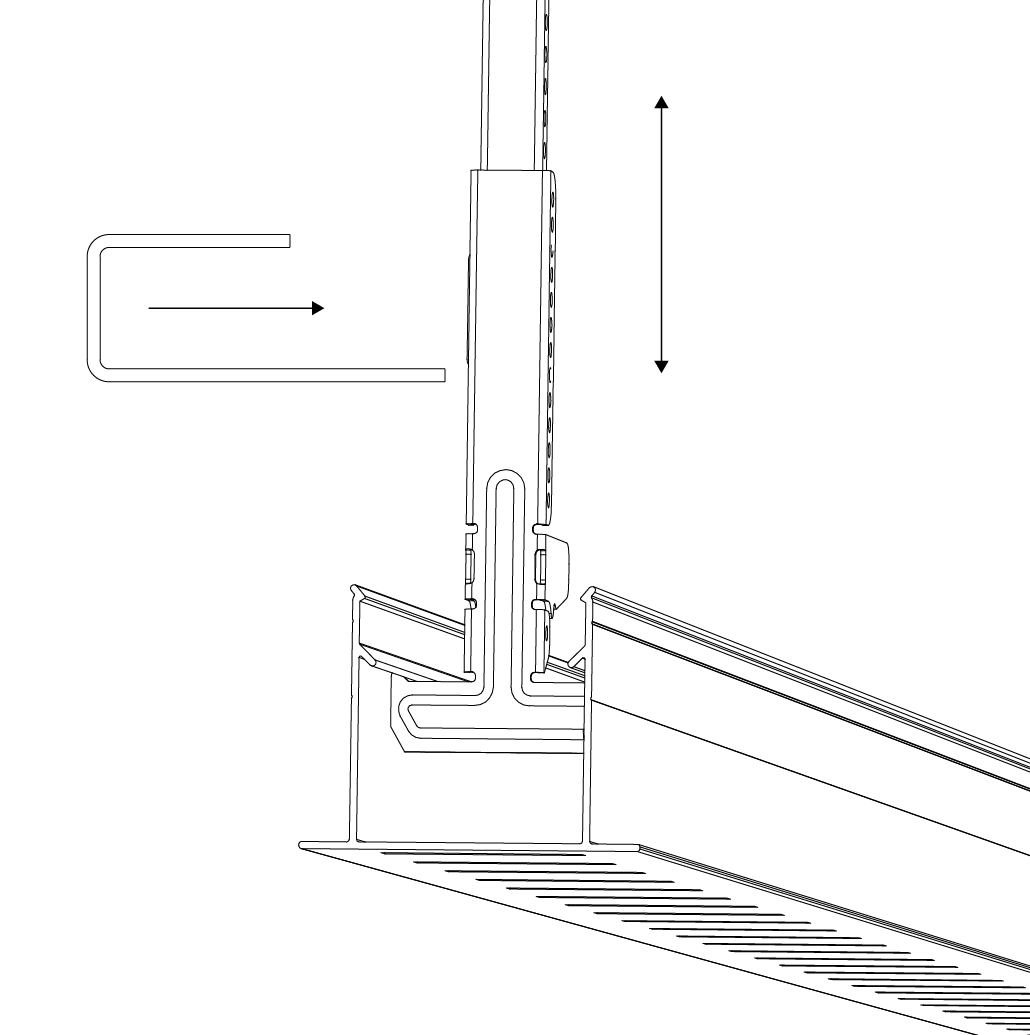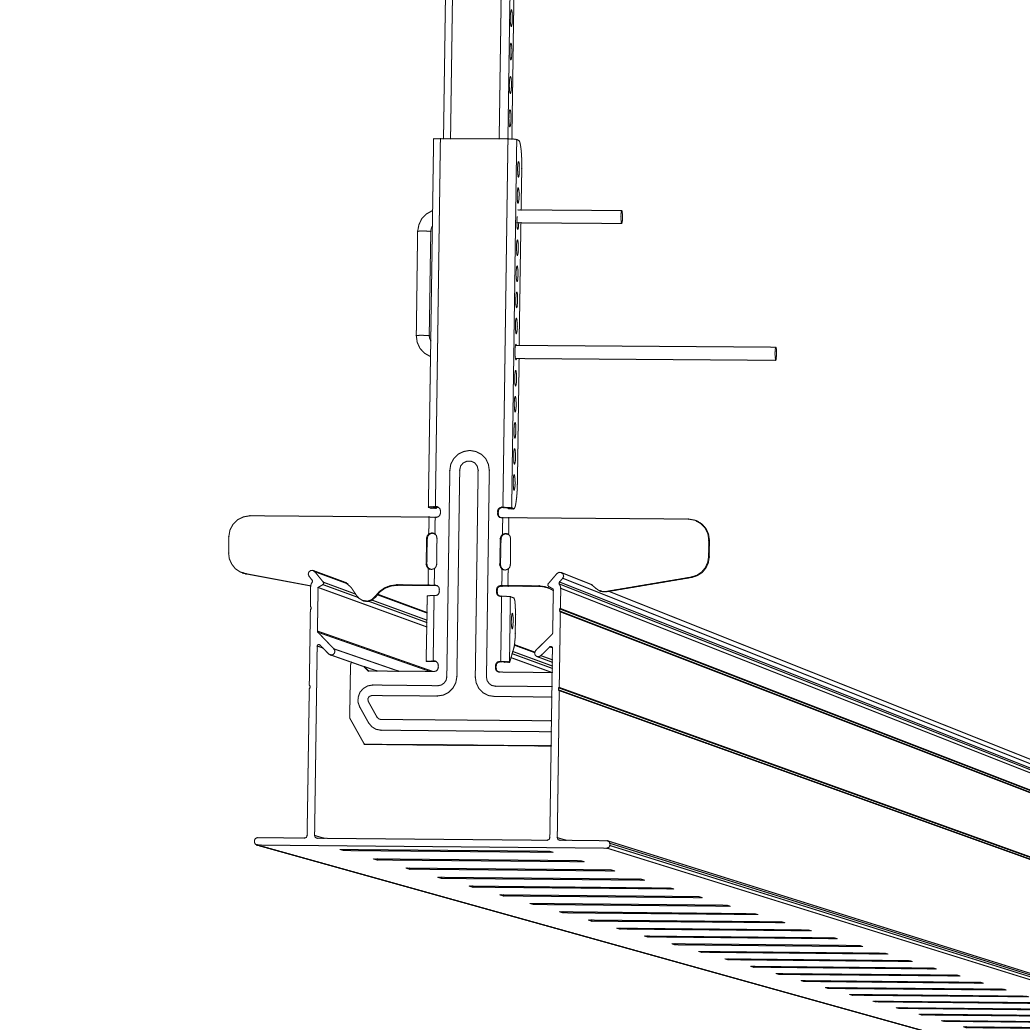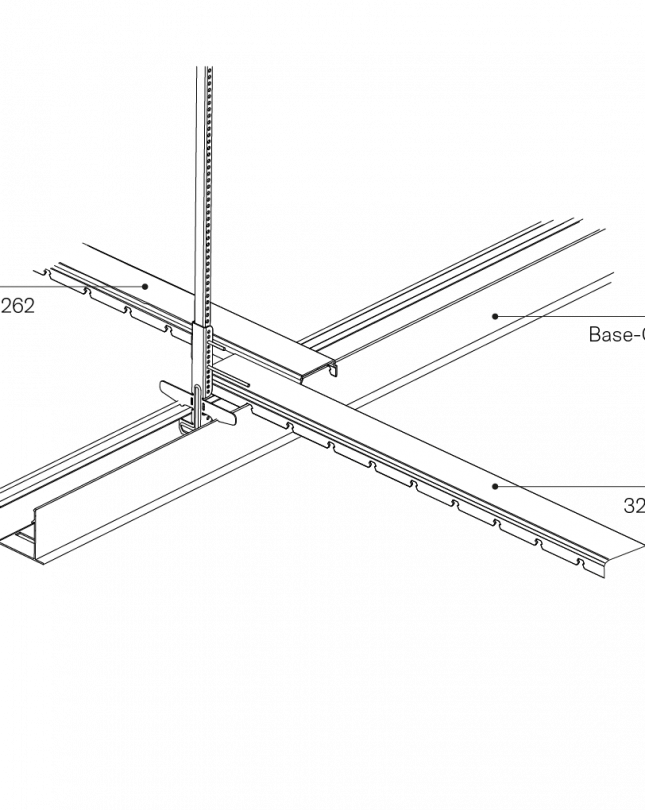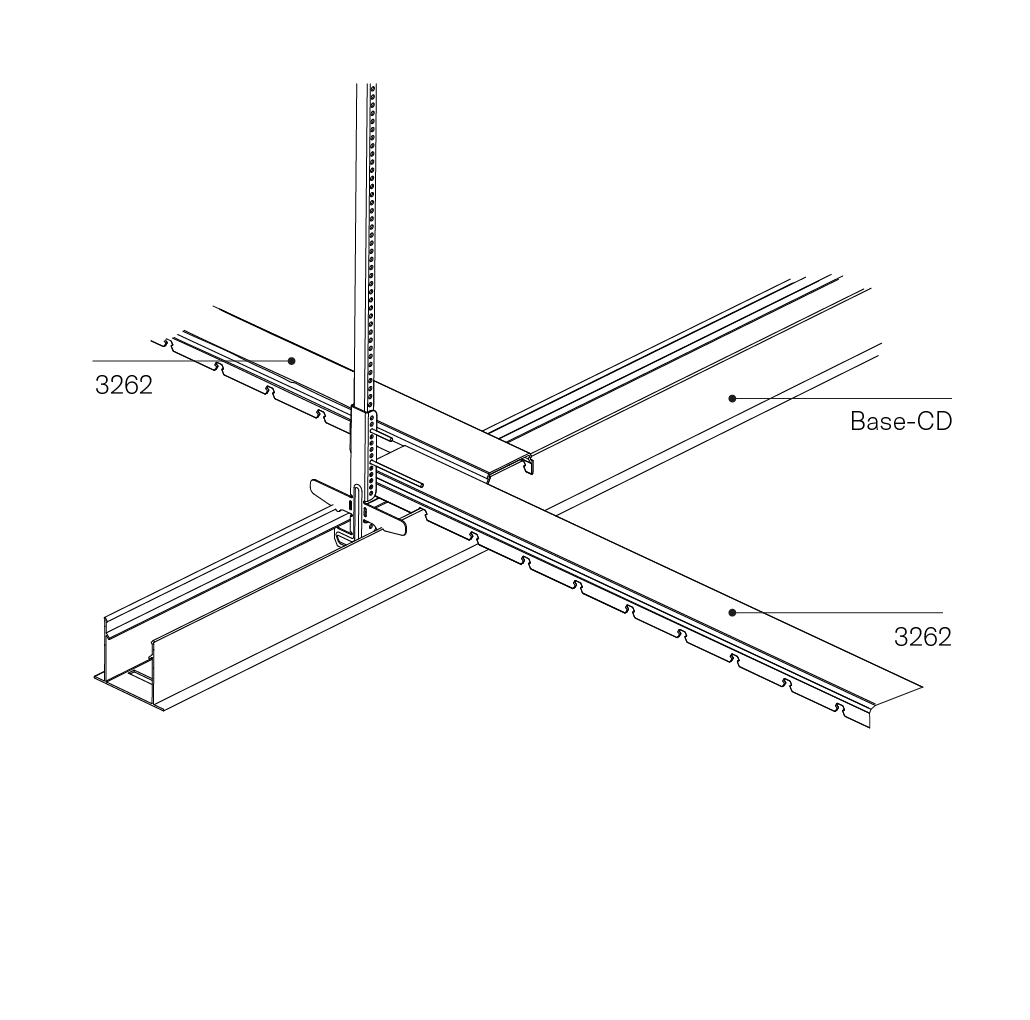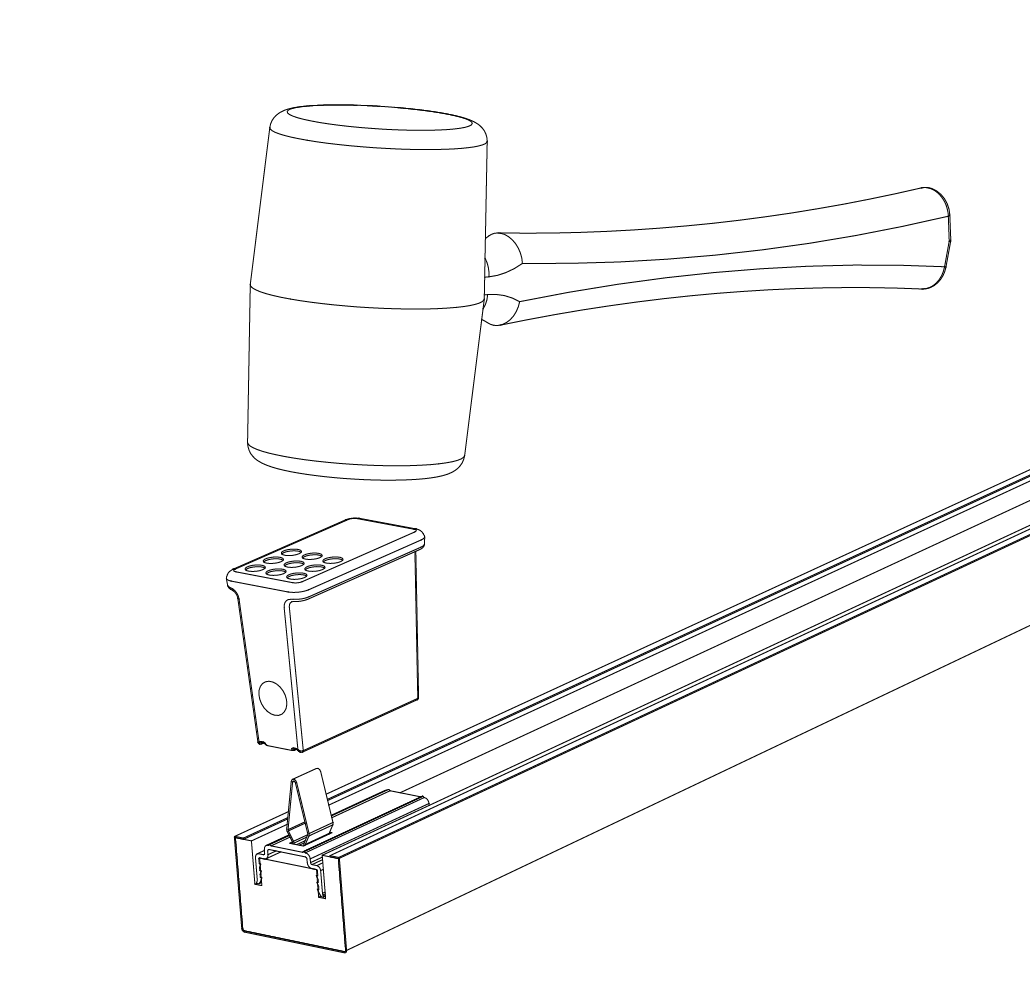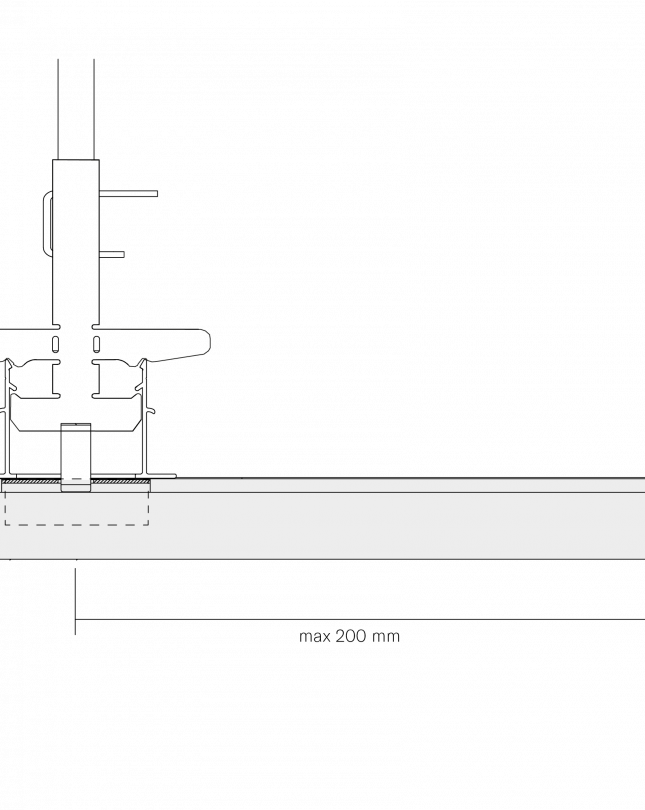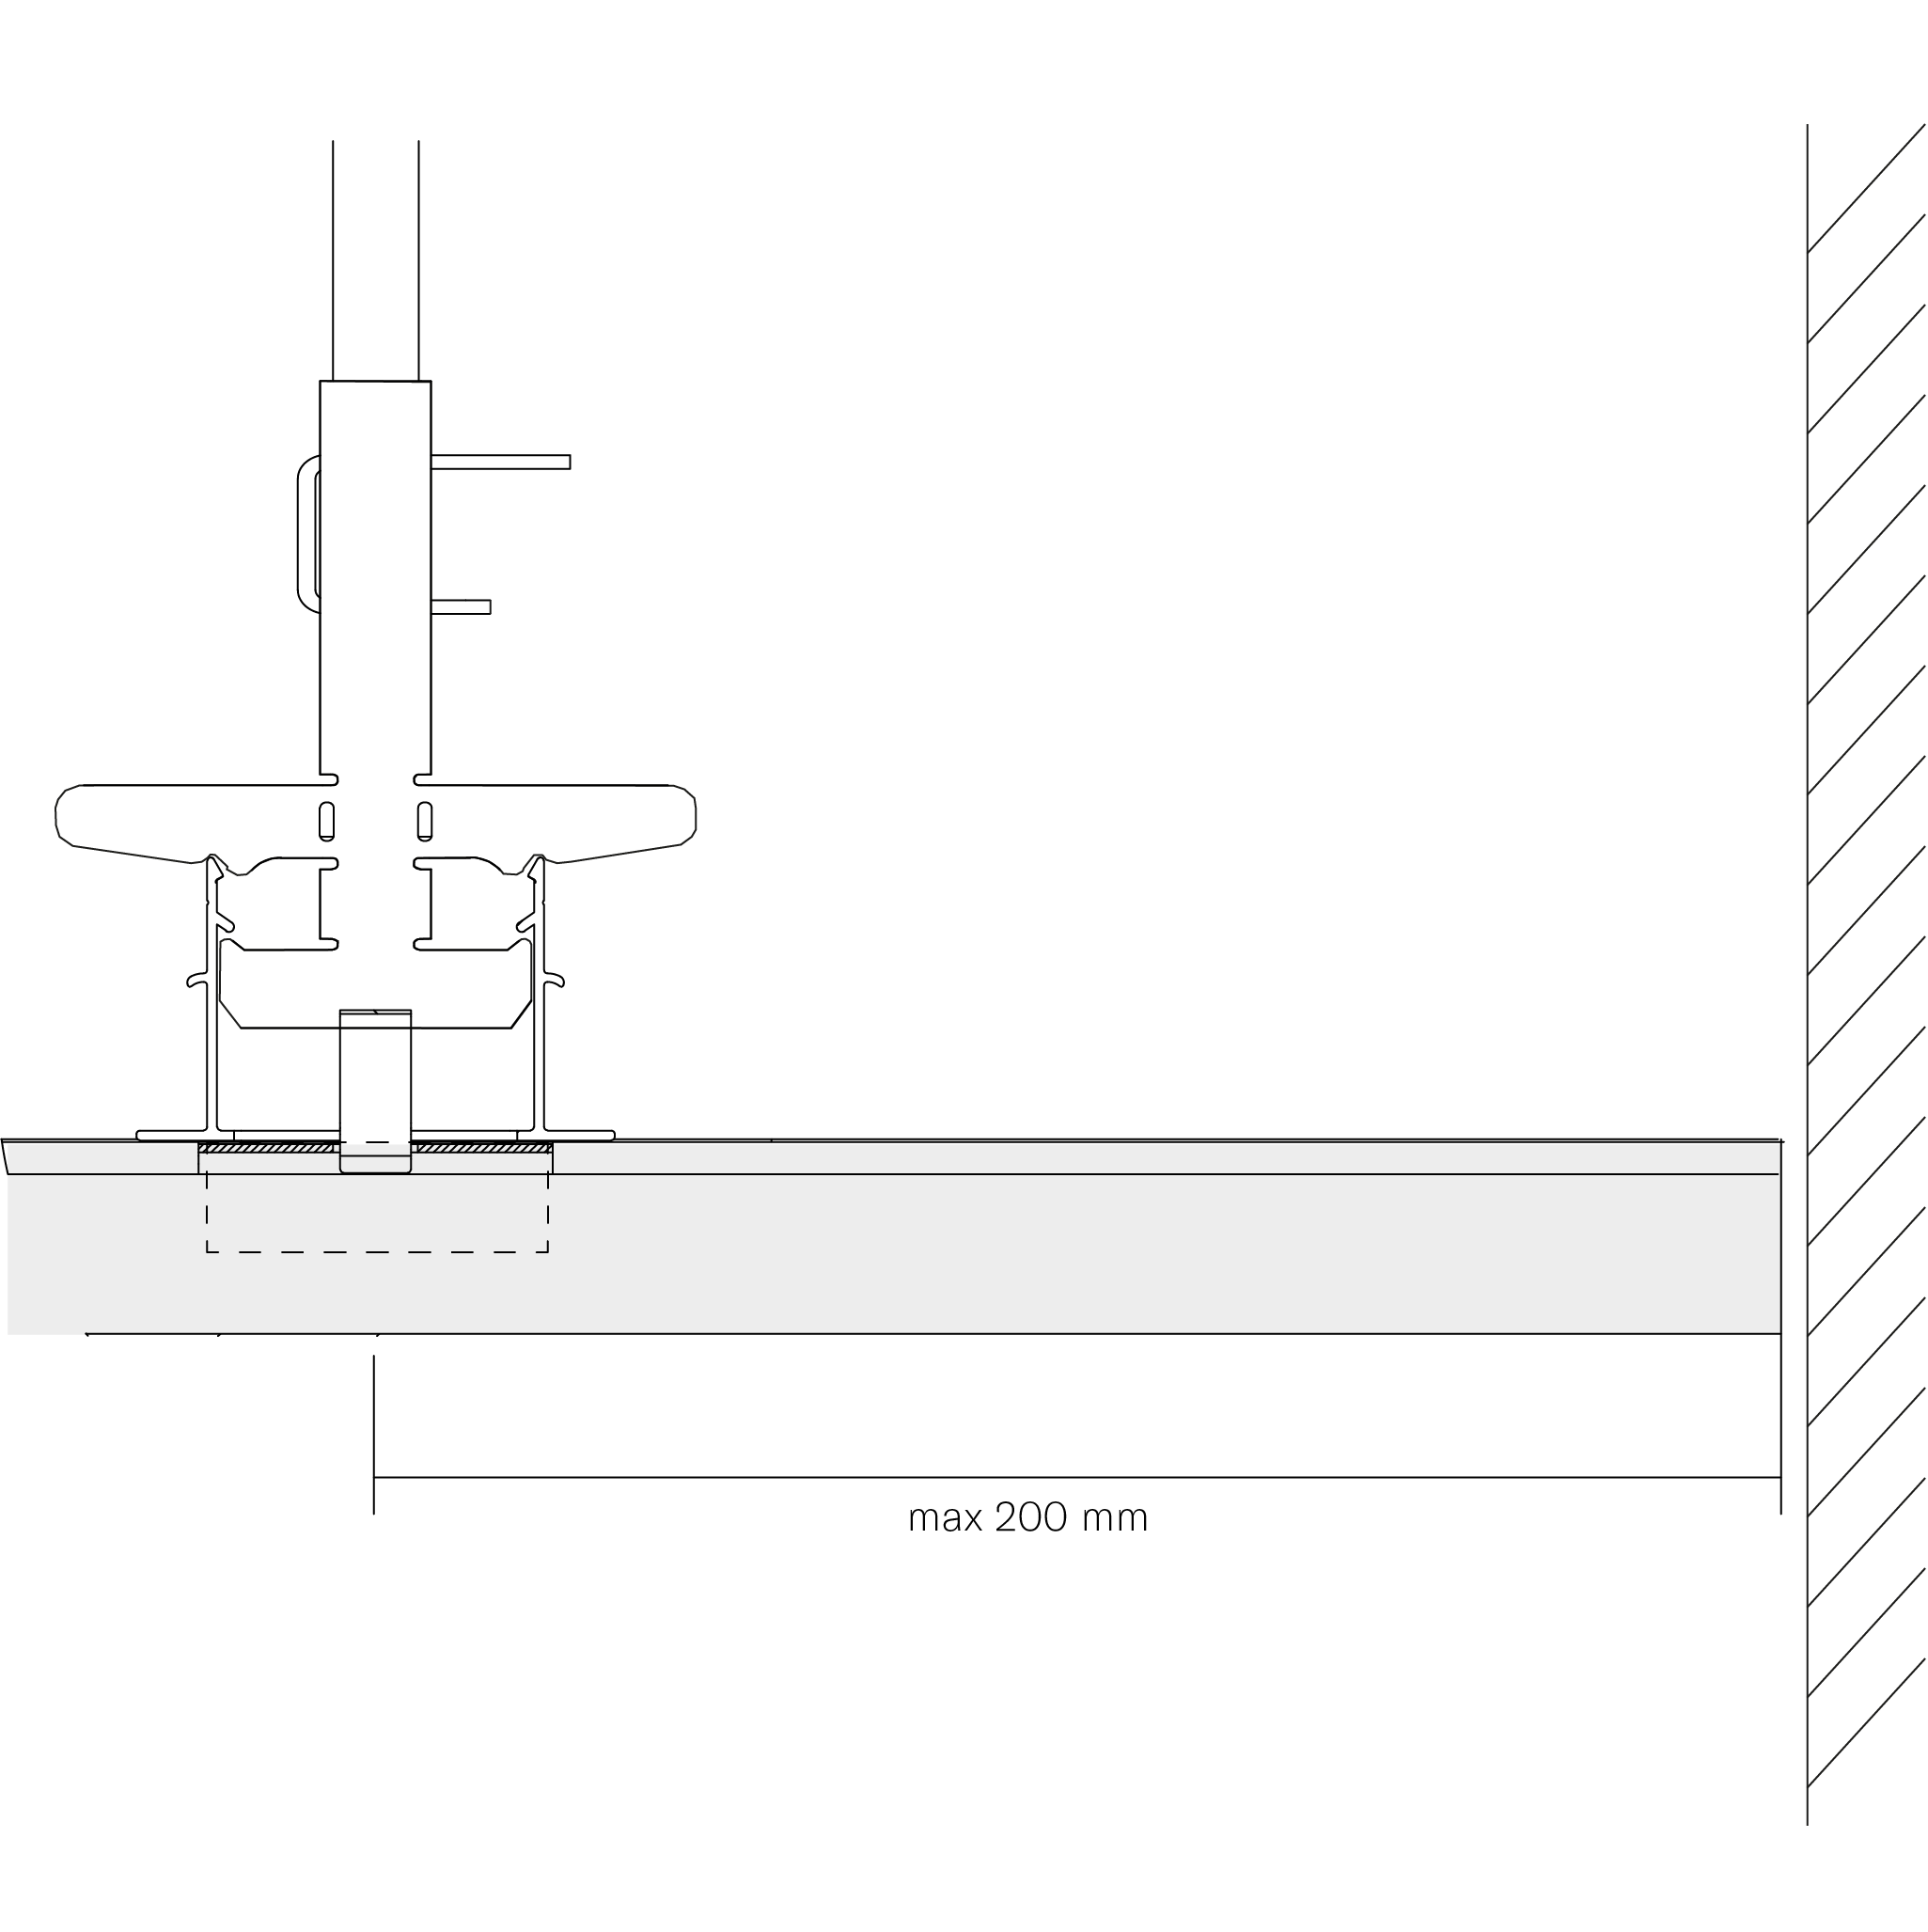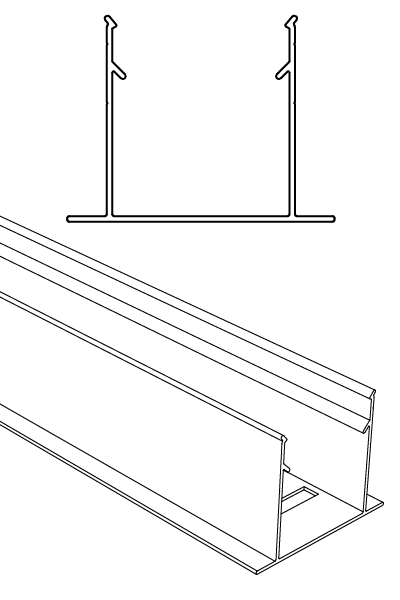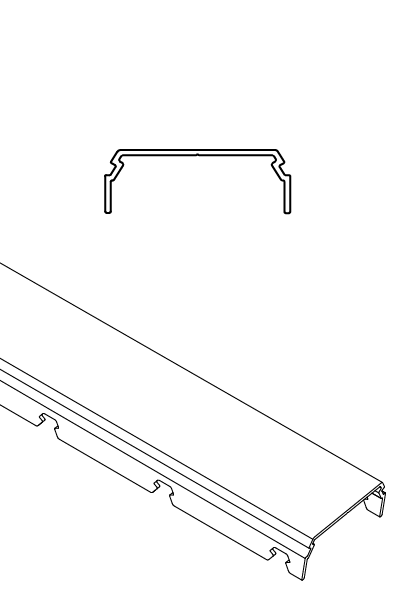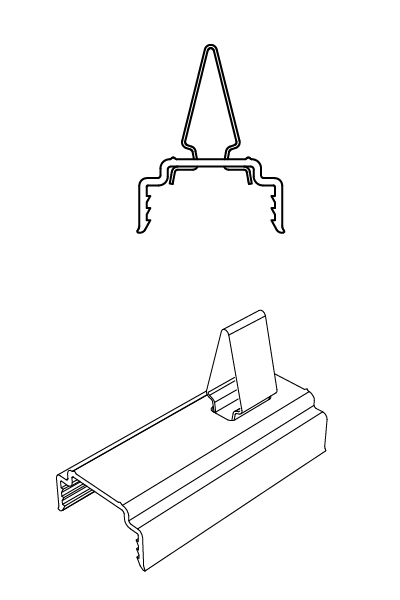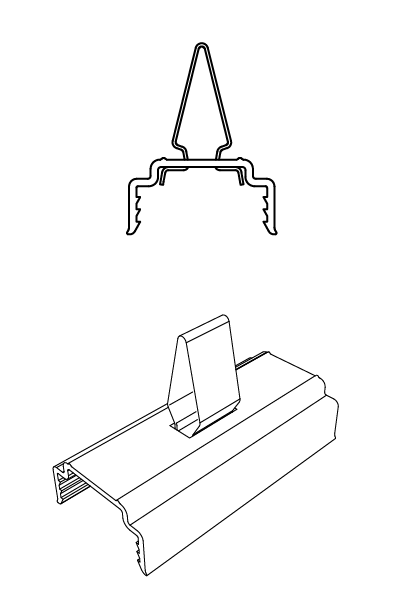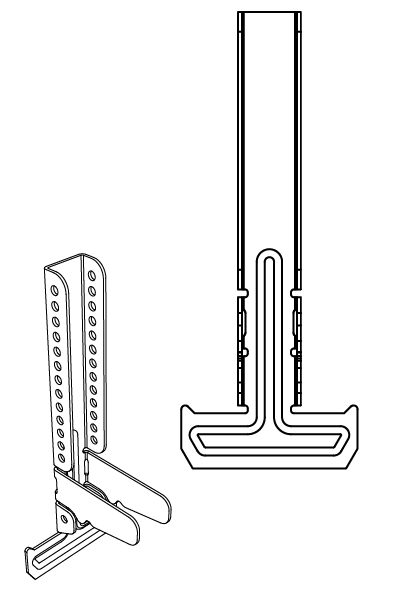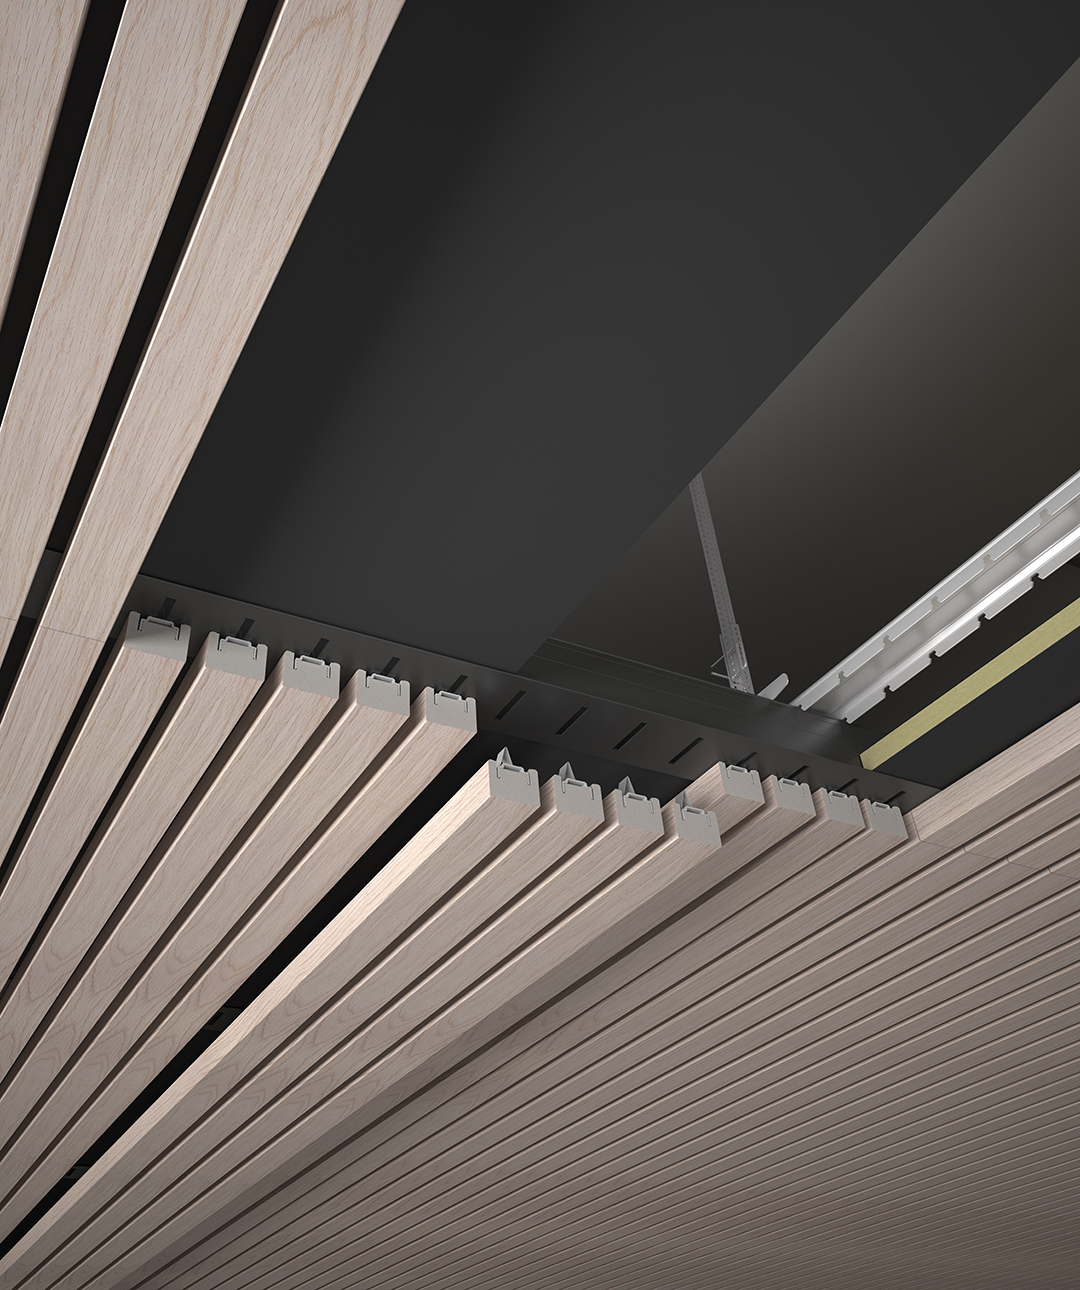
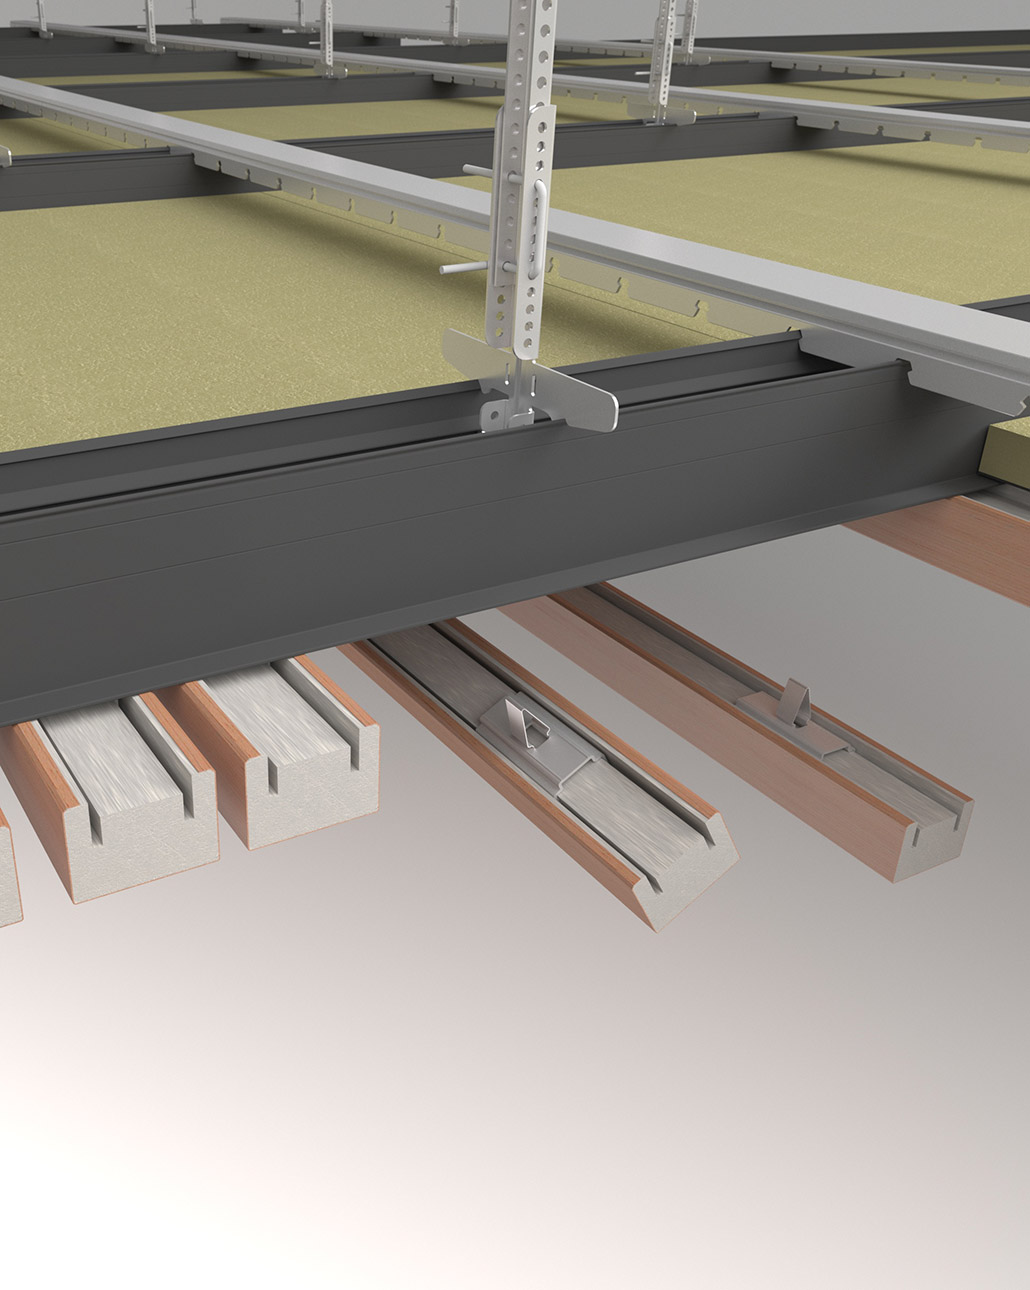
No tools are needed to assemble the interlocking components. The system is fully demountable, ideal when access to the ancillary systems is required.
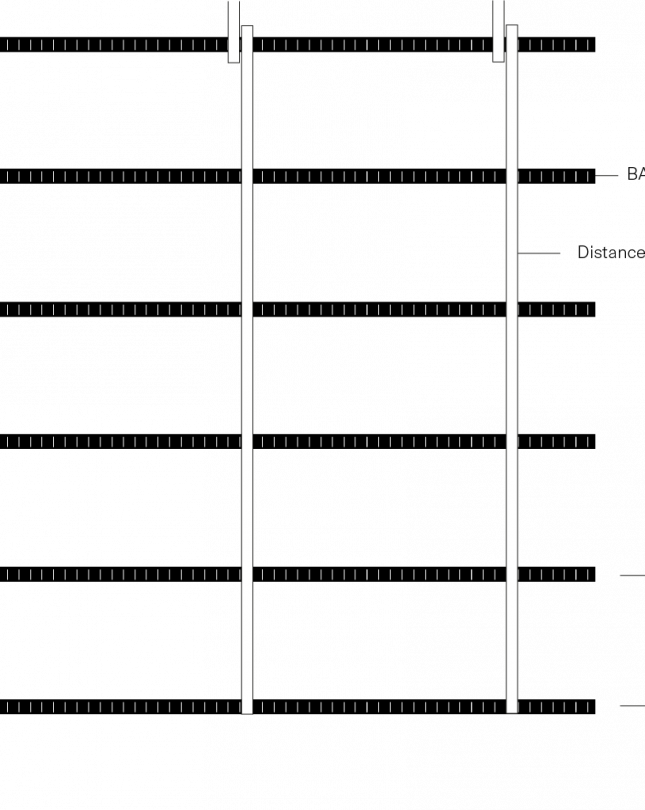
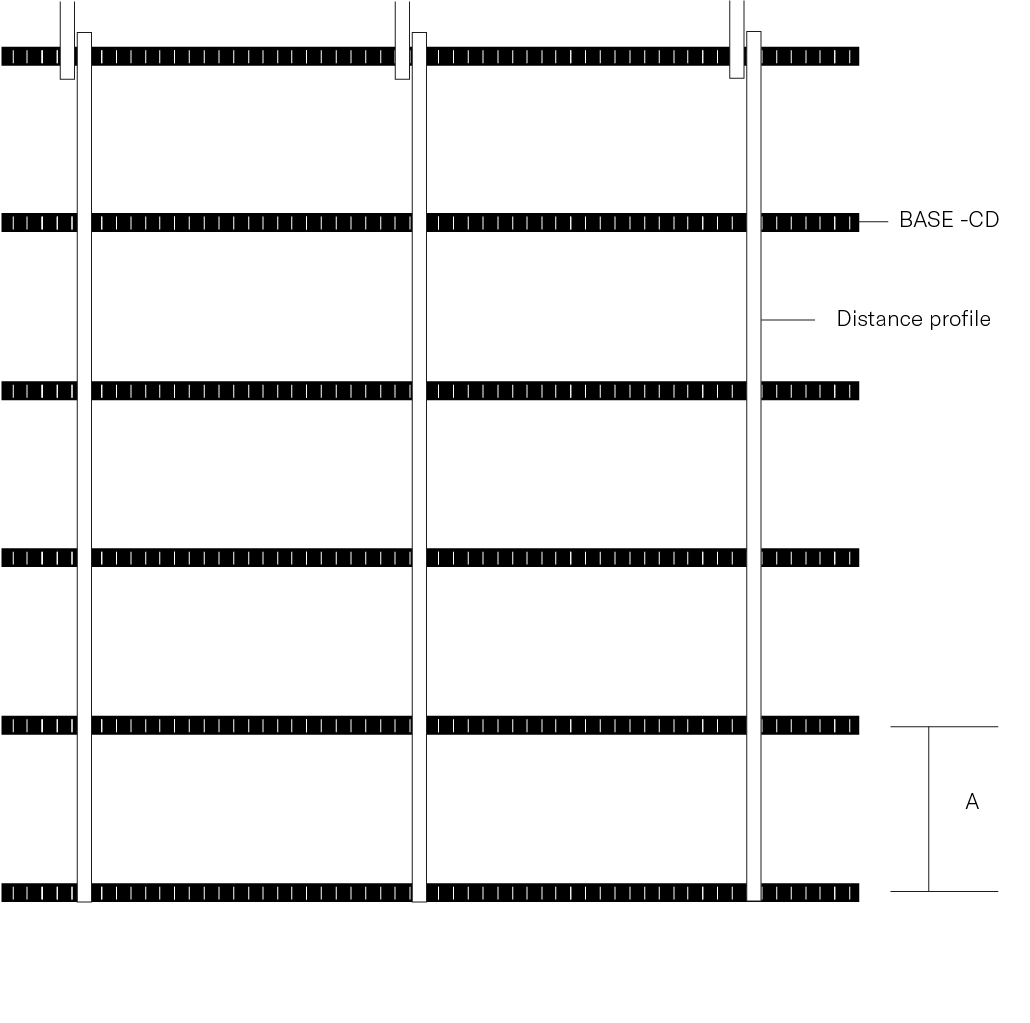
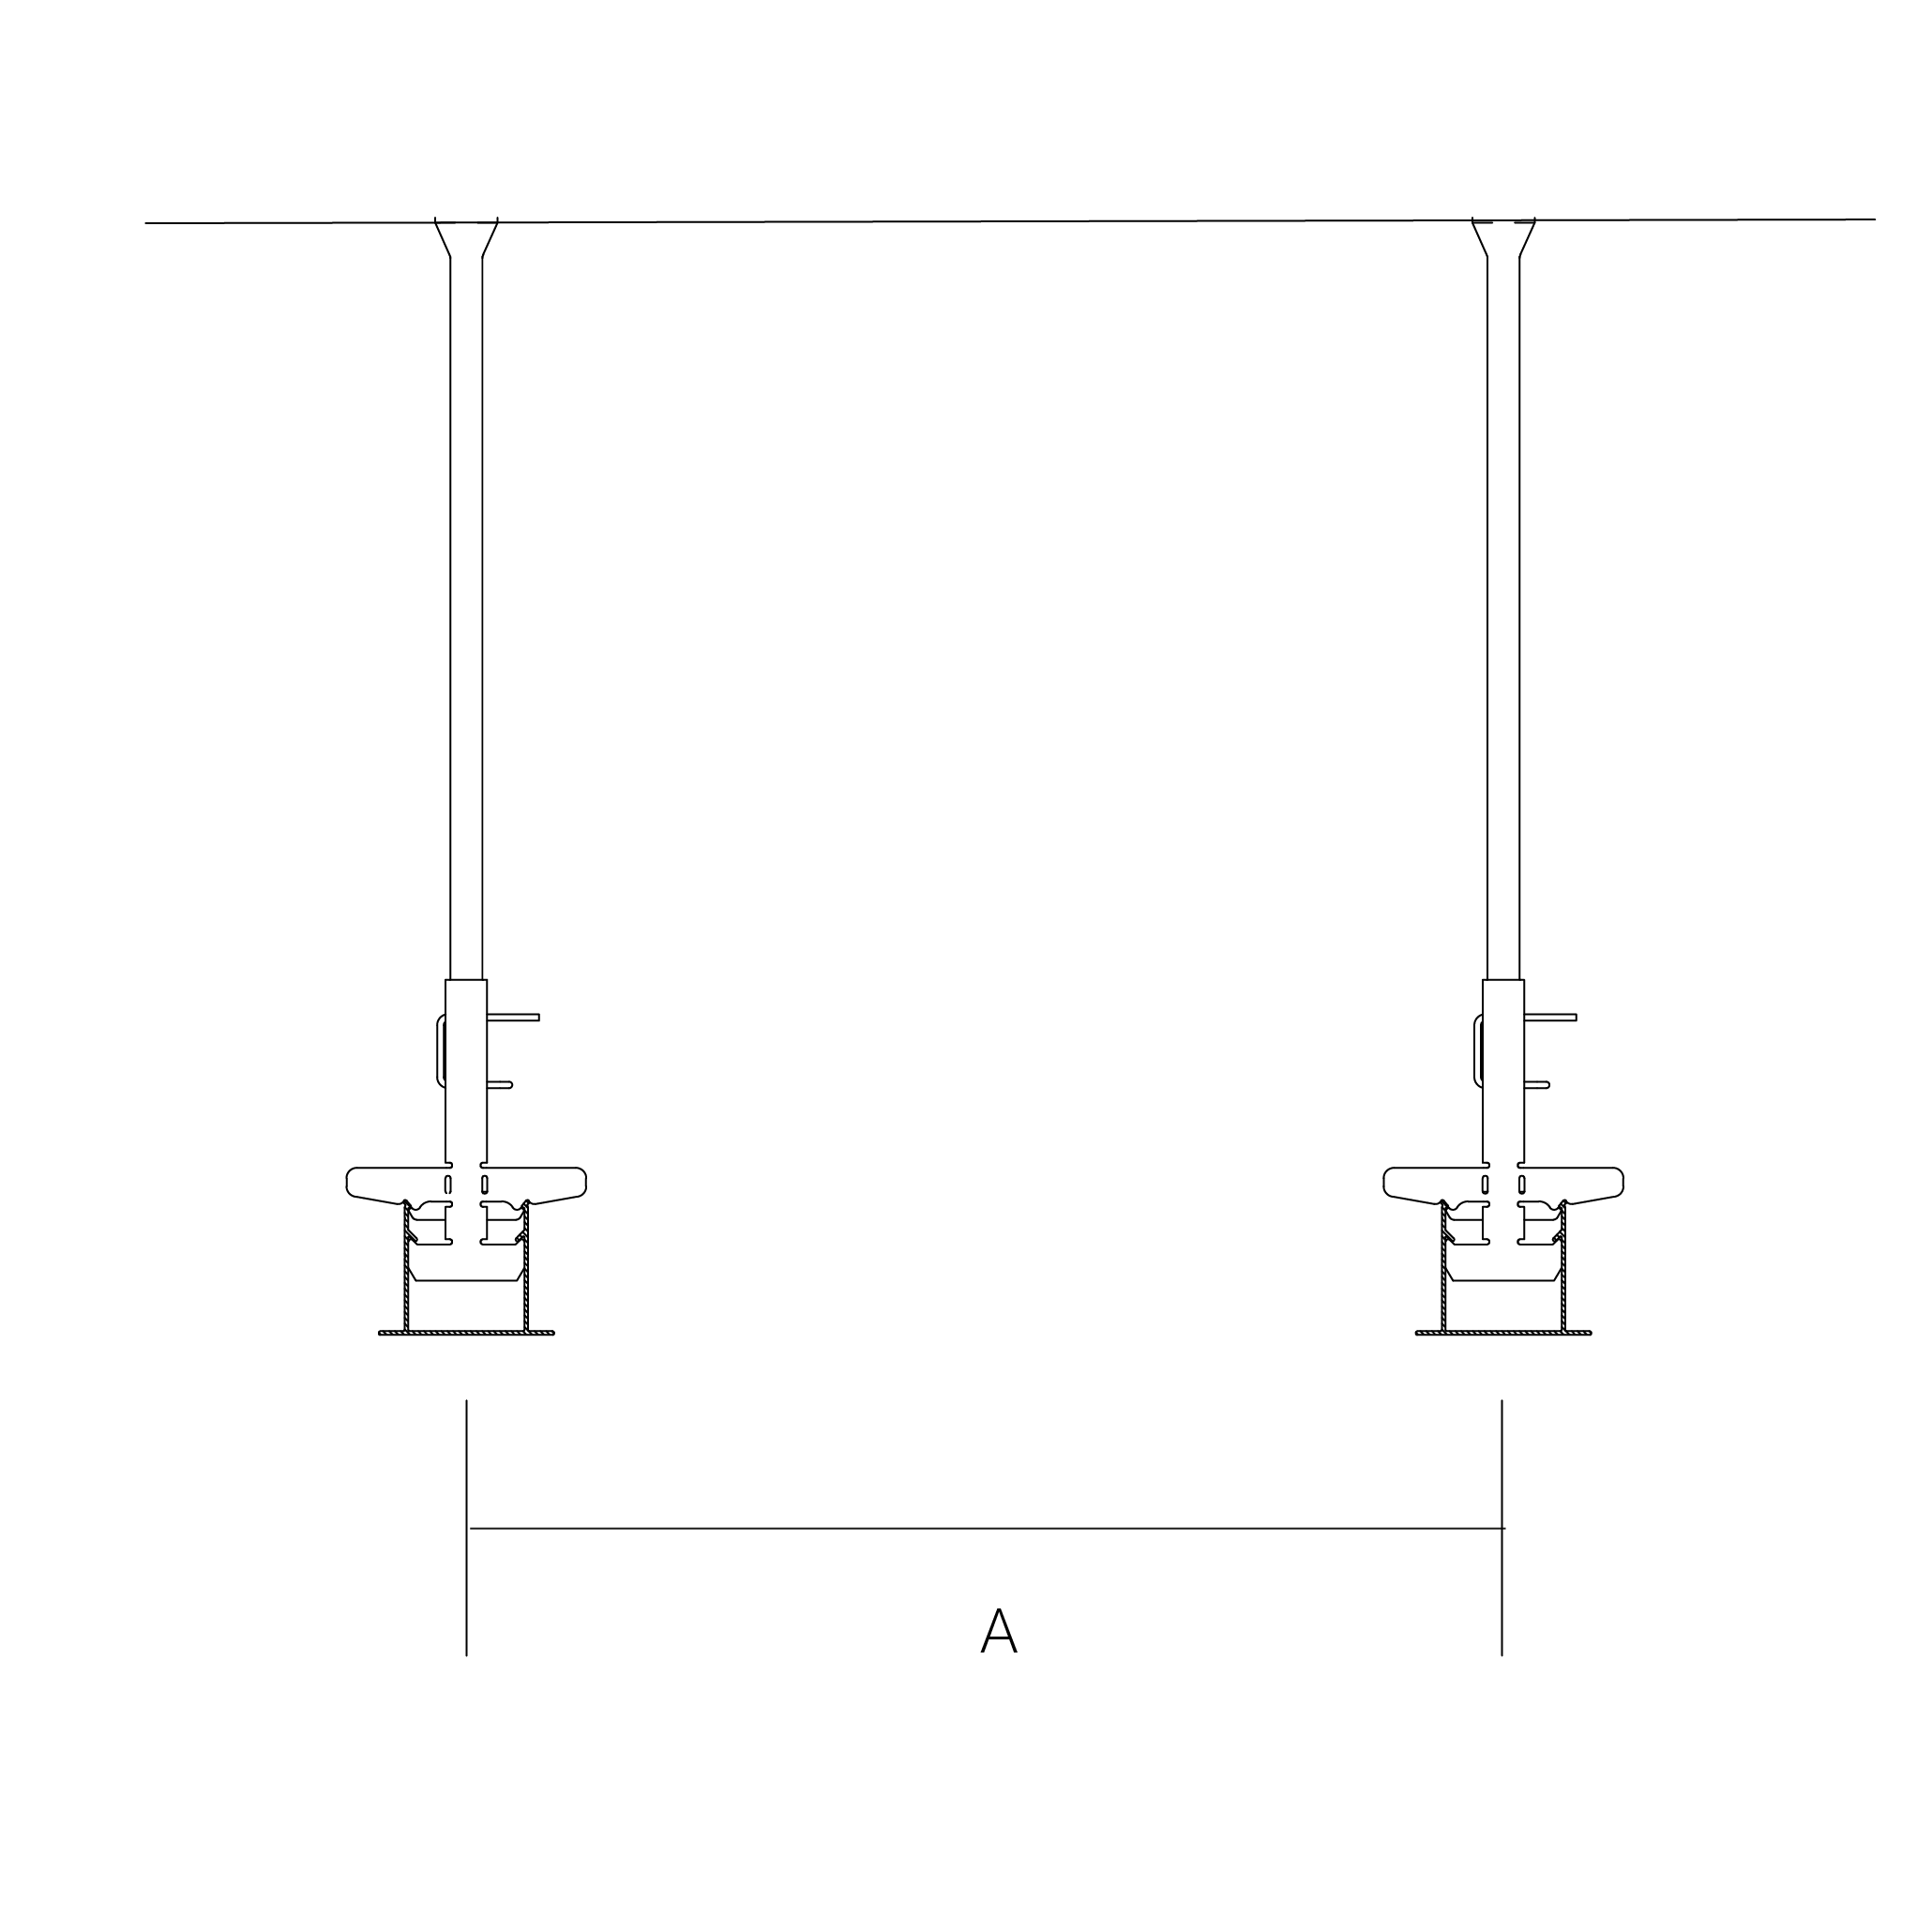
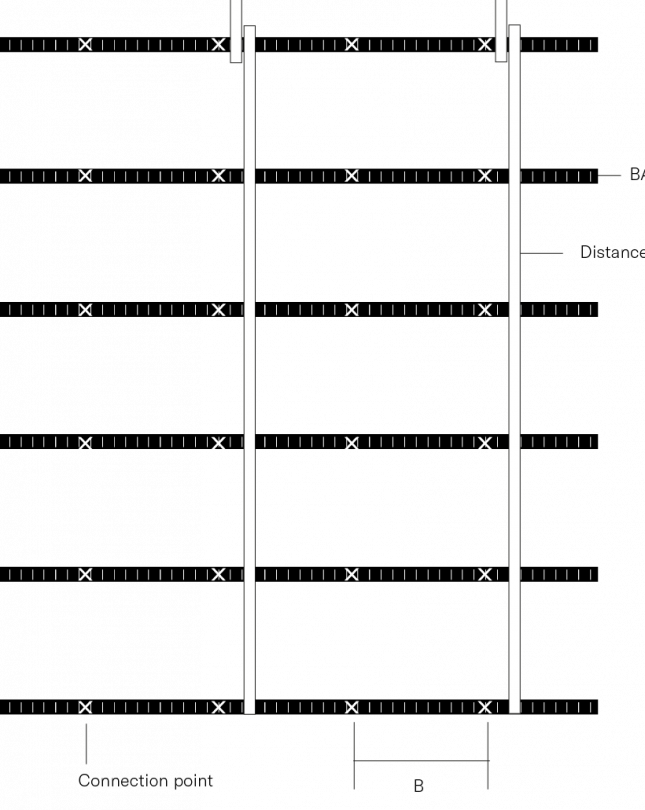
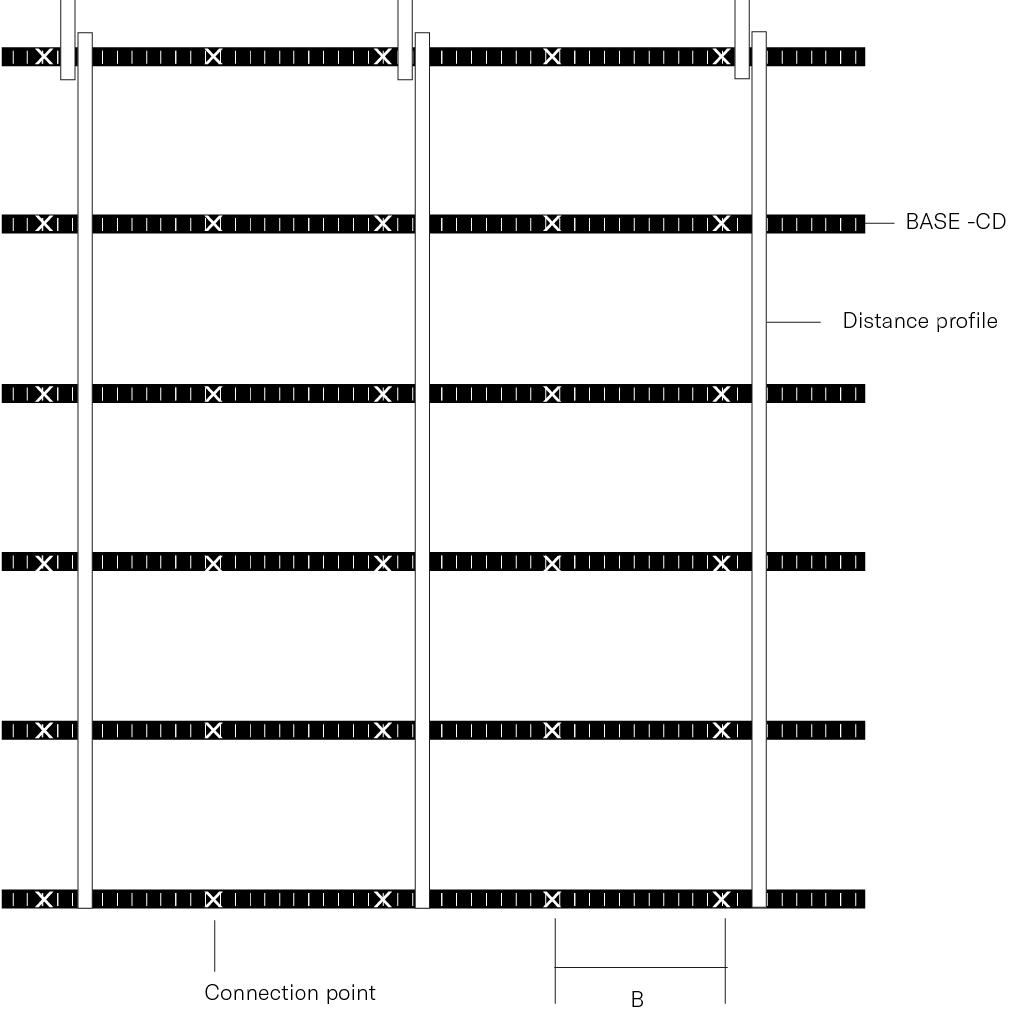
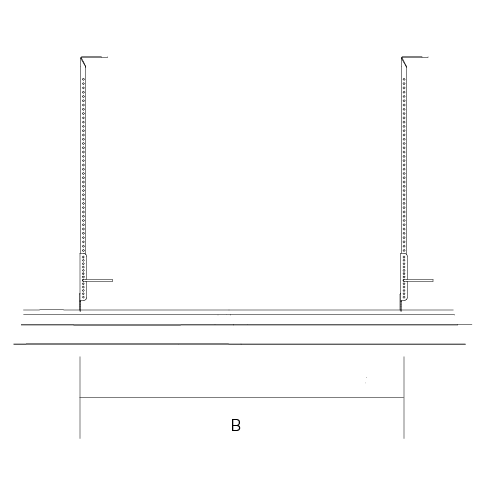
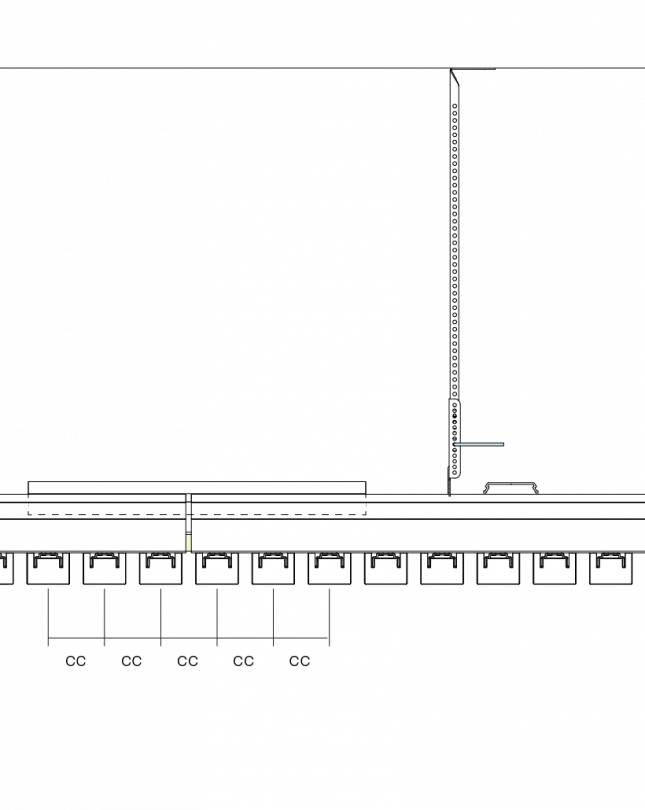
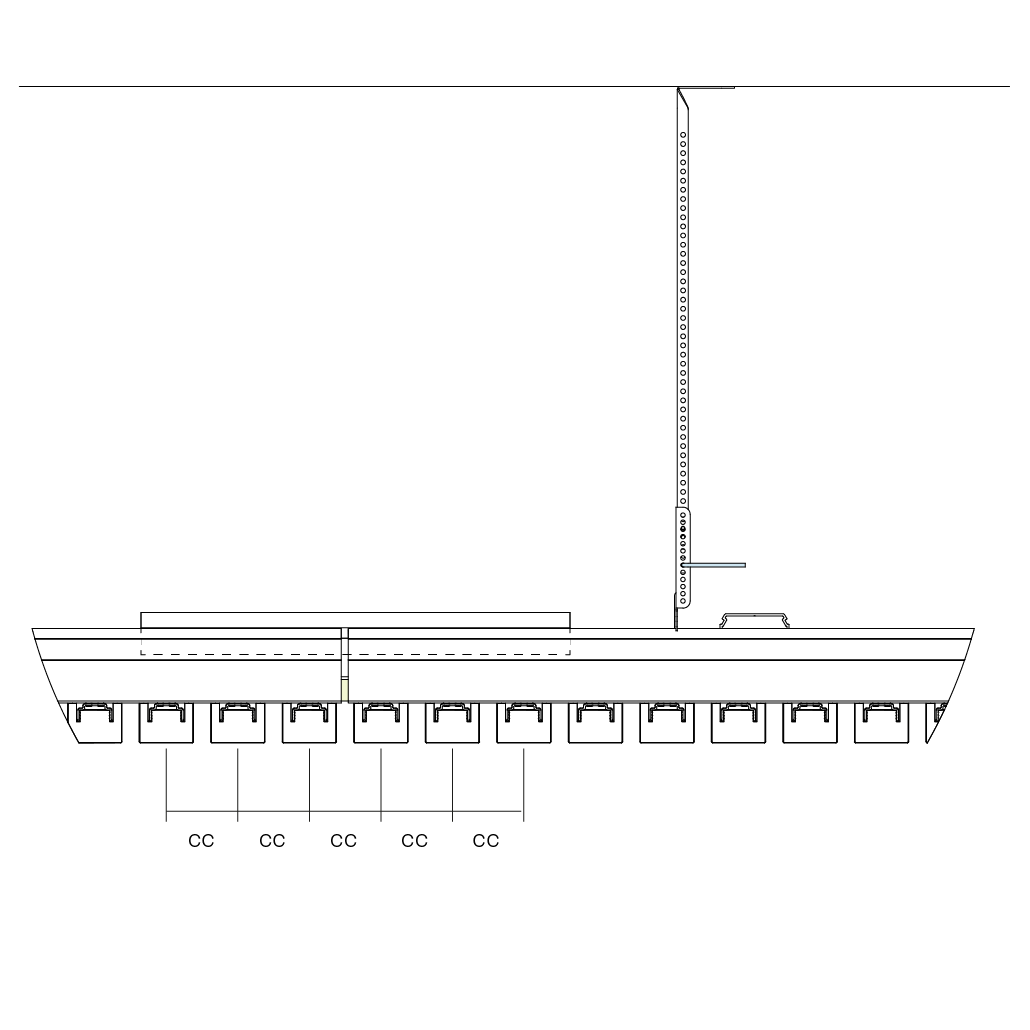
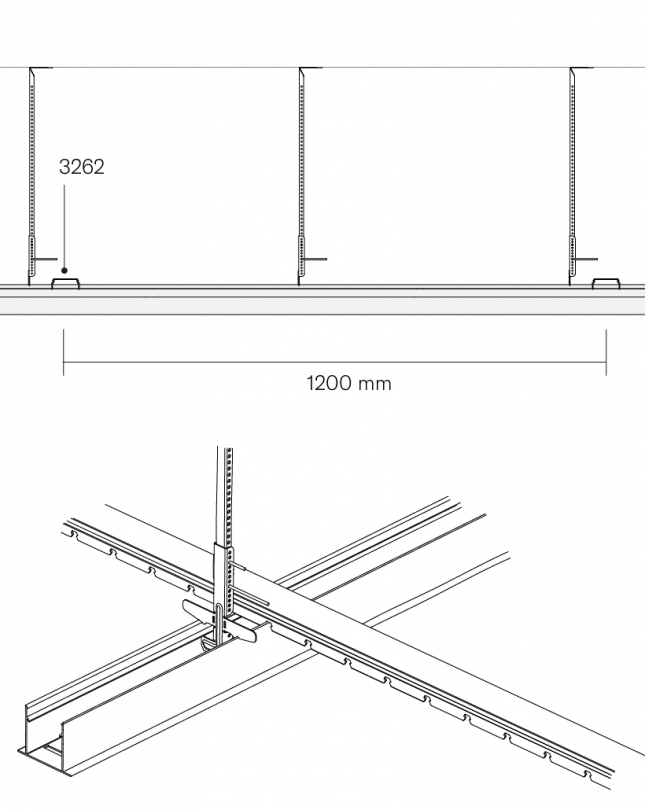
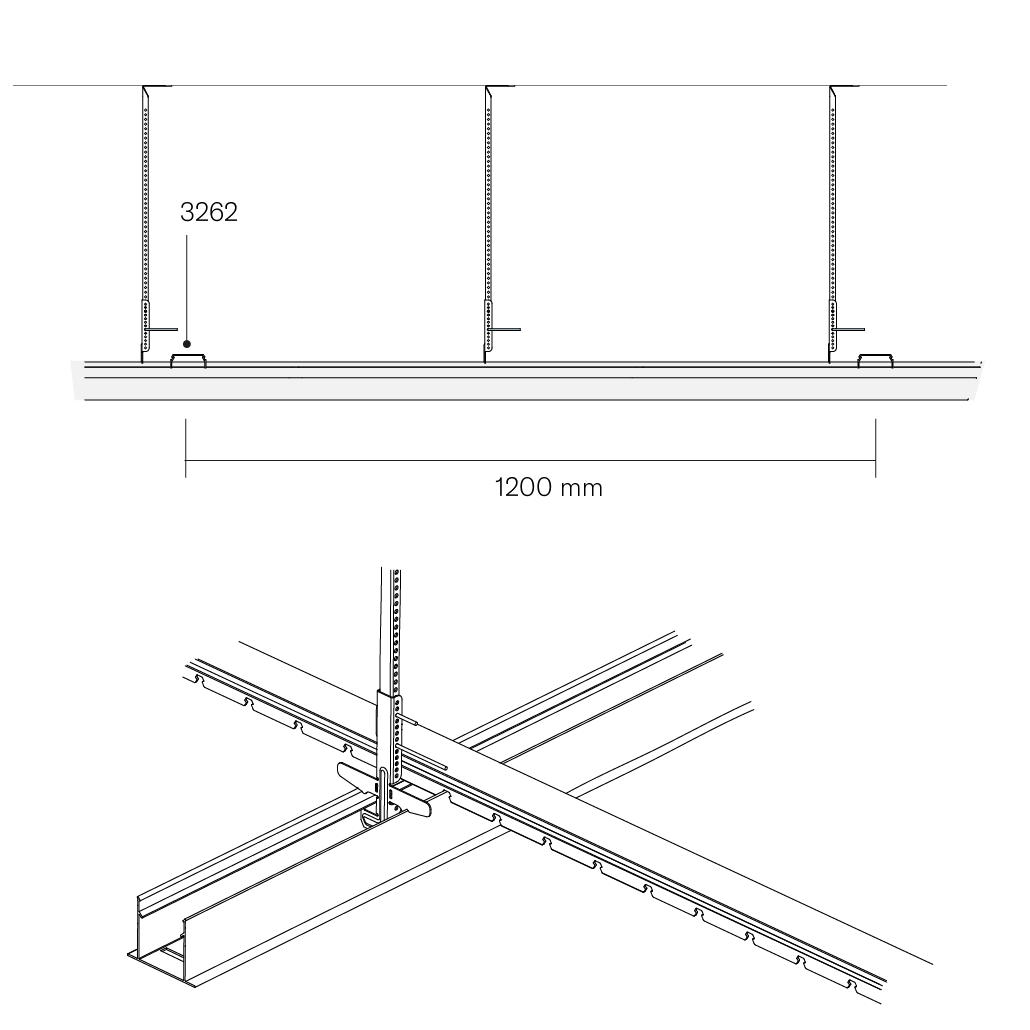
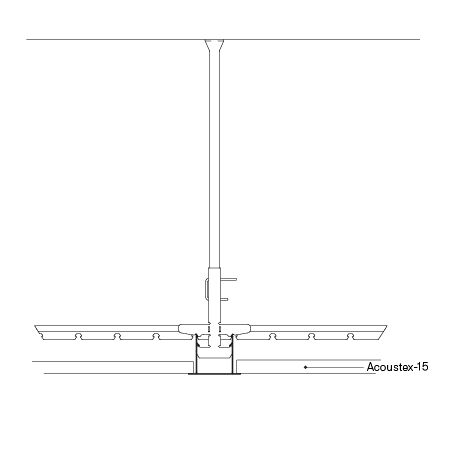
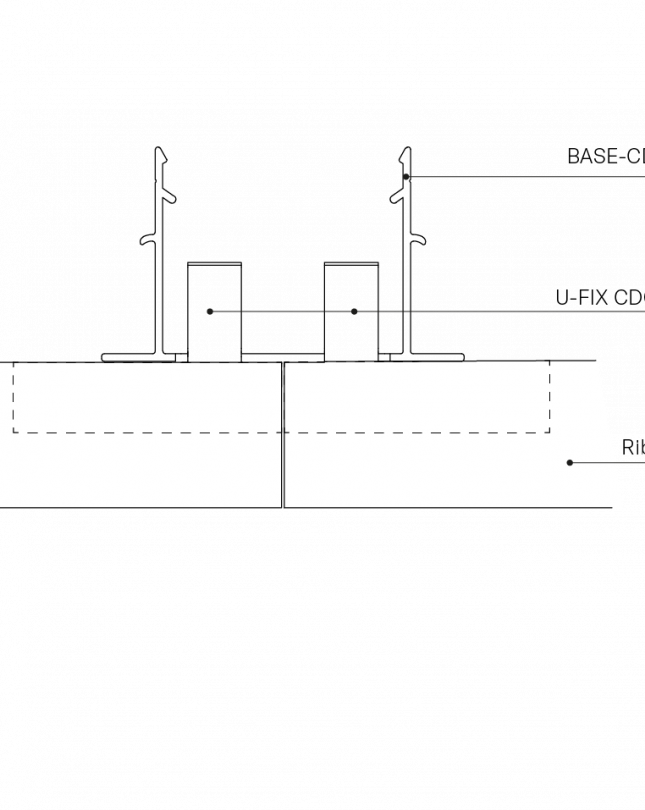
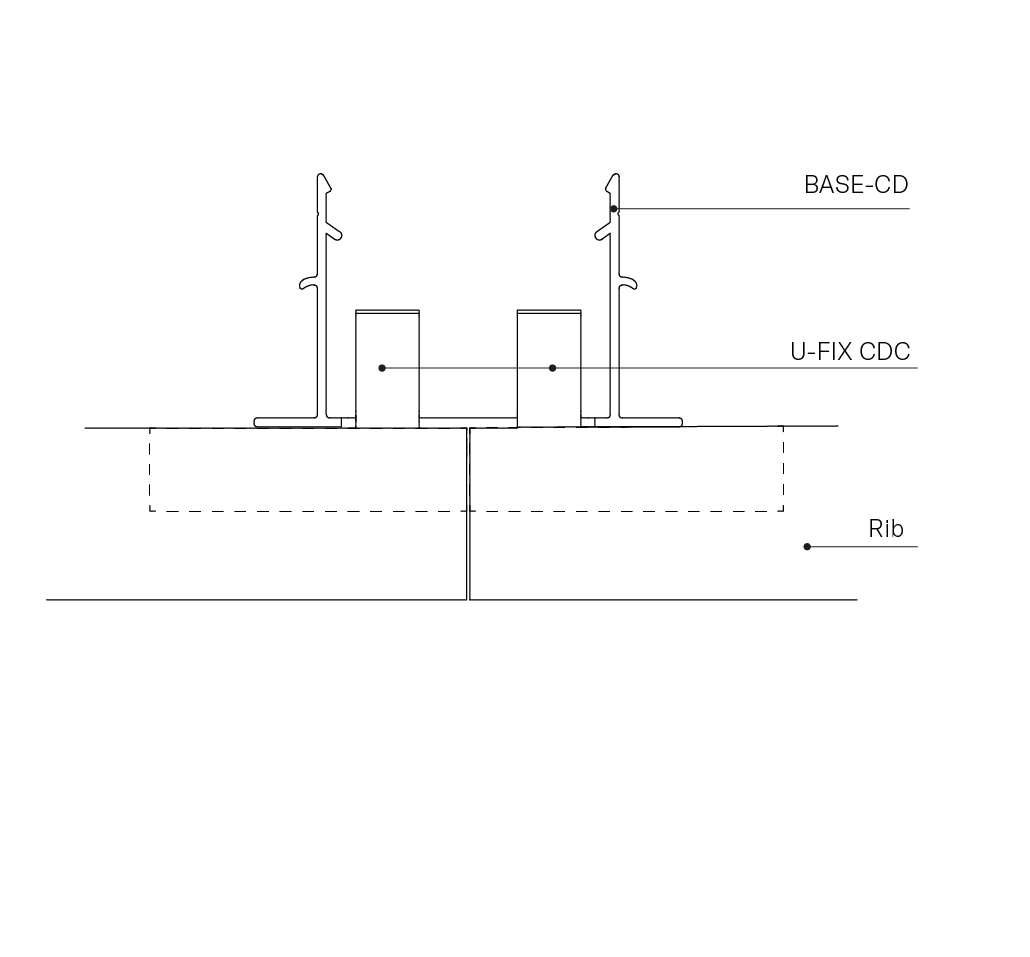
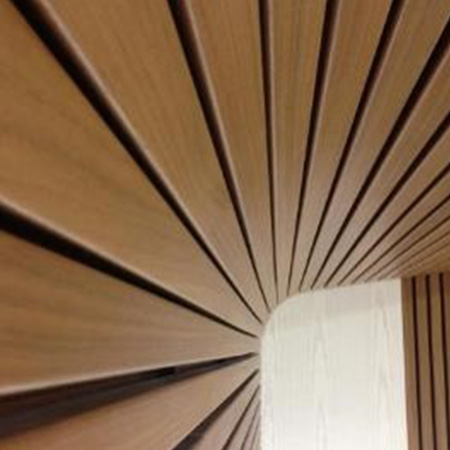
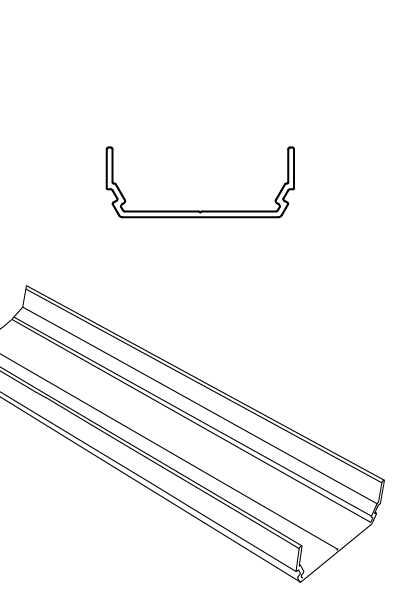
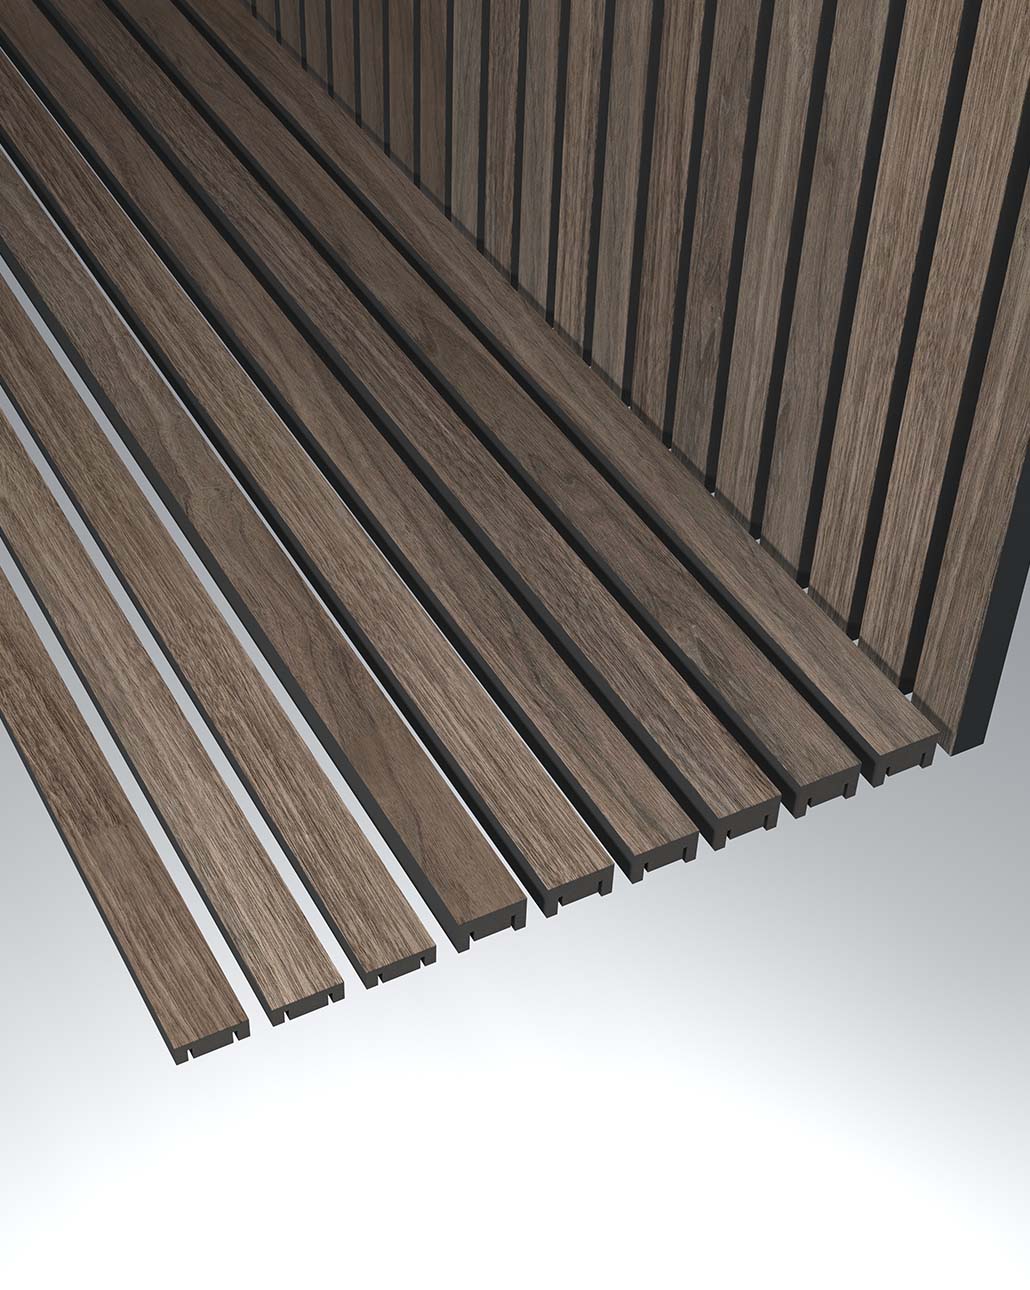
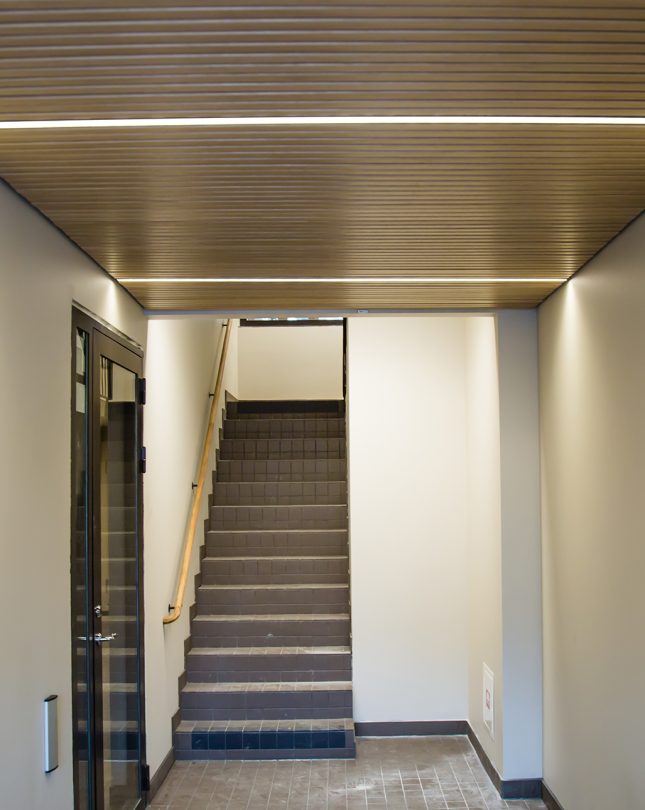
Linear Rib Installation – Ceiling
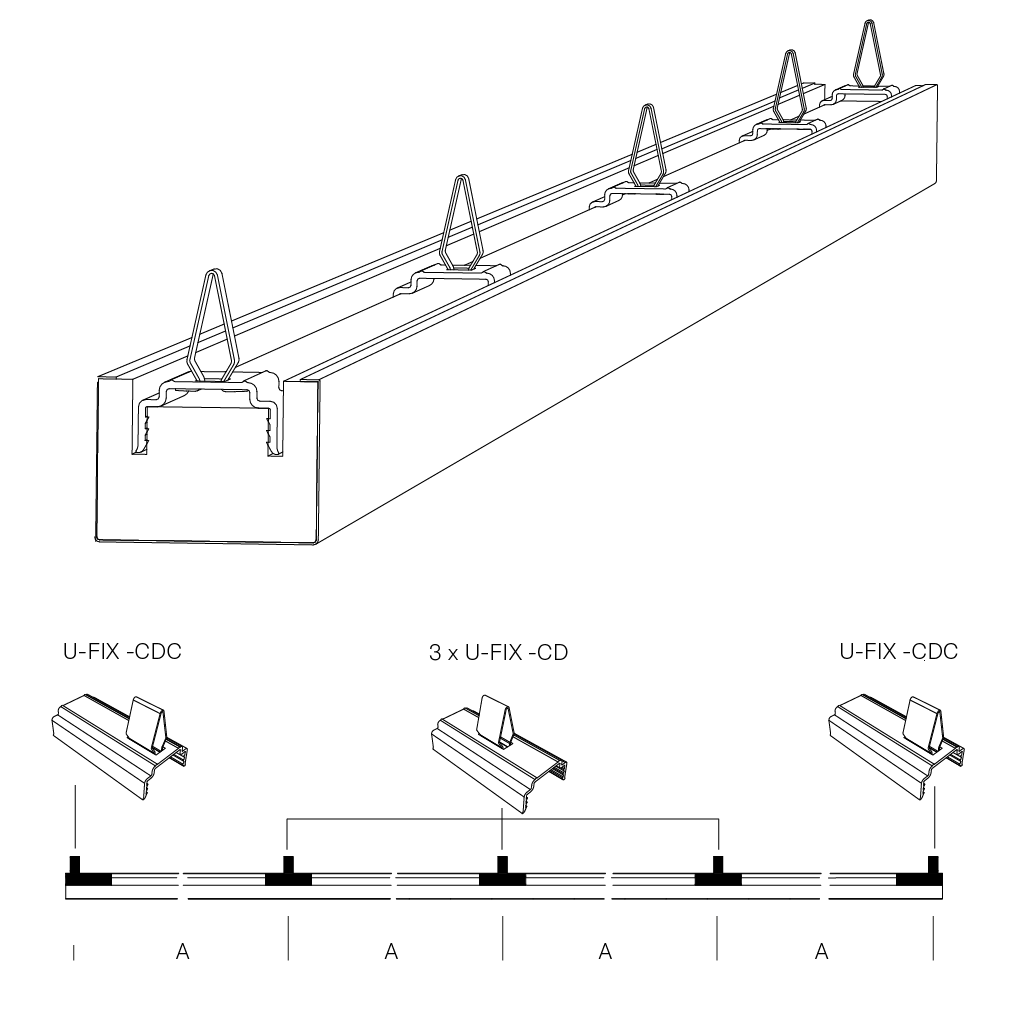
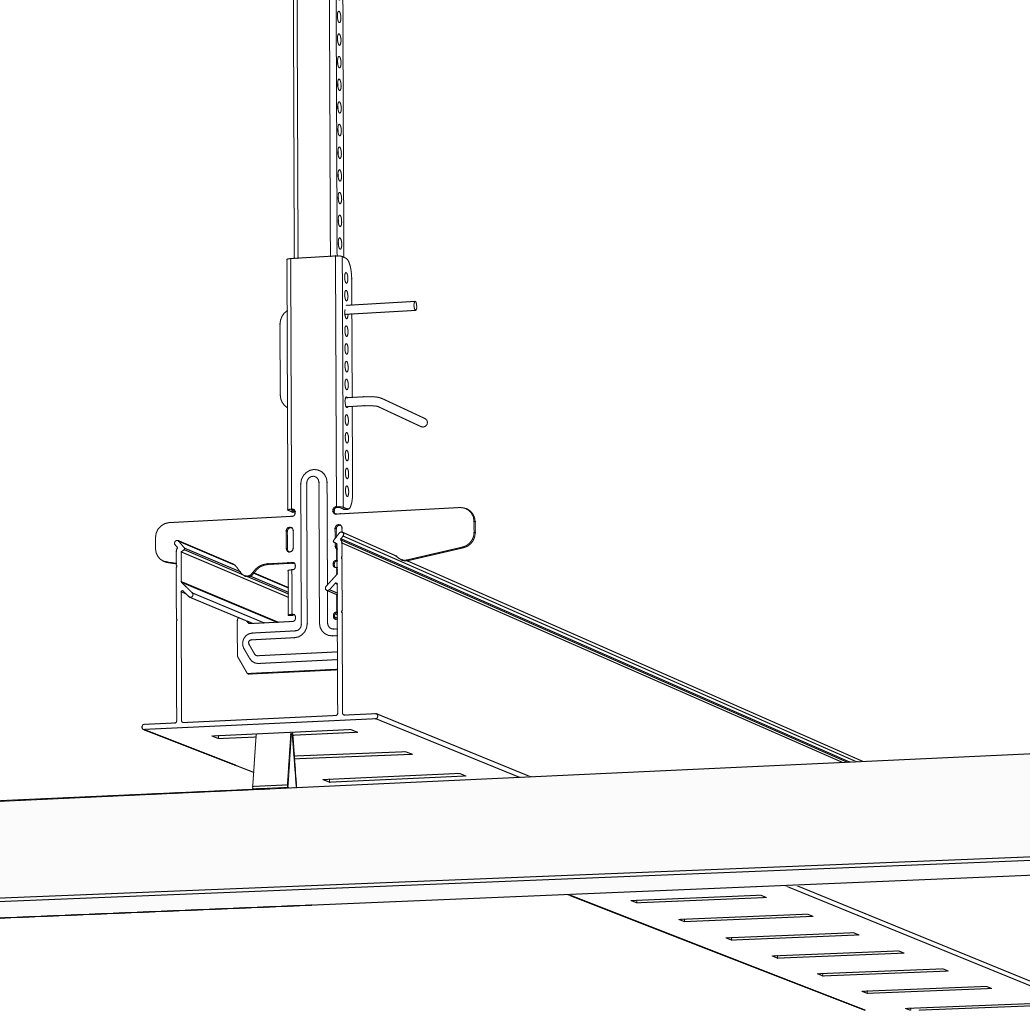
The Capax installation system for Linear RIB is a user-friendly aluminium grid, offering installation reliability and a perfect visual result.
Compatible products: Linear Rib-R, Rib-S and Stripe-XL.