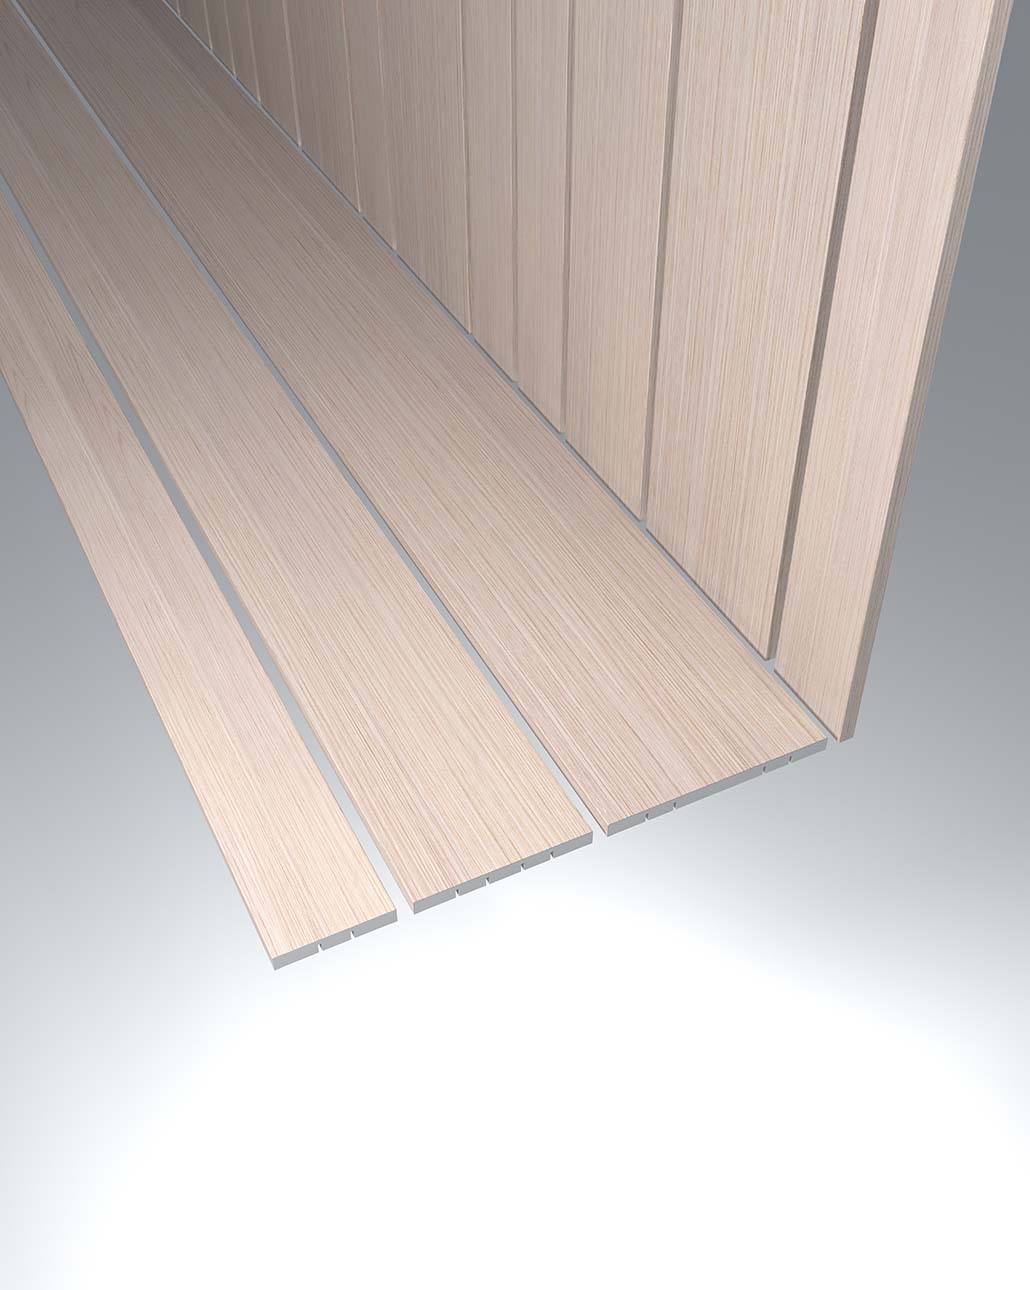
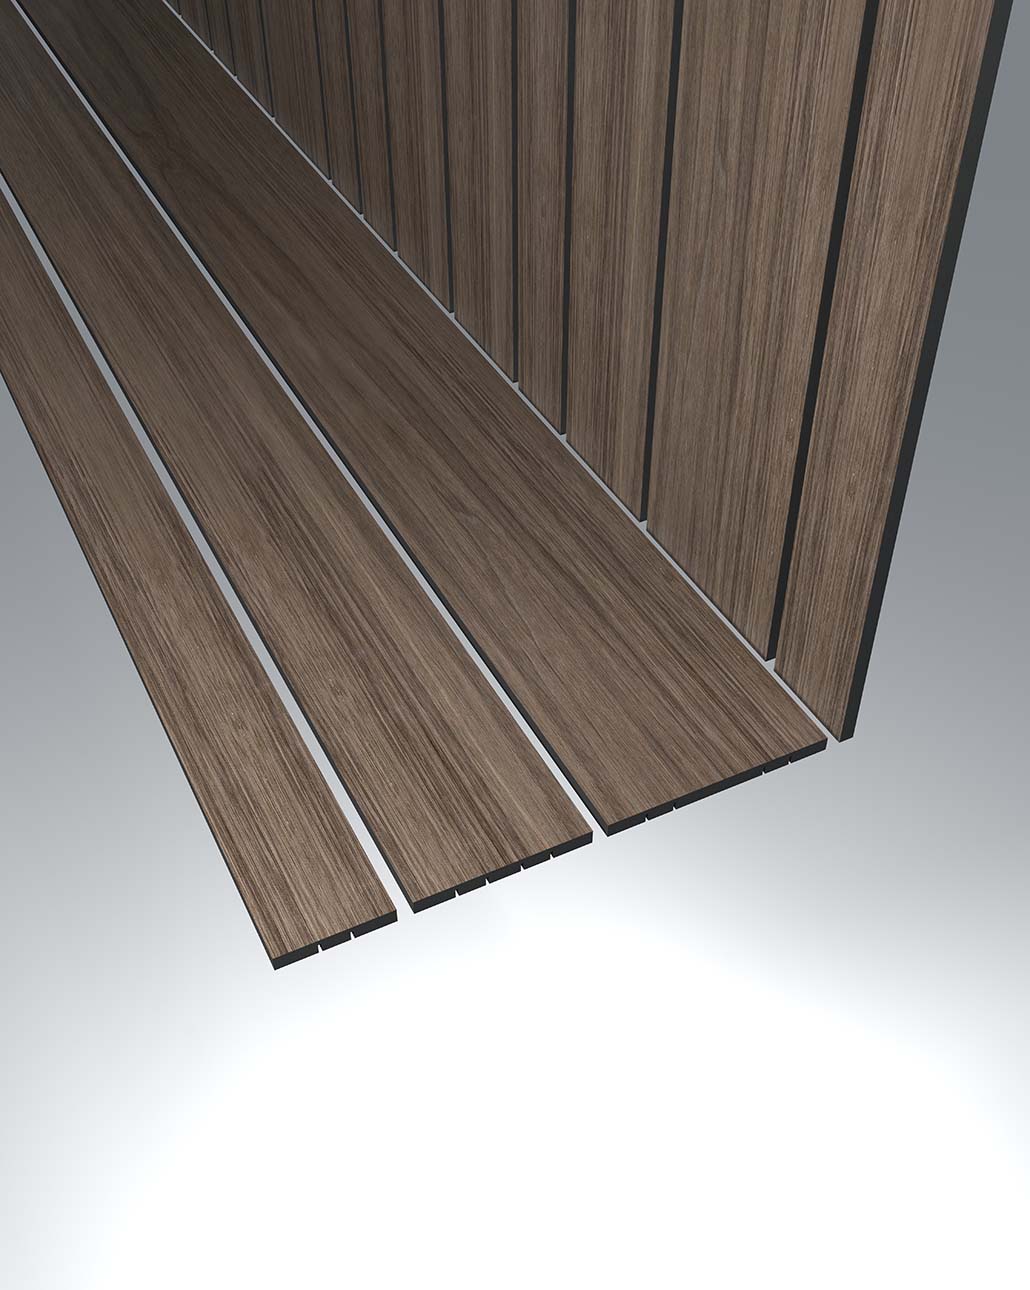
Linear Plank Installation – Ceiling
Installation for Linear Plank and Linear Plank-P in decreasing or full lengths.


Installation for Linear Plank and Linear Plank-P in decreasing or full lengths.
APPLICATION
Ceilings
TYPE / SOLUTION
Linear System
INSTALLATION
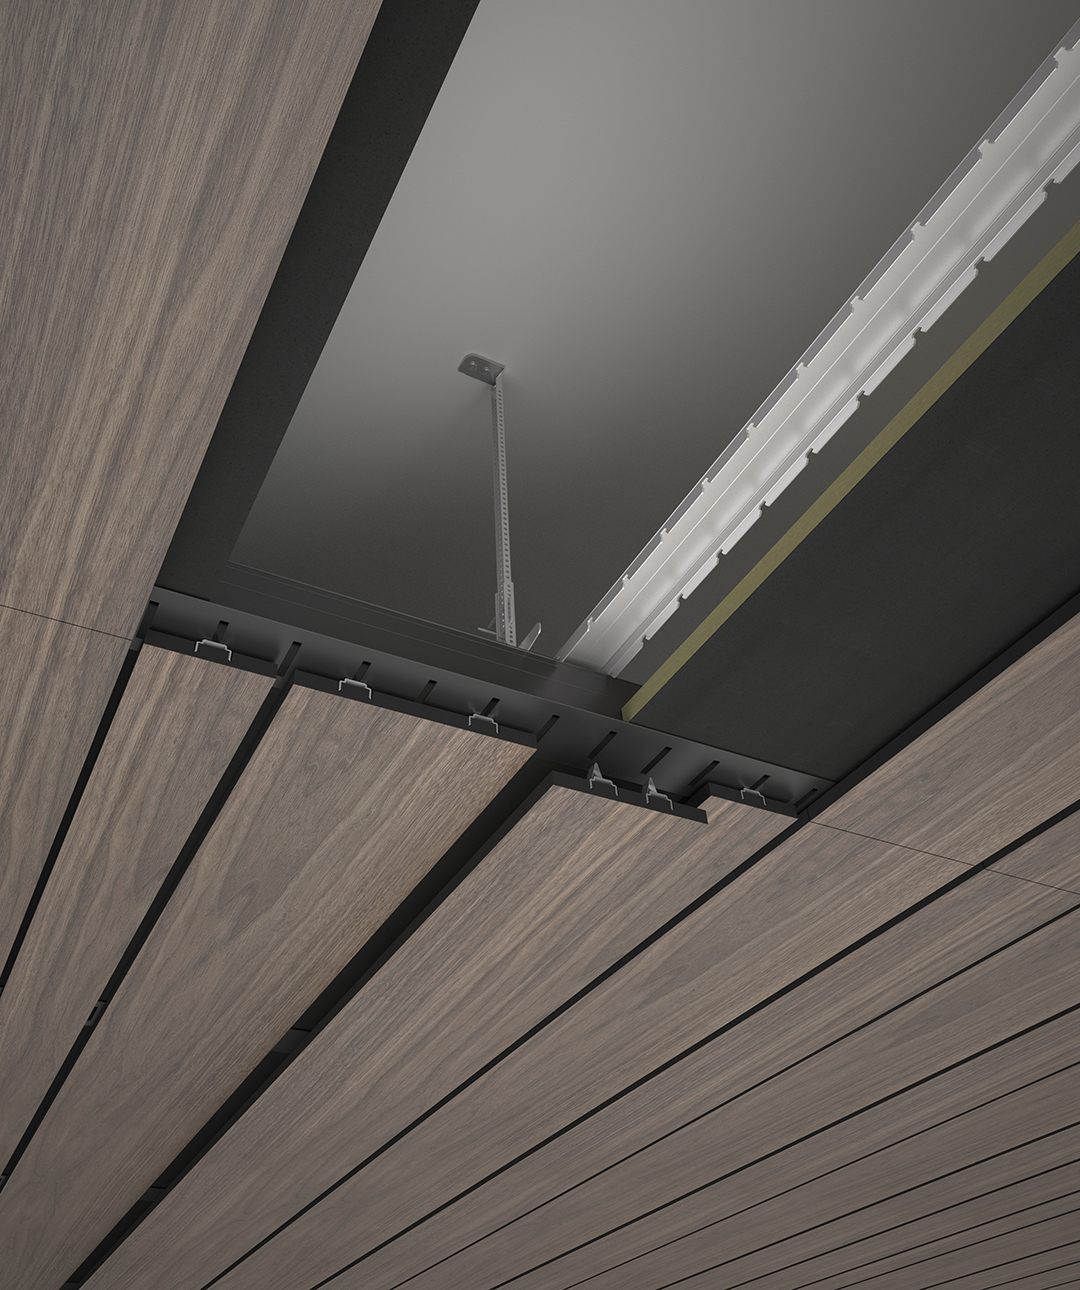
CAPAX SYSTEM
The Capax installation system for Linear Plank Ceiling is a user-friendly aluminium grid, offering installation reliability and a perfect visual result. No tools are needed to assemble the interlocking components. The system is fully demountable, ideal when access to the ancillary systems is required.
Select the Planks on colour shade and plan your wall installation, we recommend mixing varying shades randomly.
The room temperature should be between 18-50 C°. The air humidity should be between 25-60%. The humidity in the under-laying construction (concrete) should not be higher than 15%.
Gustafs Capax System can be used on most types of surfaces. Be sure the sub construction is suited for heavy loads, this applies in particular to high walls and large areas.

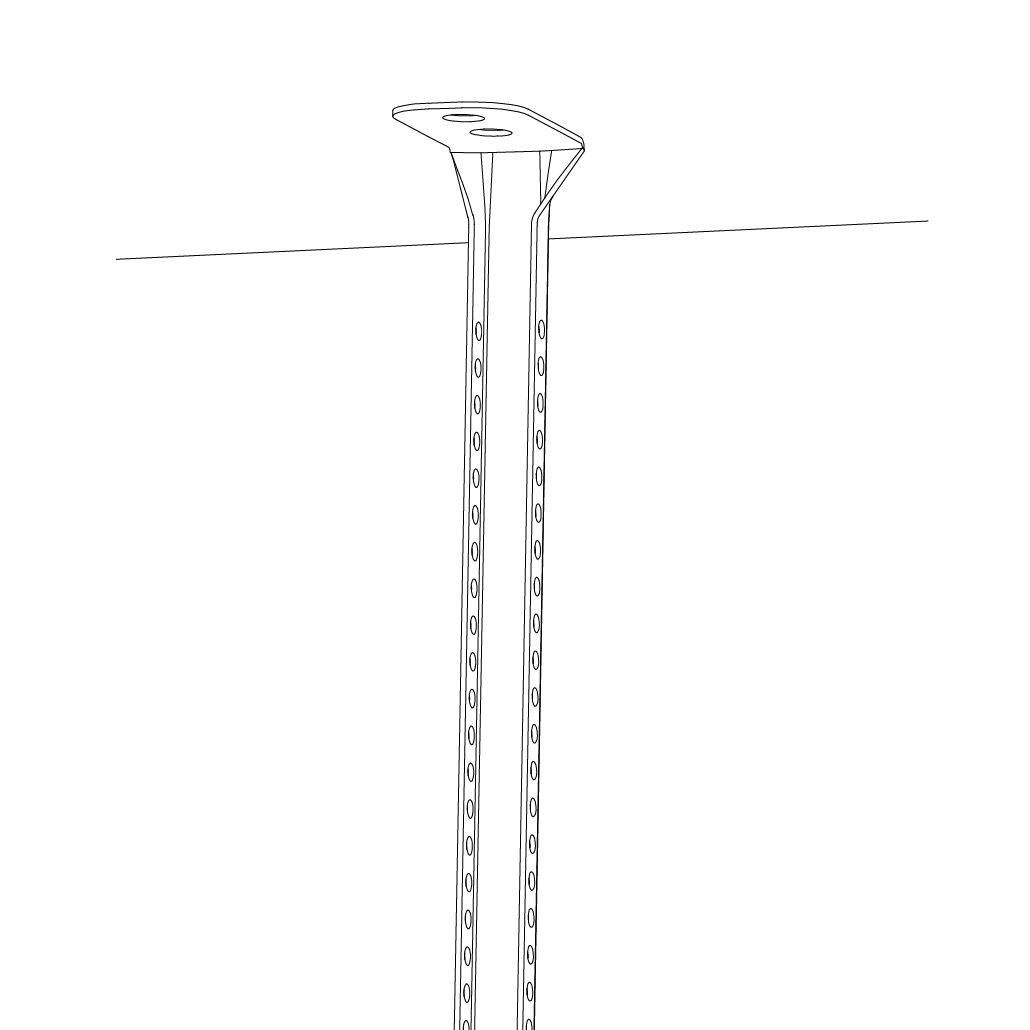
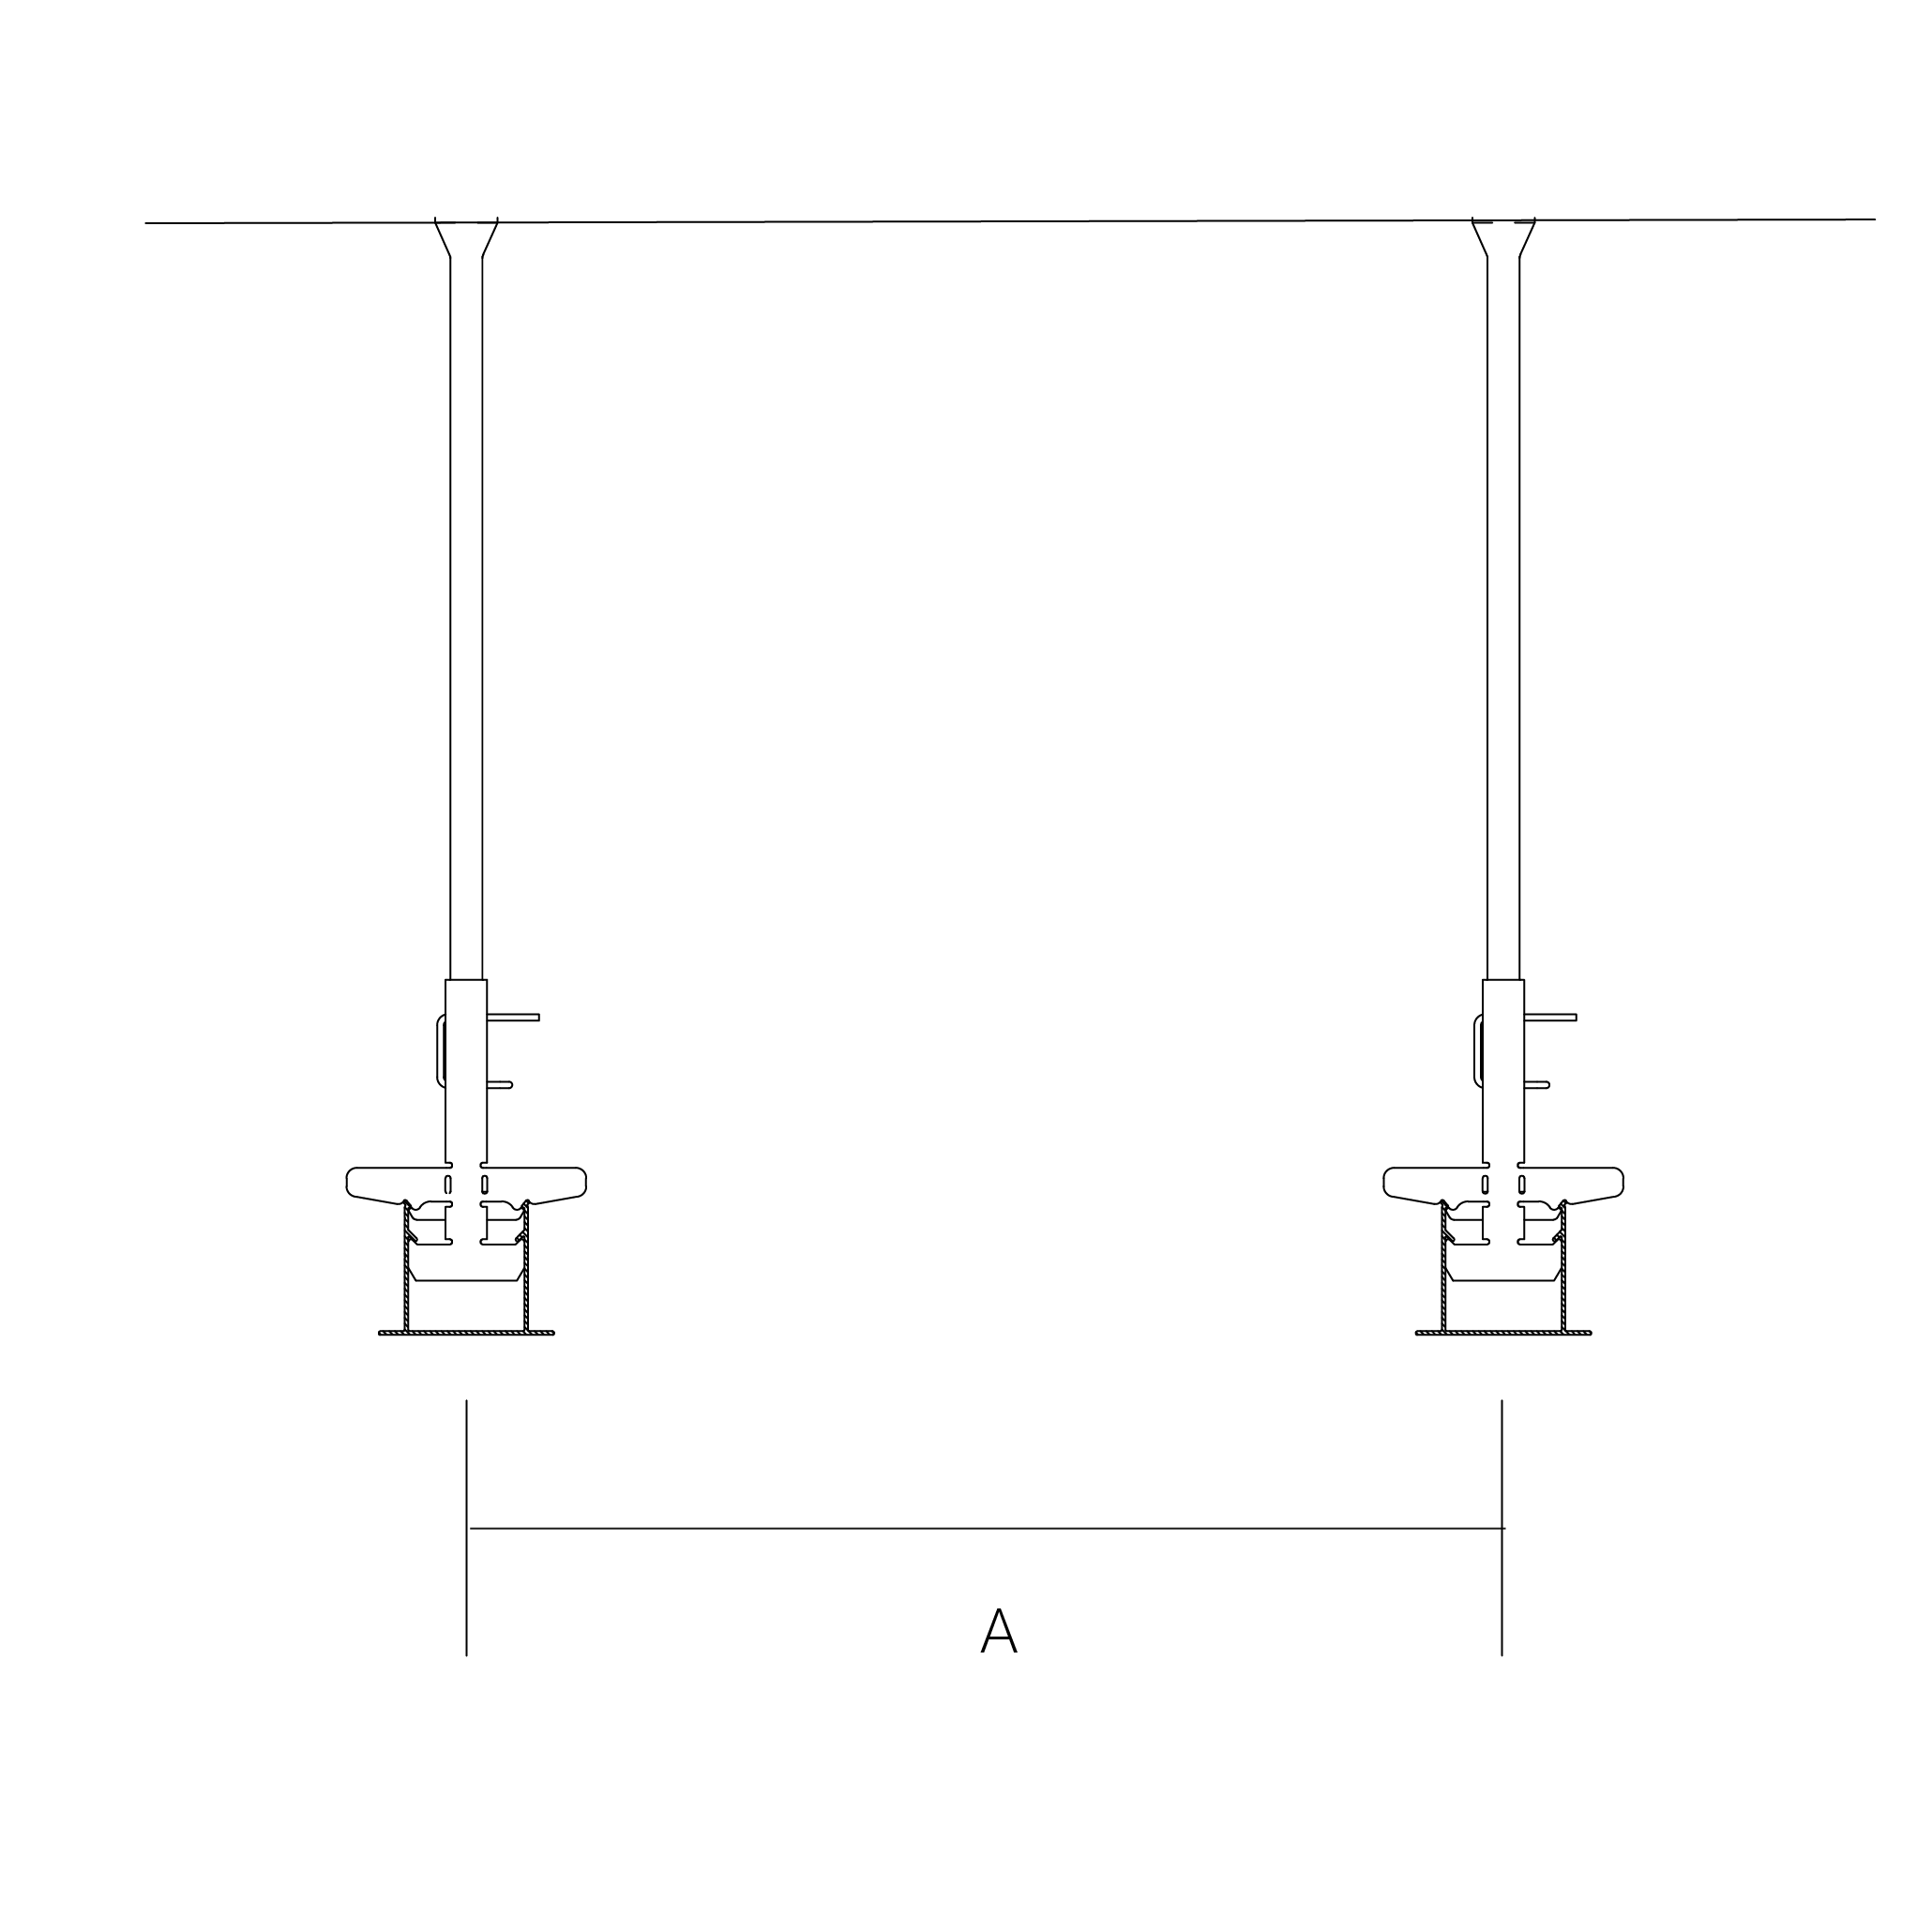
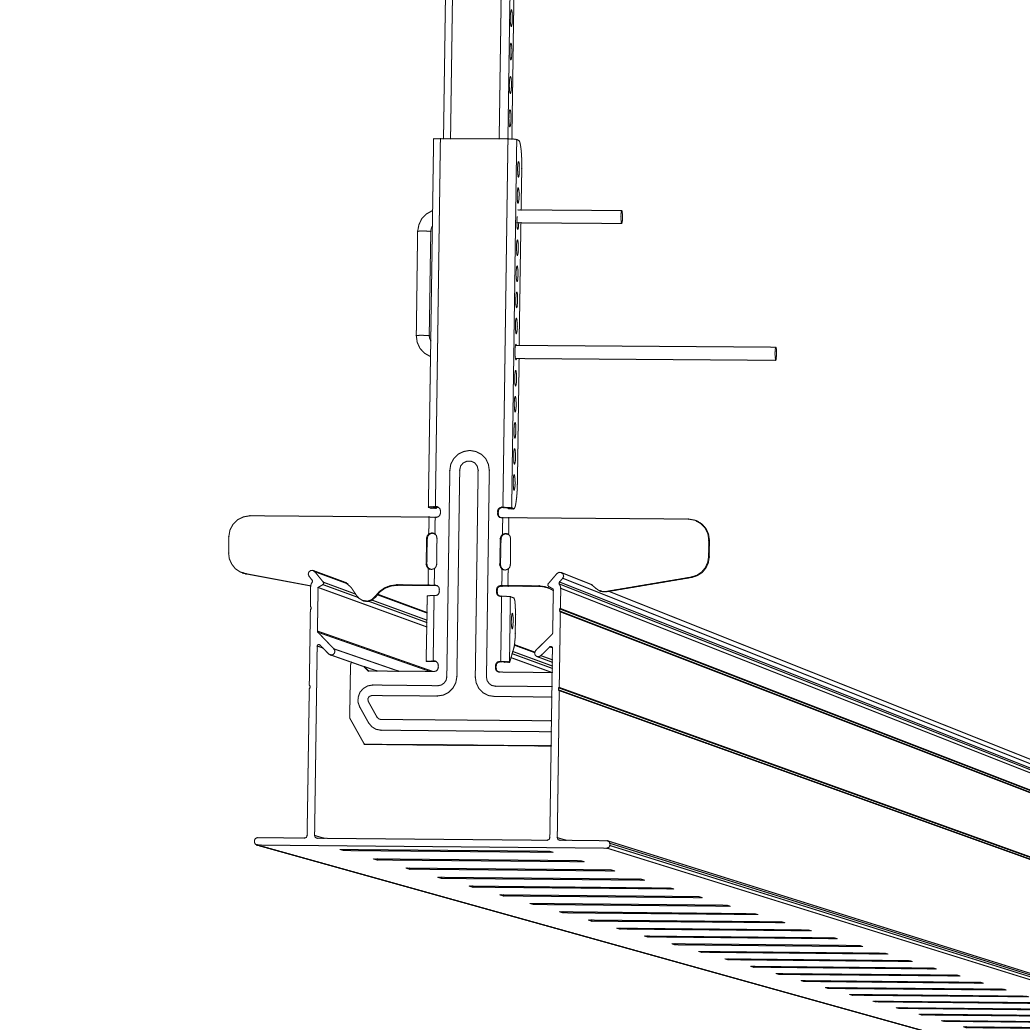
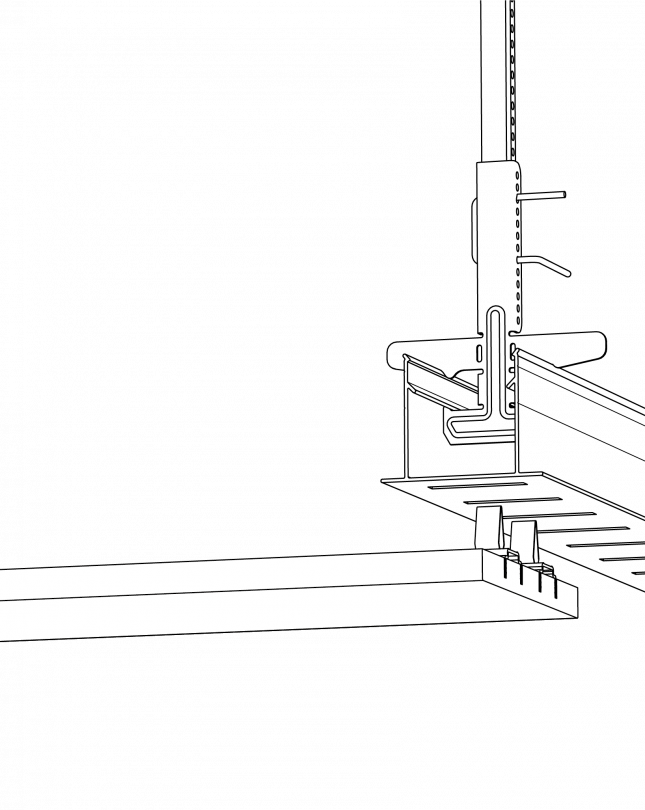
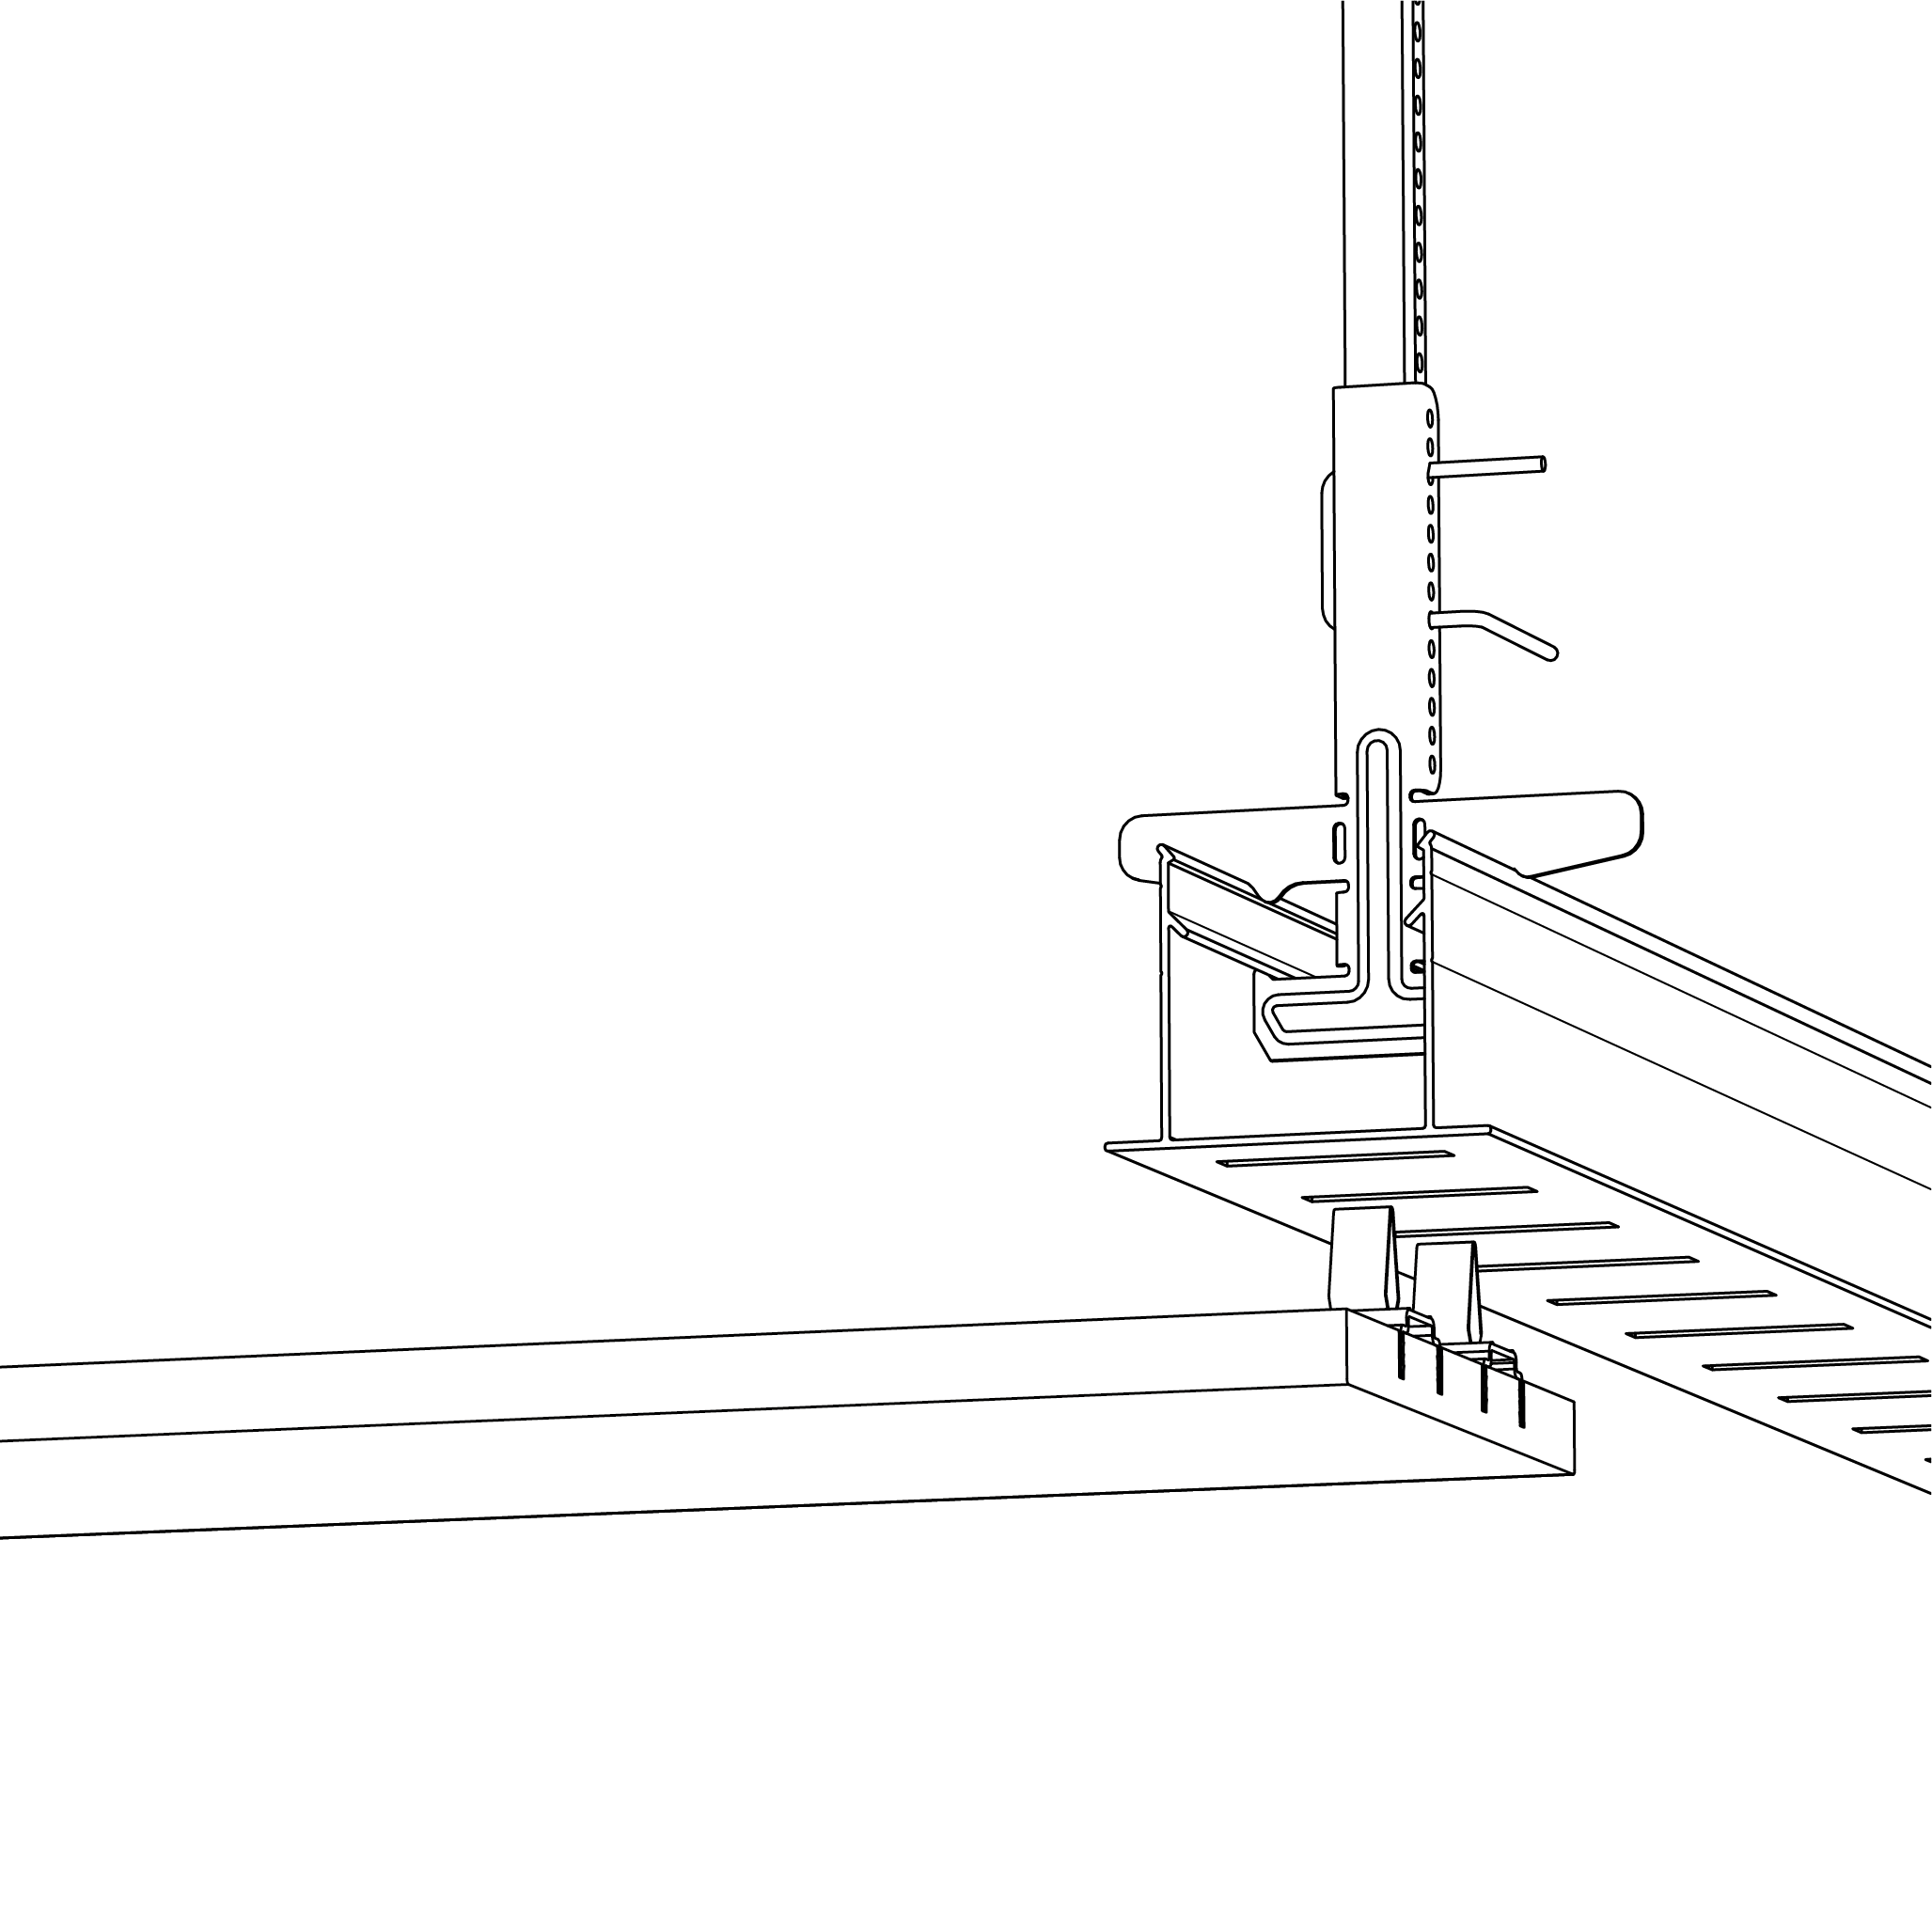
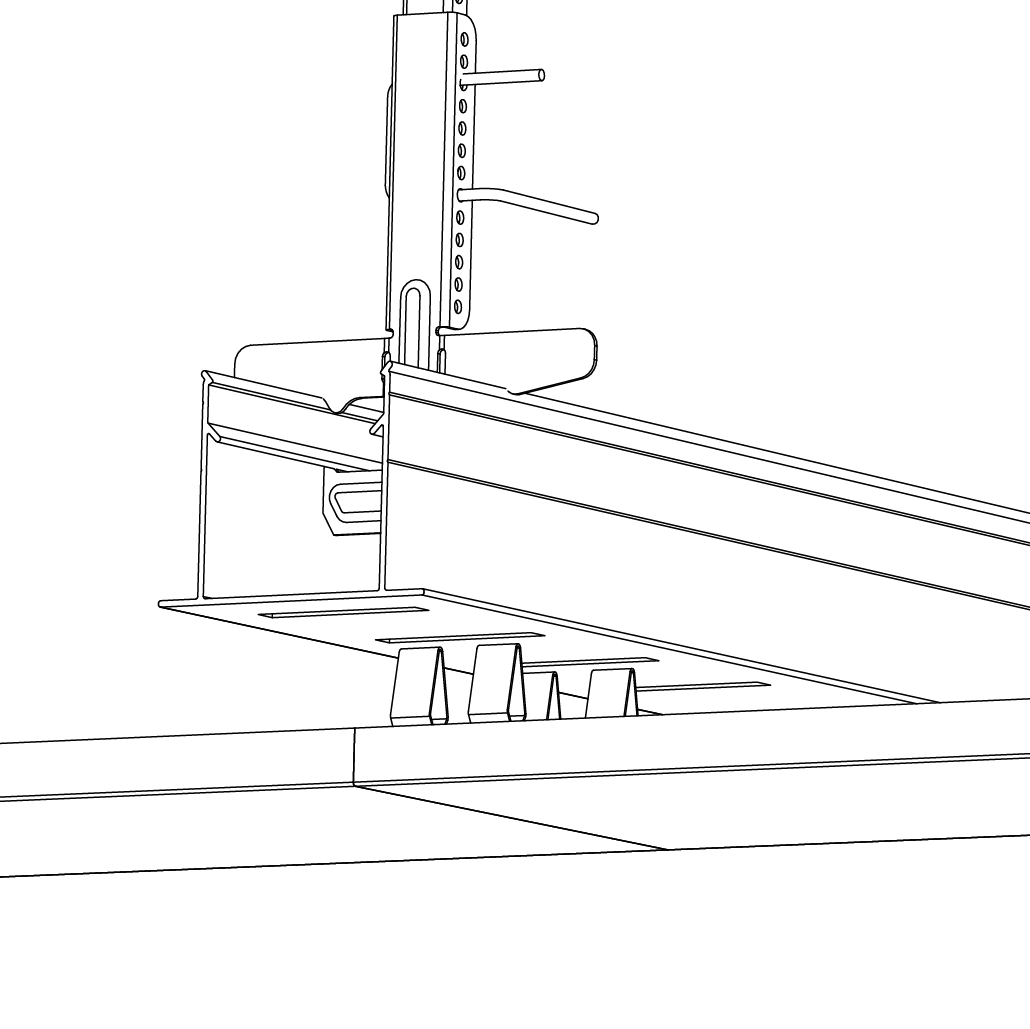
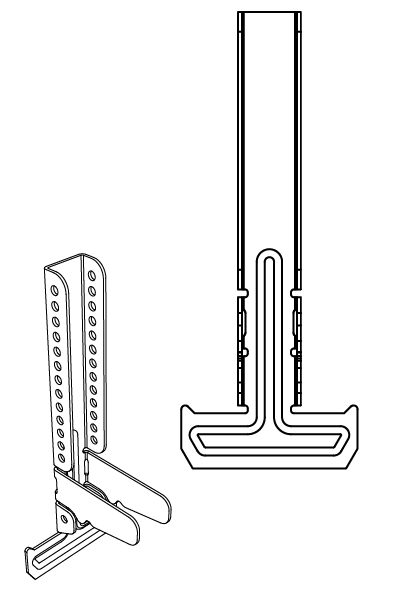
1. Suspend the ceiling hangers from the ceiling. Plan the positioning of the Nonius according to steps 3 and 4.
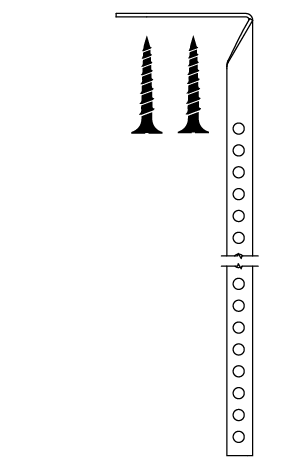

2. Use the adapter NONIUS-CD to connect the BASE-CD profile to the ceiling hangers.
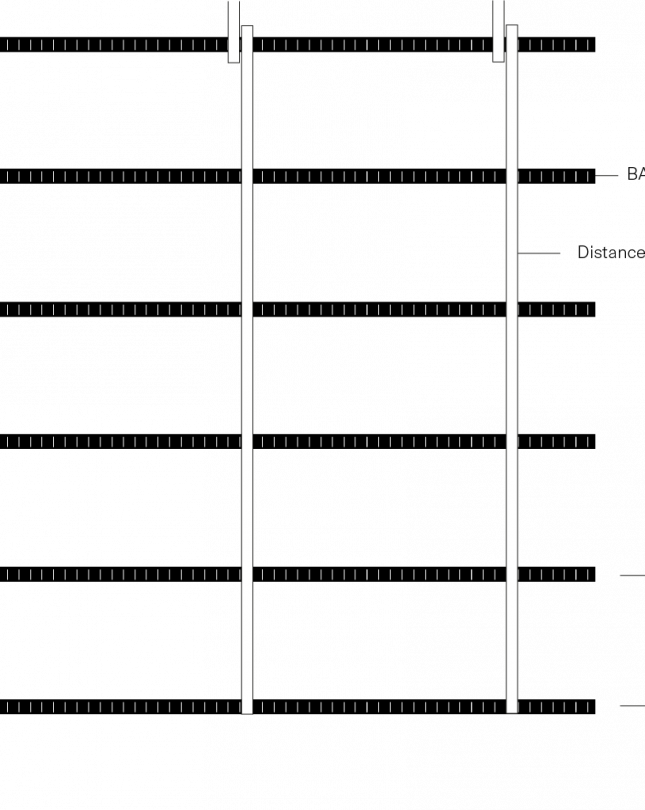
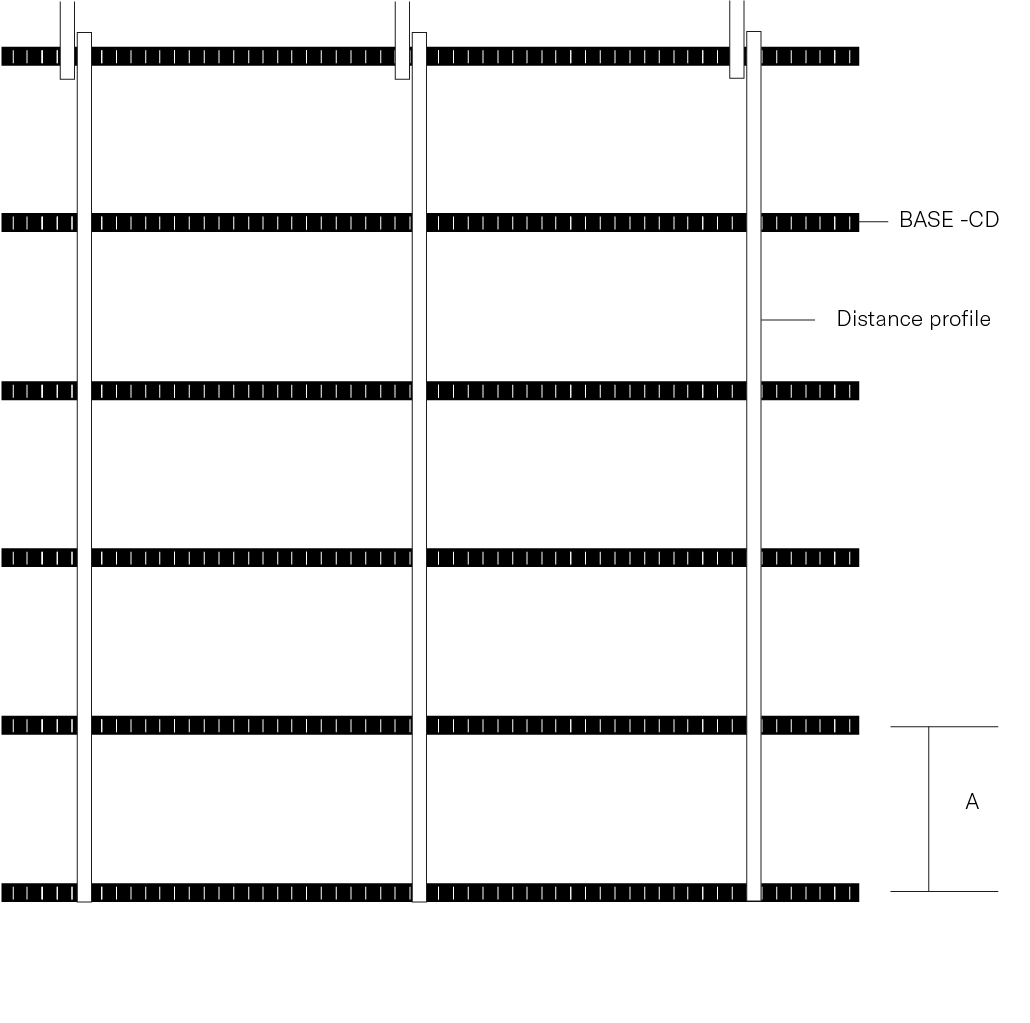
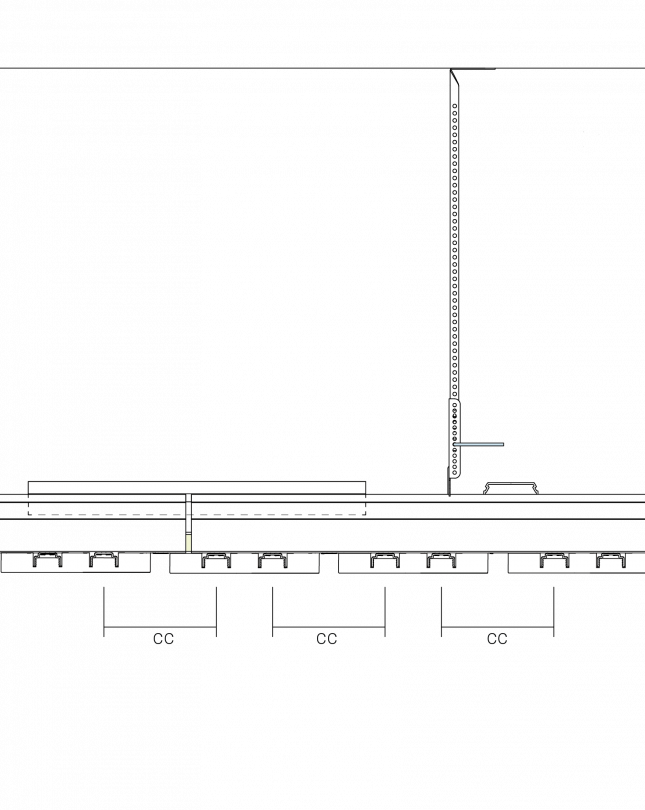
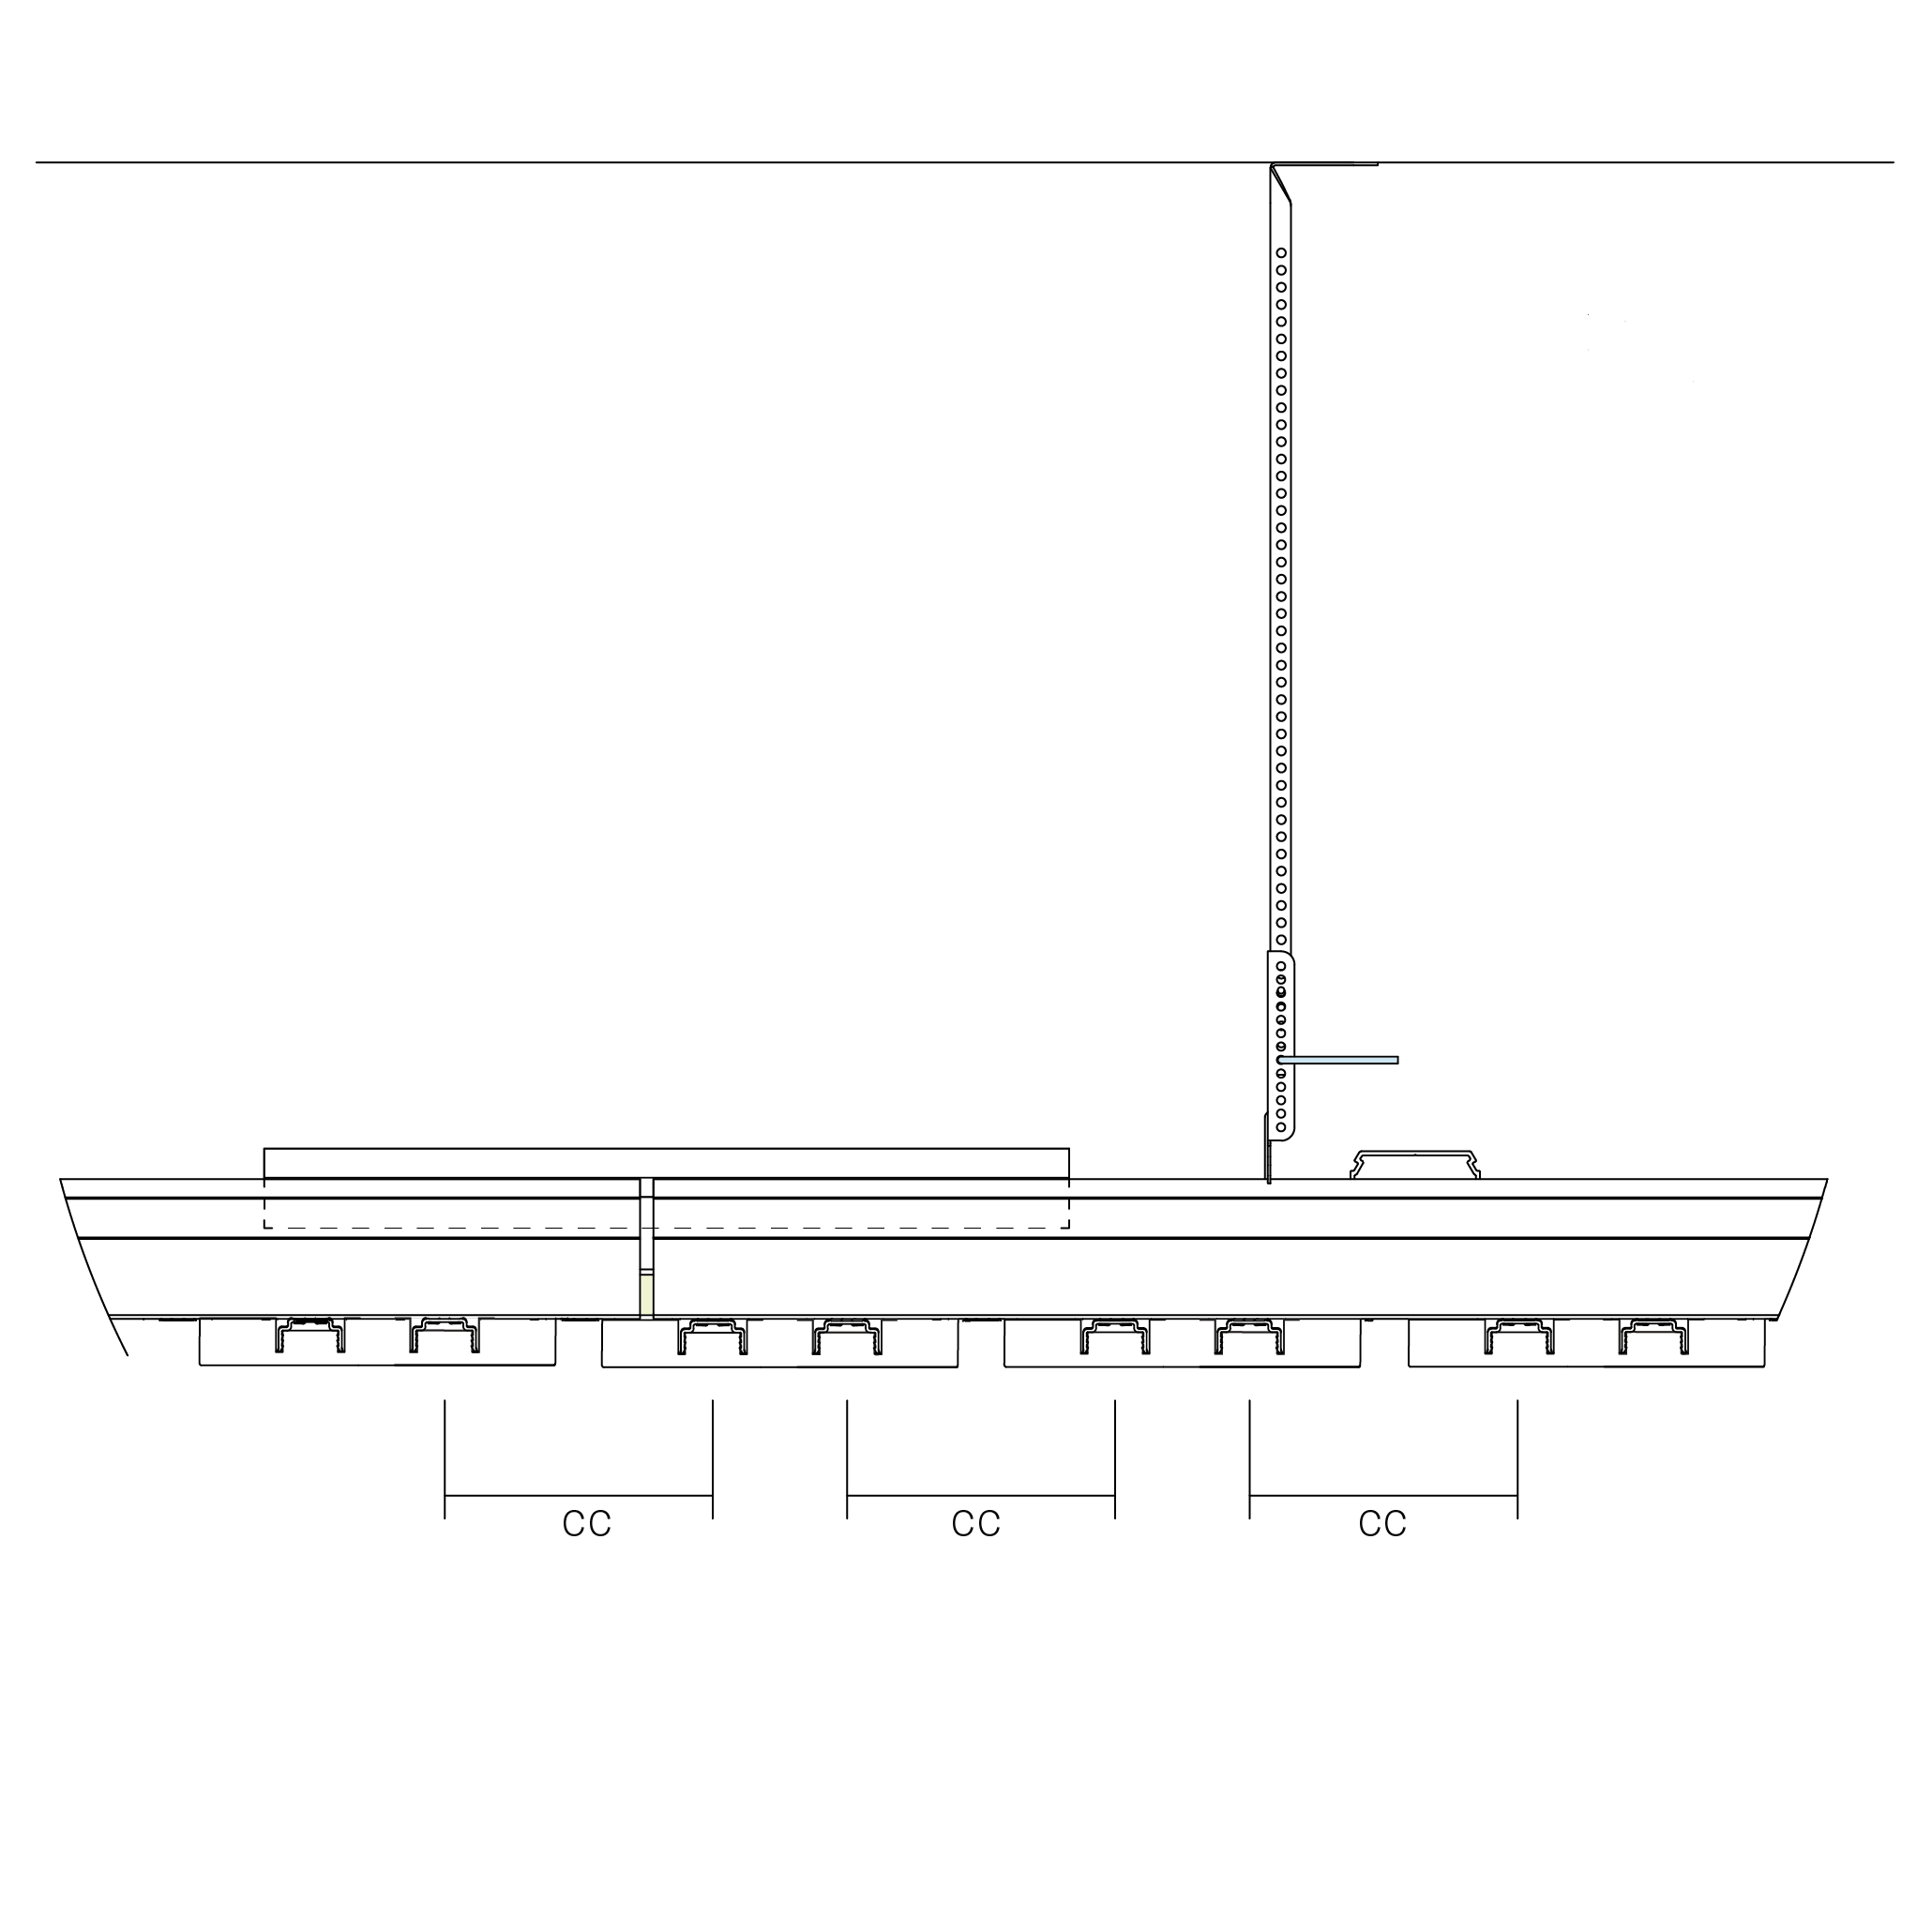
3. Suspend the BASE-CD with a repeated interval of 600 mm, measured from the centrums of the profiles (cc).
A=600 mm
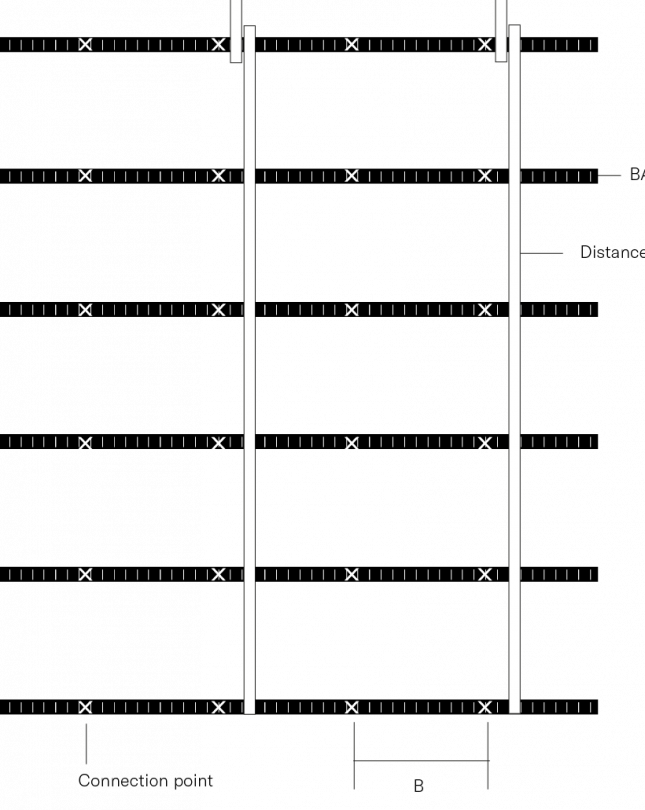
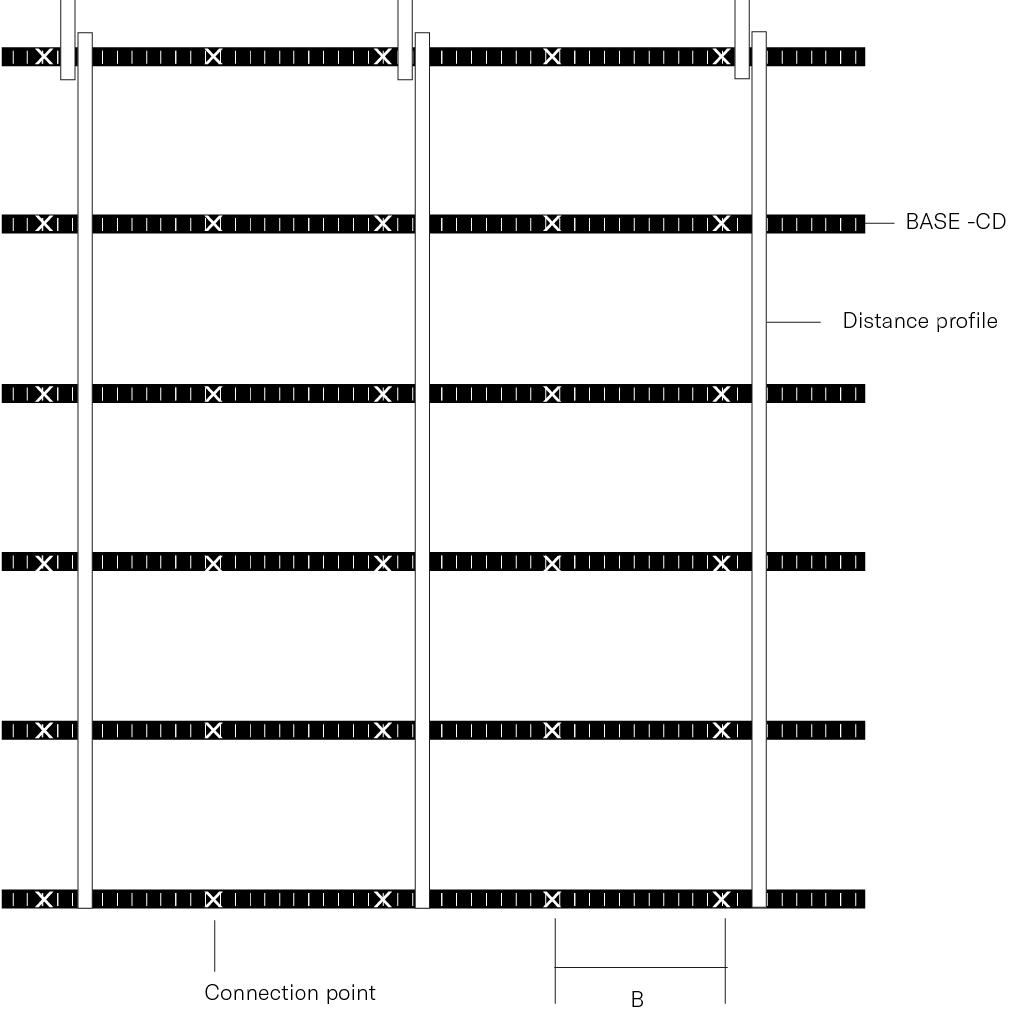
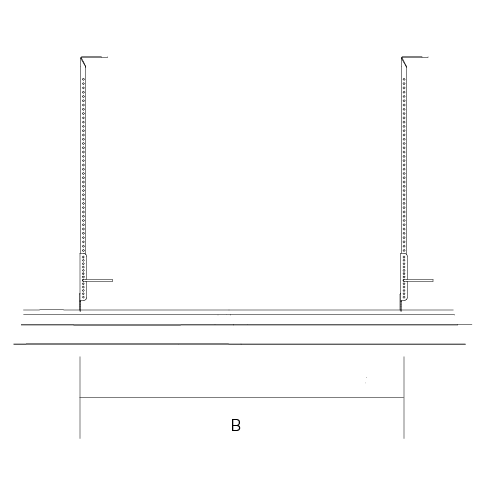
4. Measured along the length of the BASE-CD, the connection to the ceiling must be made every 600 mm.
B = 600 mm

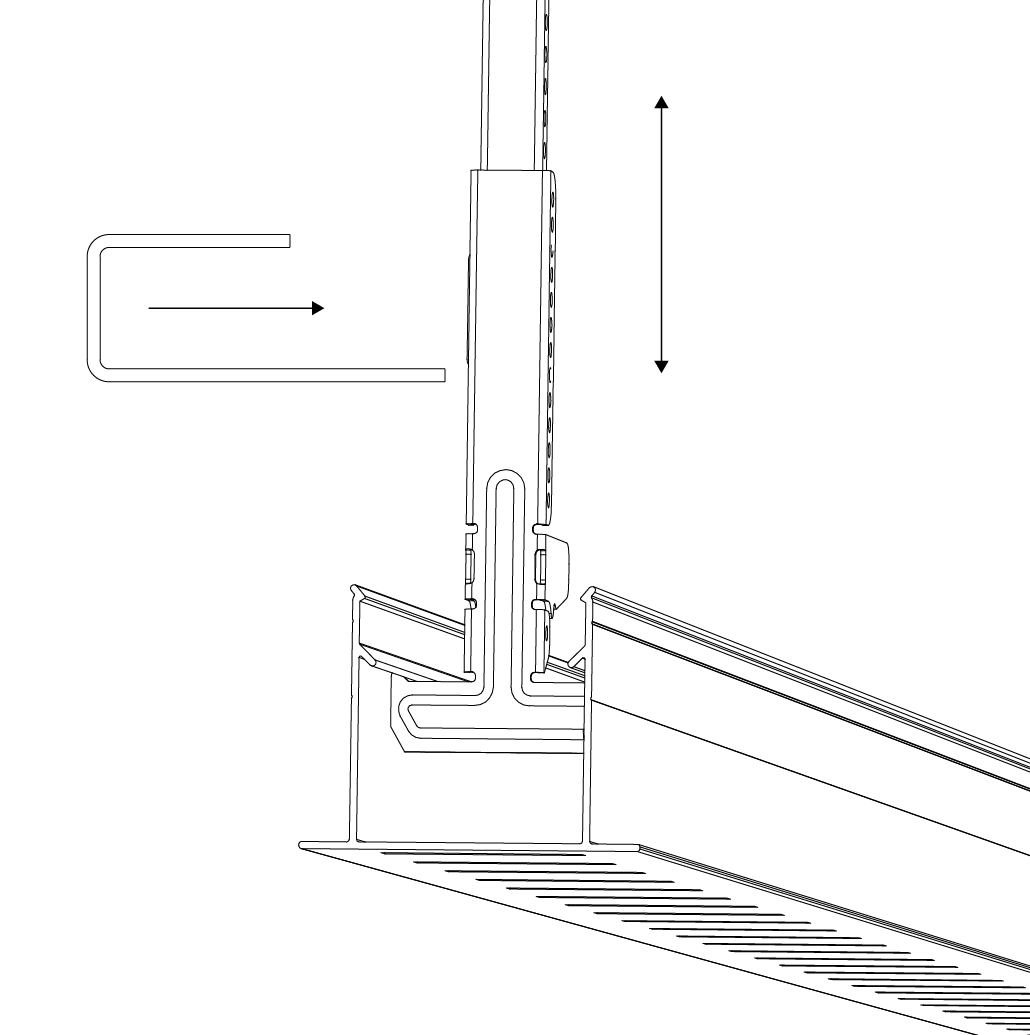
5. Level the height using a laser and secure with the locking pin.

6. Secure the position of the NONIUS-CD by bending the 2 wings.
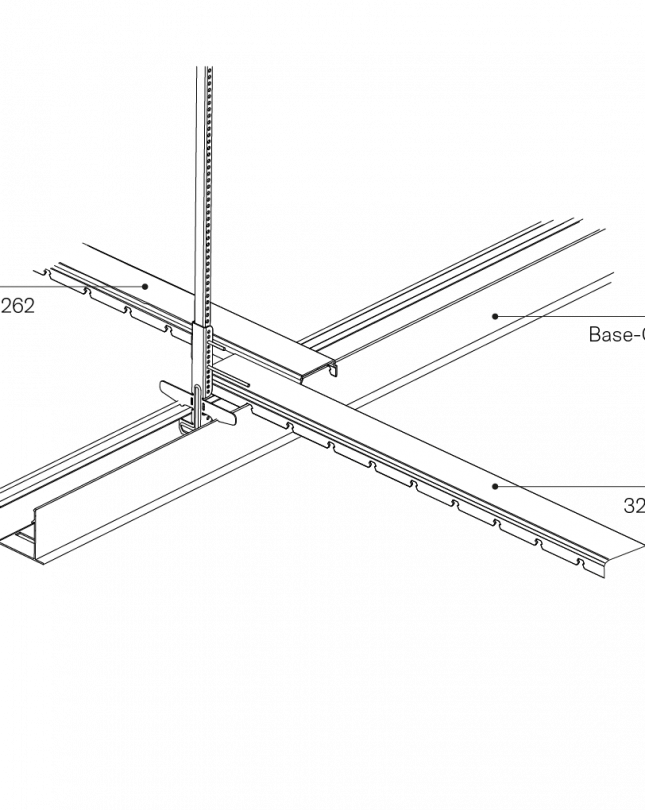
7. When needed, connect the BASE-CD in-line with profile 3263 and assure the cc distance between the fixation holes remains constant. Increase the friction between the engaging components by slightly twisting one corner inwards, on each BASE-CD.

Base-CD in-line connection using Capax profile 3263
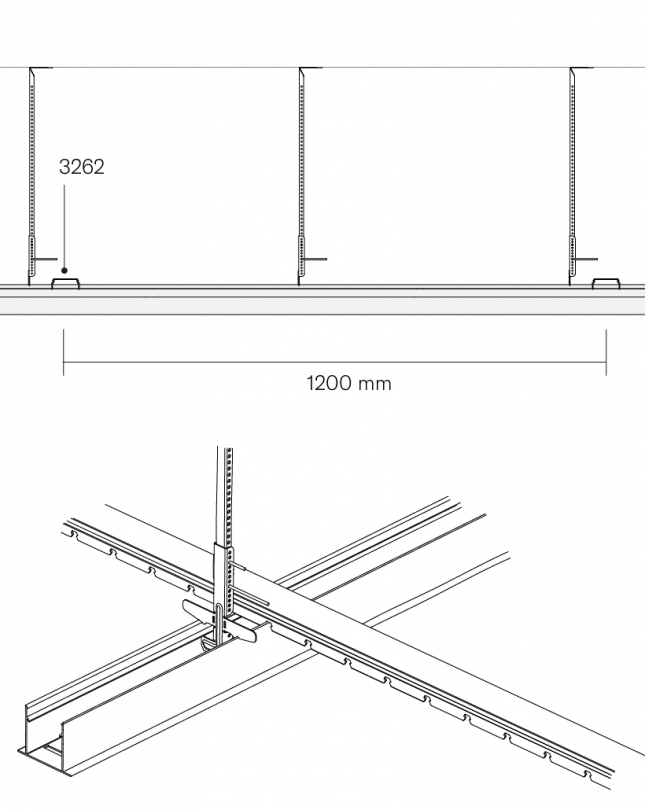
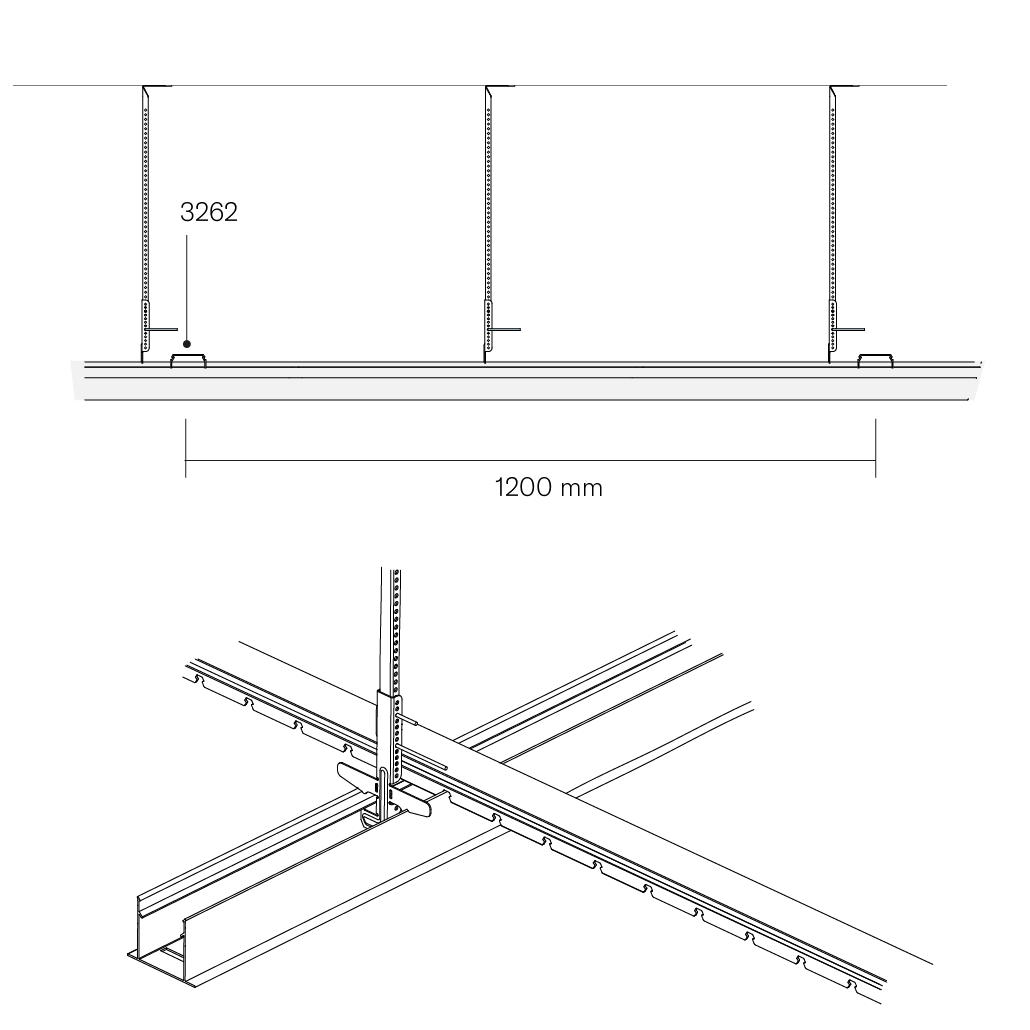
8. Snap the distance profile 3262 perpendicular to the BASE-CD every 1200 mm.
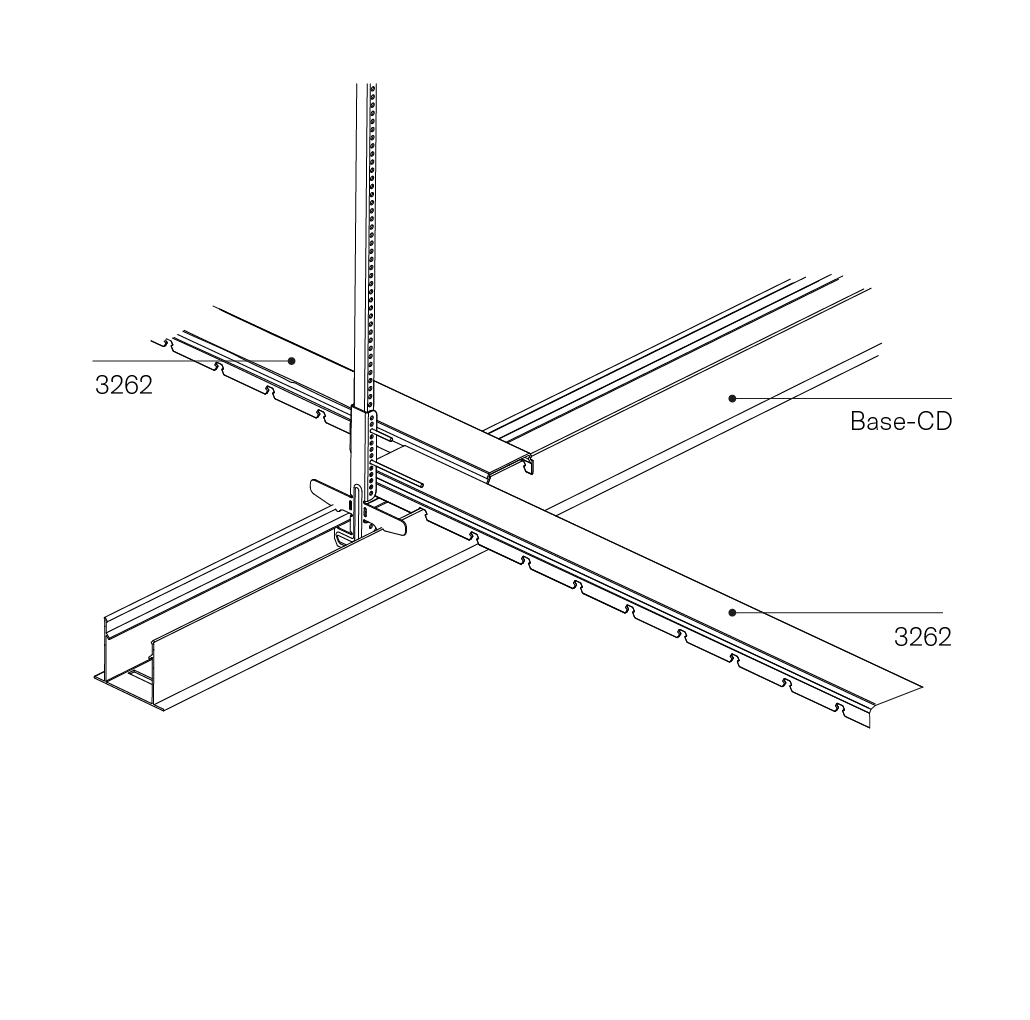
9. Two distance profiles Capax 3262 will partially run parallel, where mounted on the same BASE-CD.
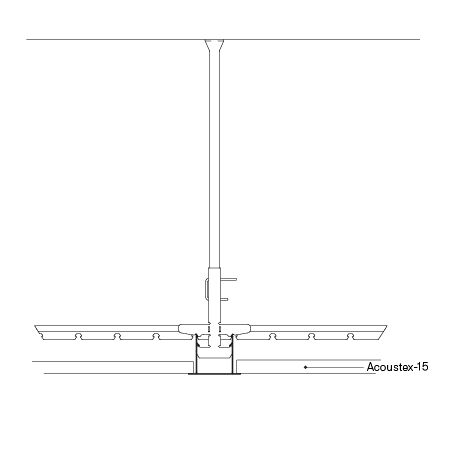
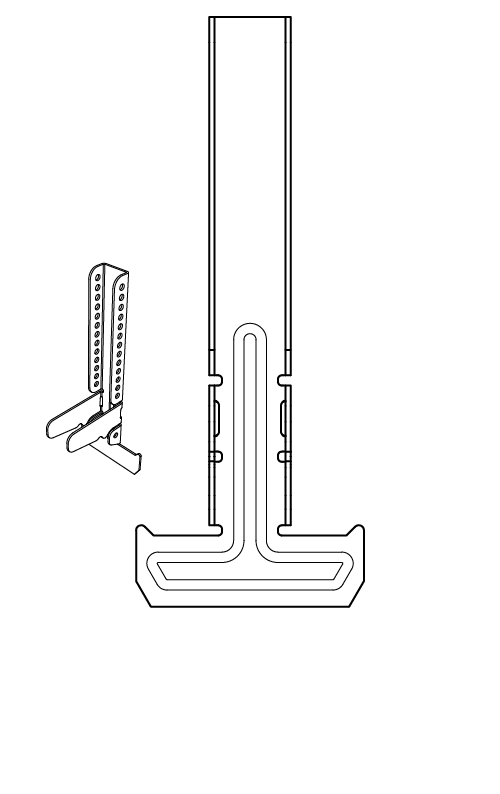
10. Install Acoustex-15 insulation onto the “T” section of the BASE-CD.
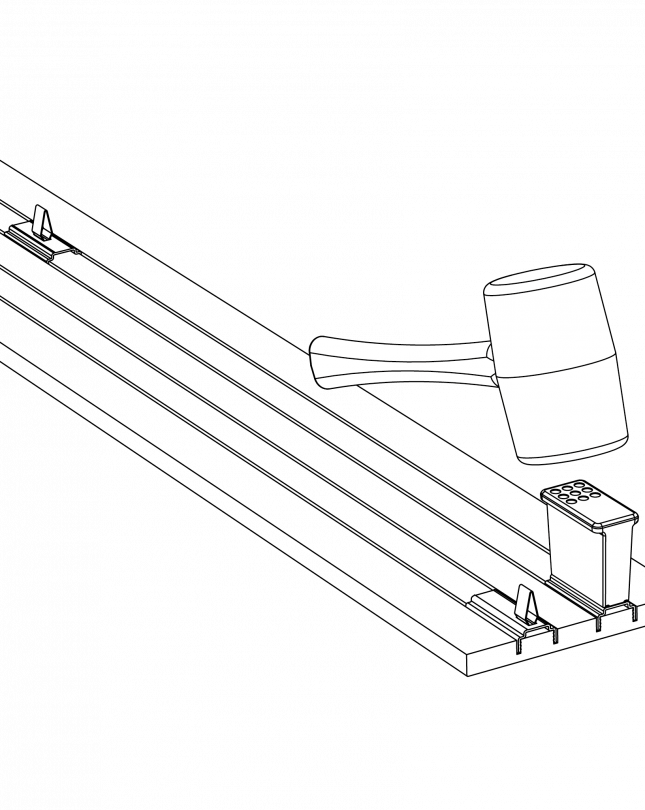
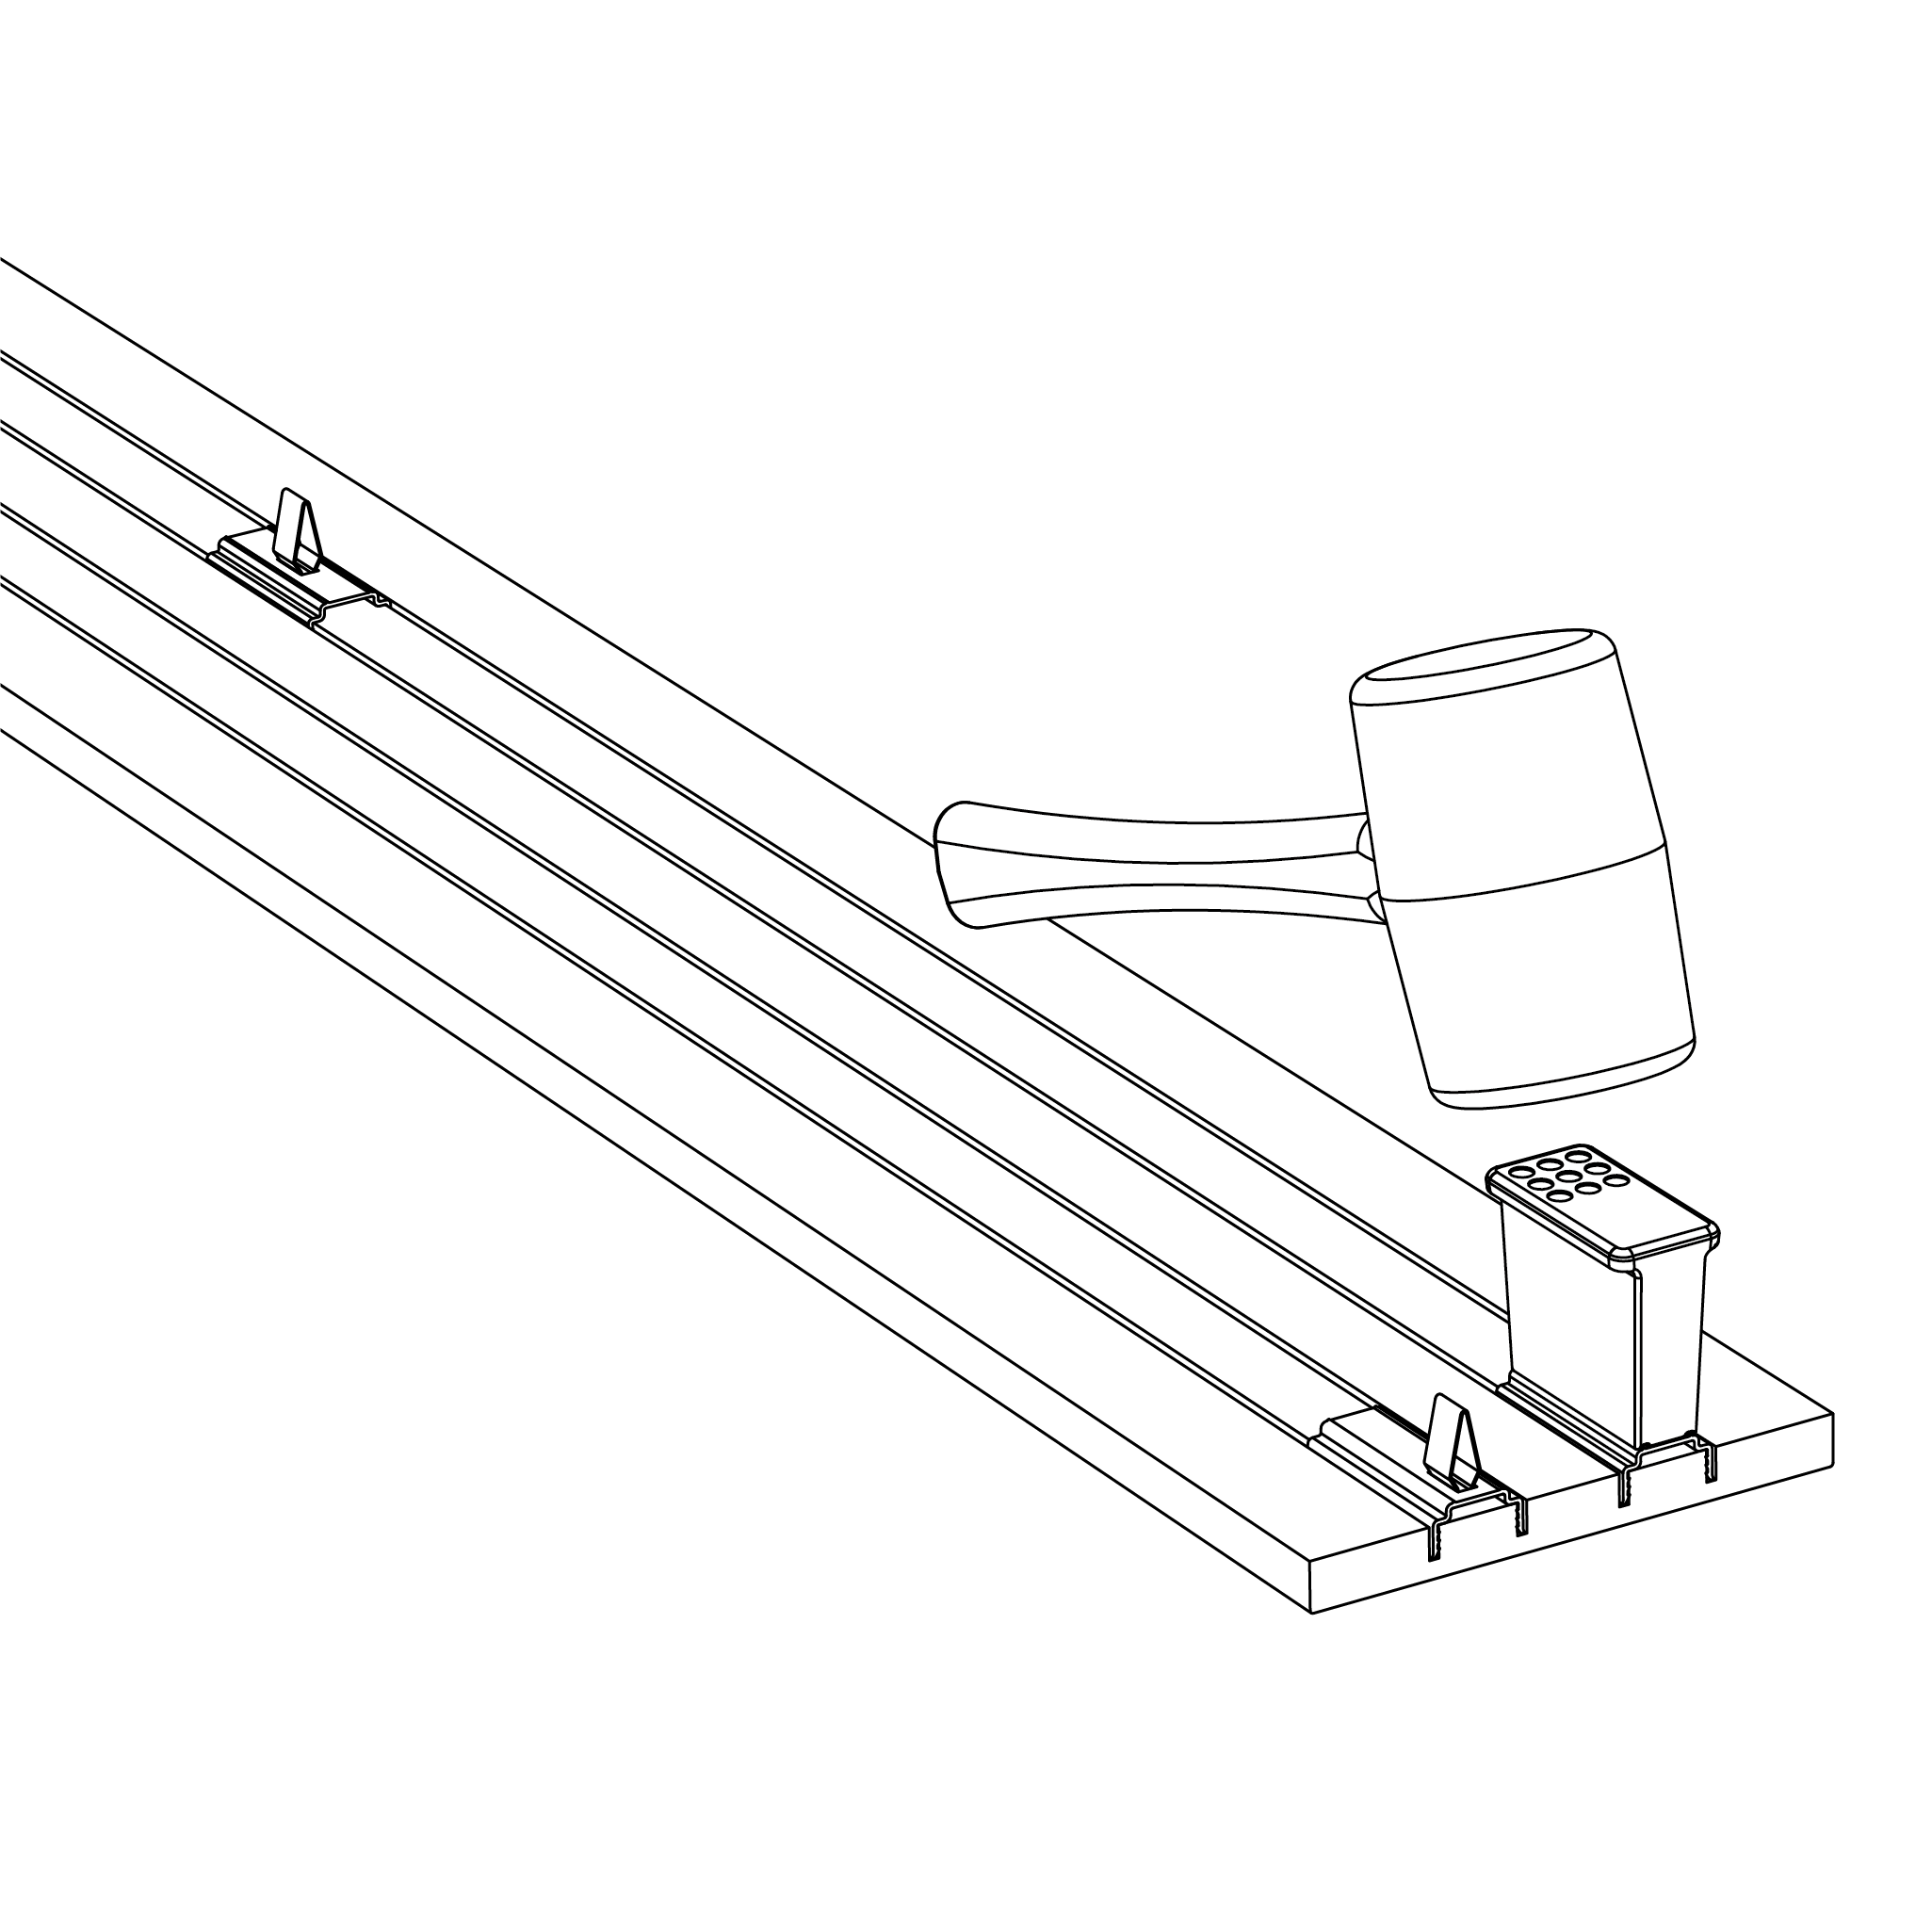
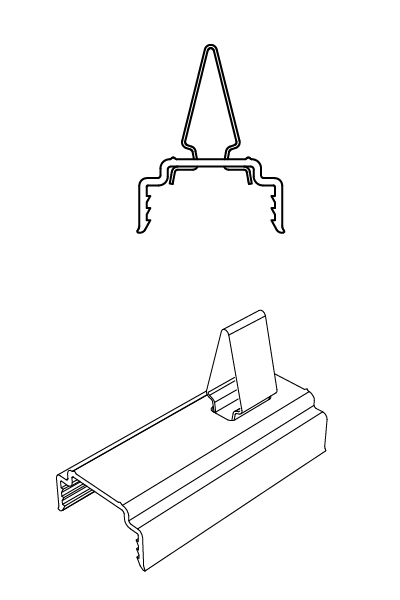
11. For 88 mm wide Planks: Attach a U-FIX-CDC holder to each end of the linear Plank using tool M-BLOCK-CD. The holders must be placed with the spring clip closest the ends of the Planks.
For 138 and 188 wide Planks: Attach 2 pcs U-FIX-CDC holder to each end of the linear Plank using tool M-BLOCK-CD. The holders must be placed with the spring clip closest the ends of the Planks.
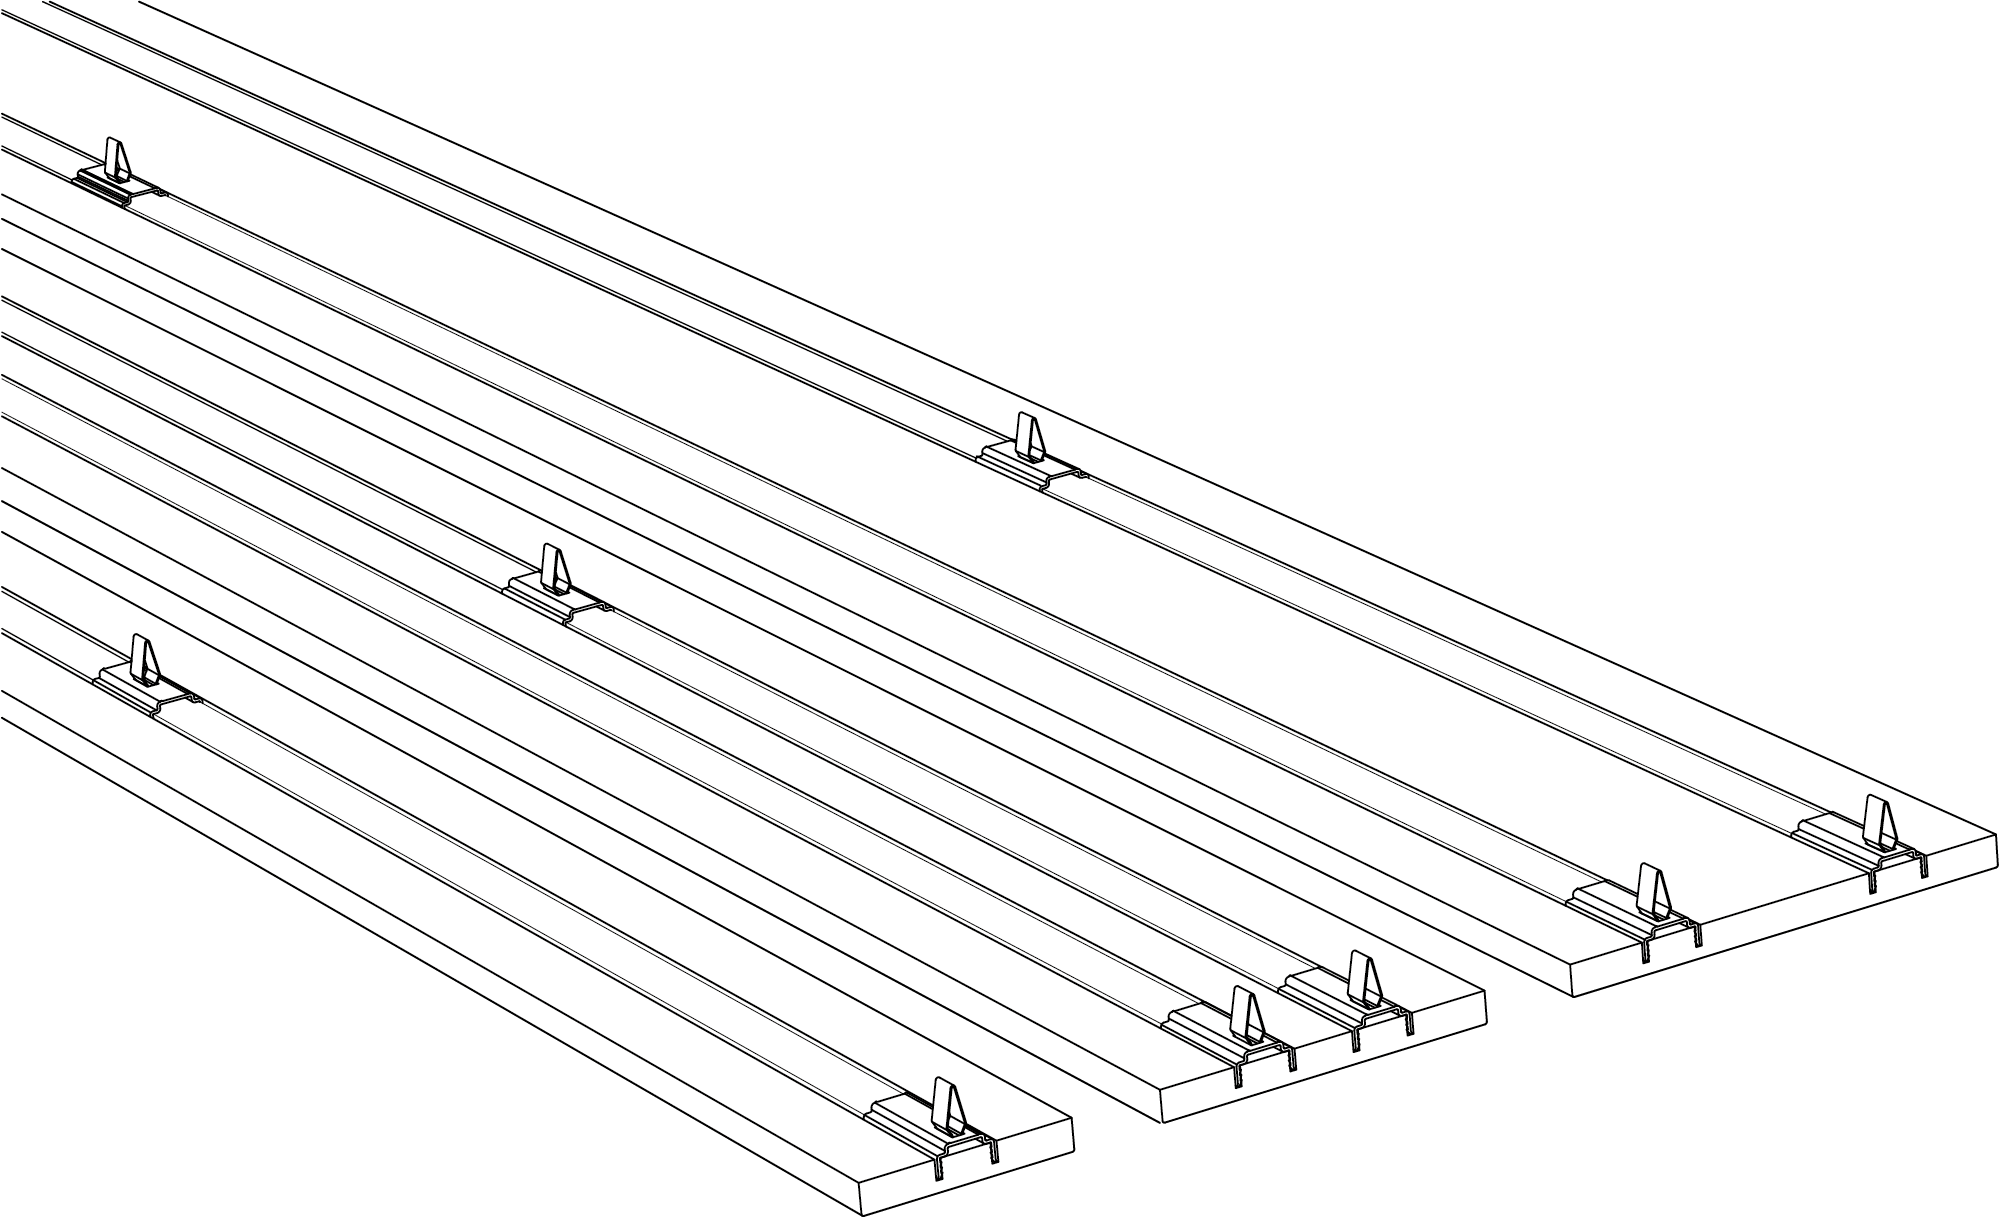

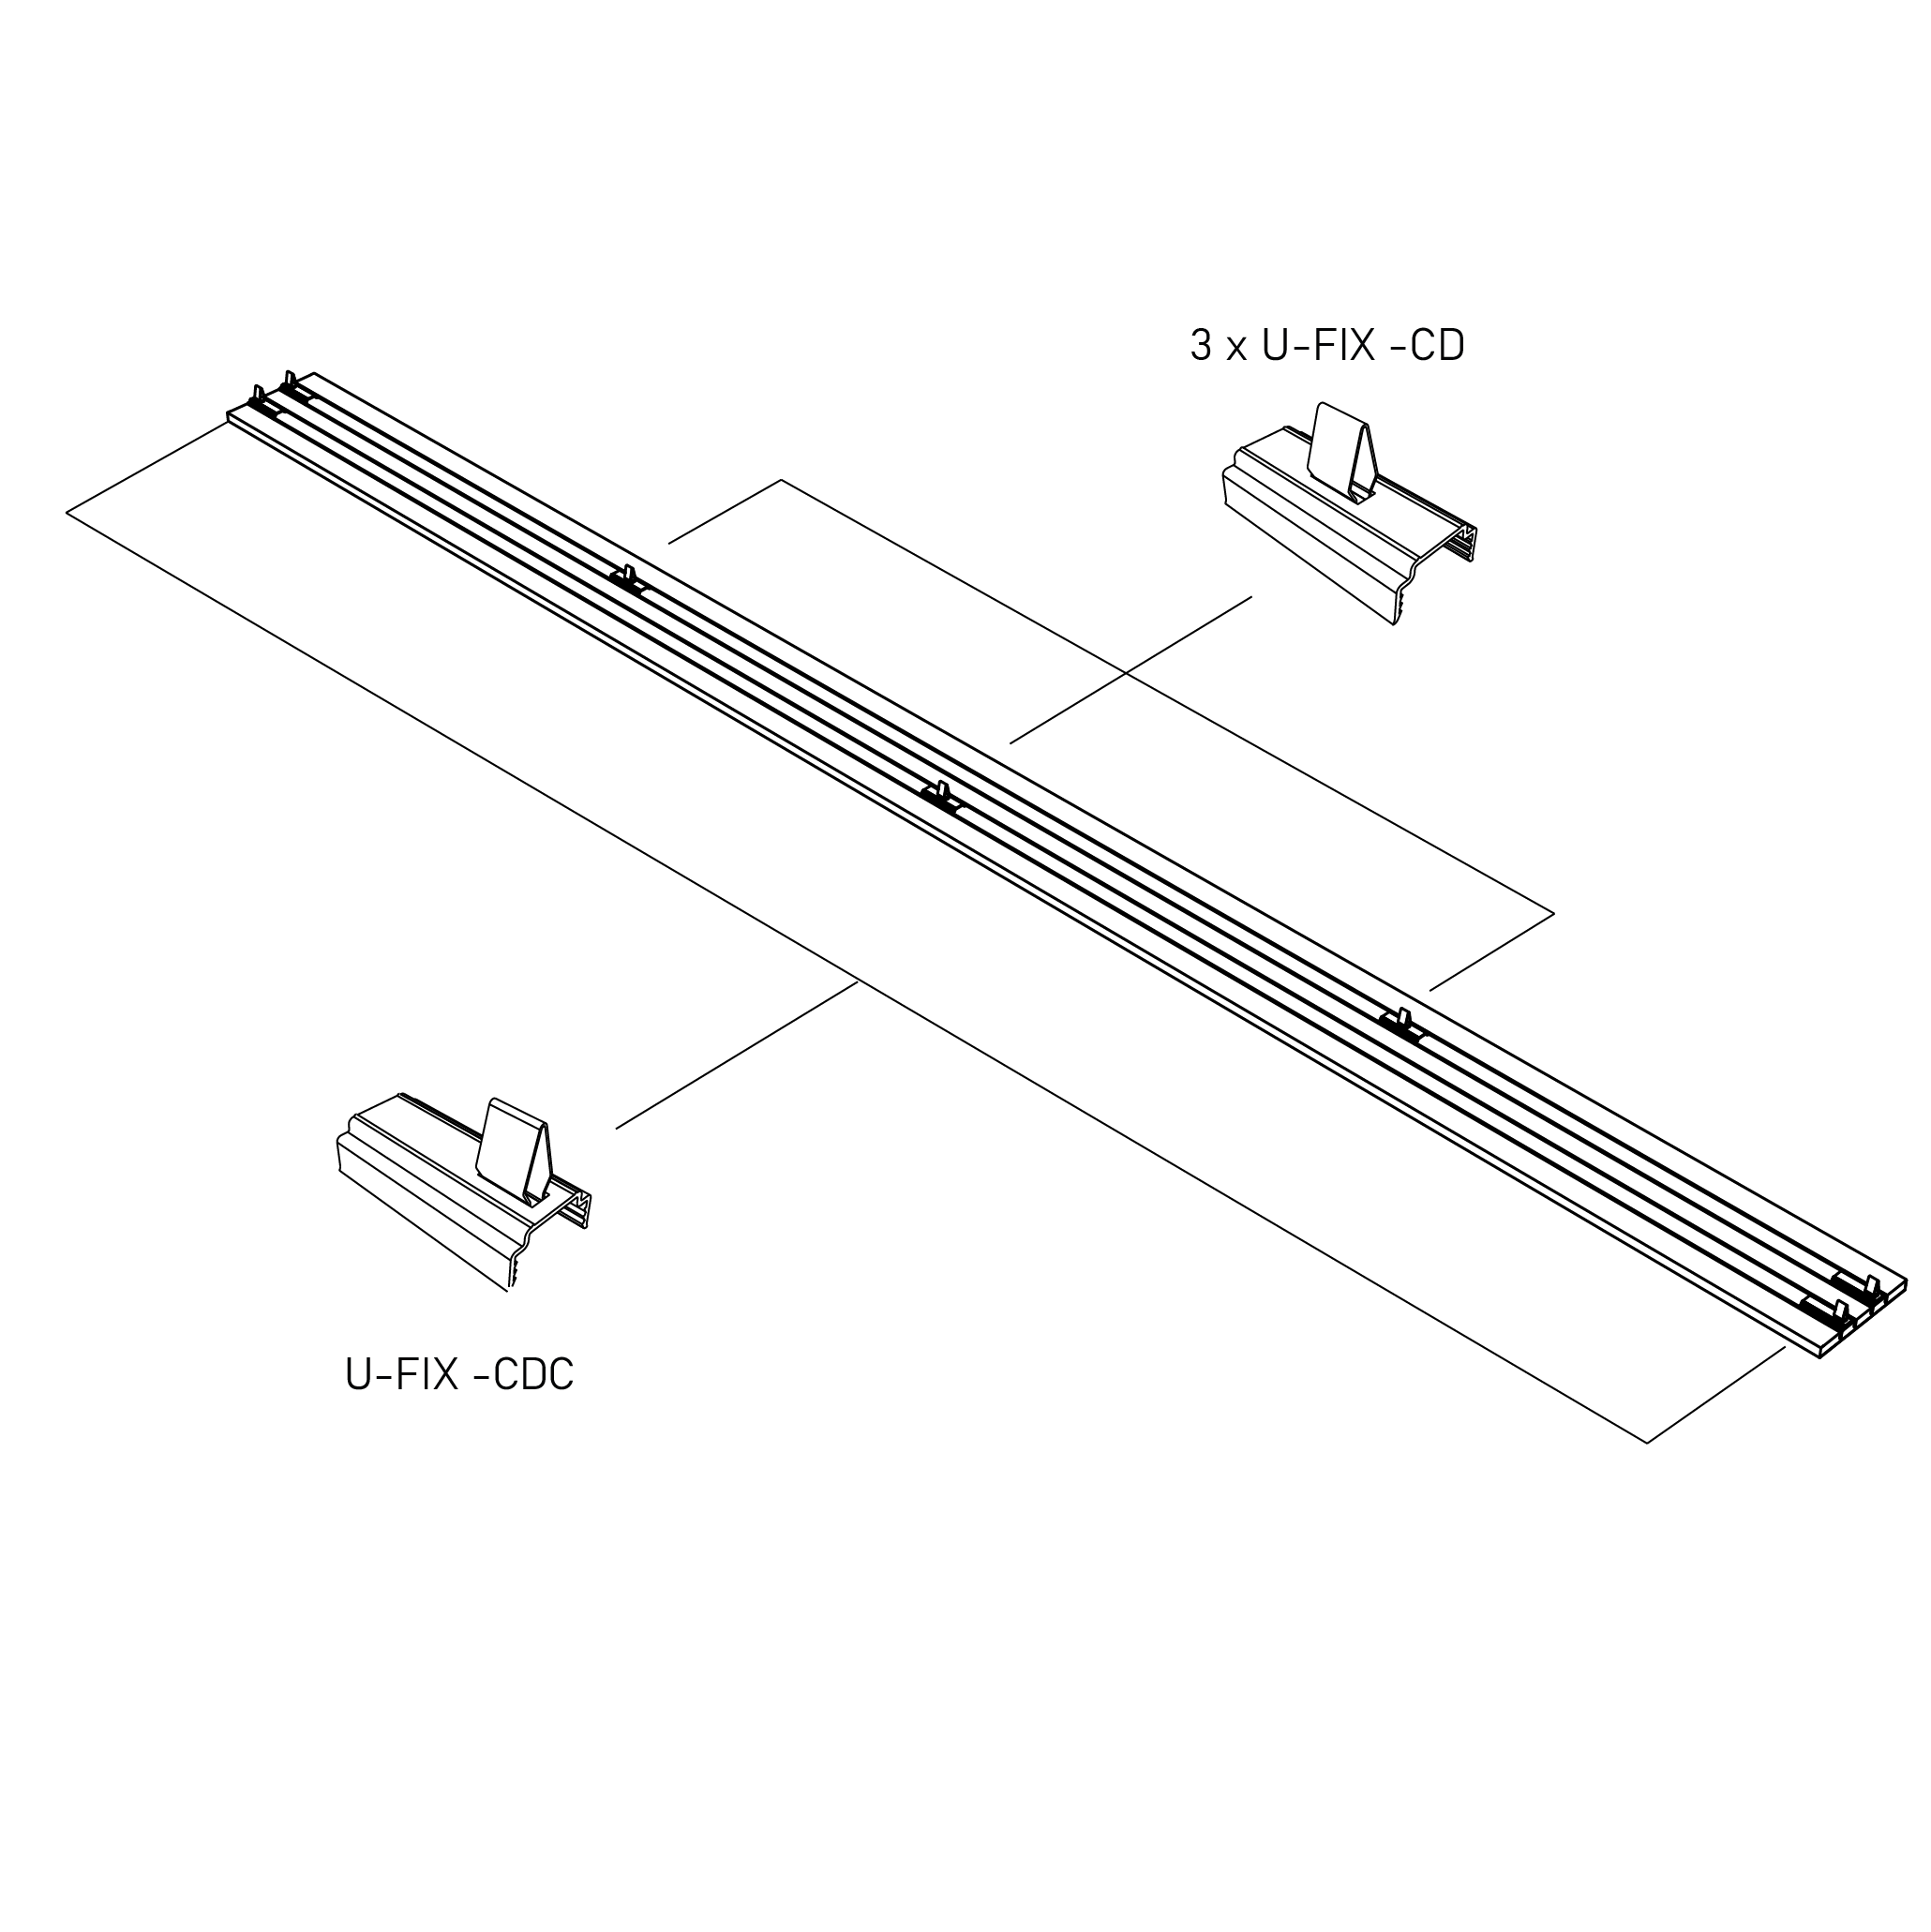
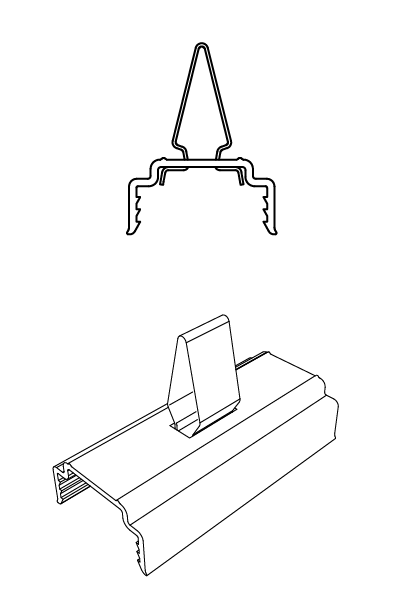
12. Attached 3 additional U-FIX-CD at a cc distance of 600 ± 10 mm.
For Plank dimentions 138mm and 188mm, place the additional U-FIX-CD clips in every other groove.
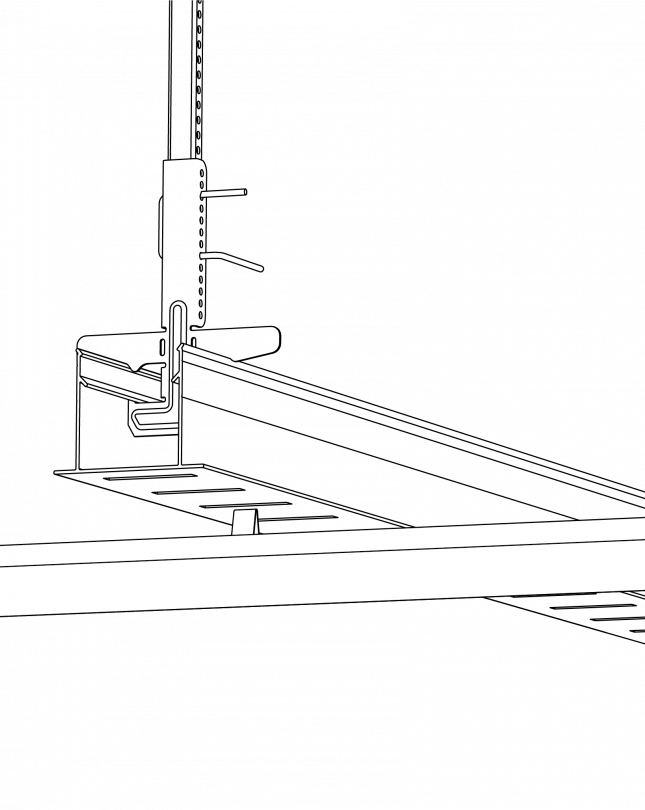
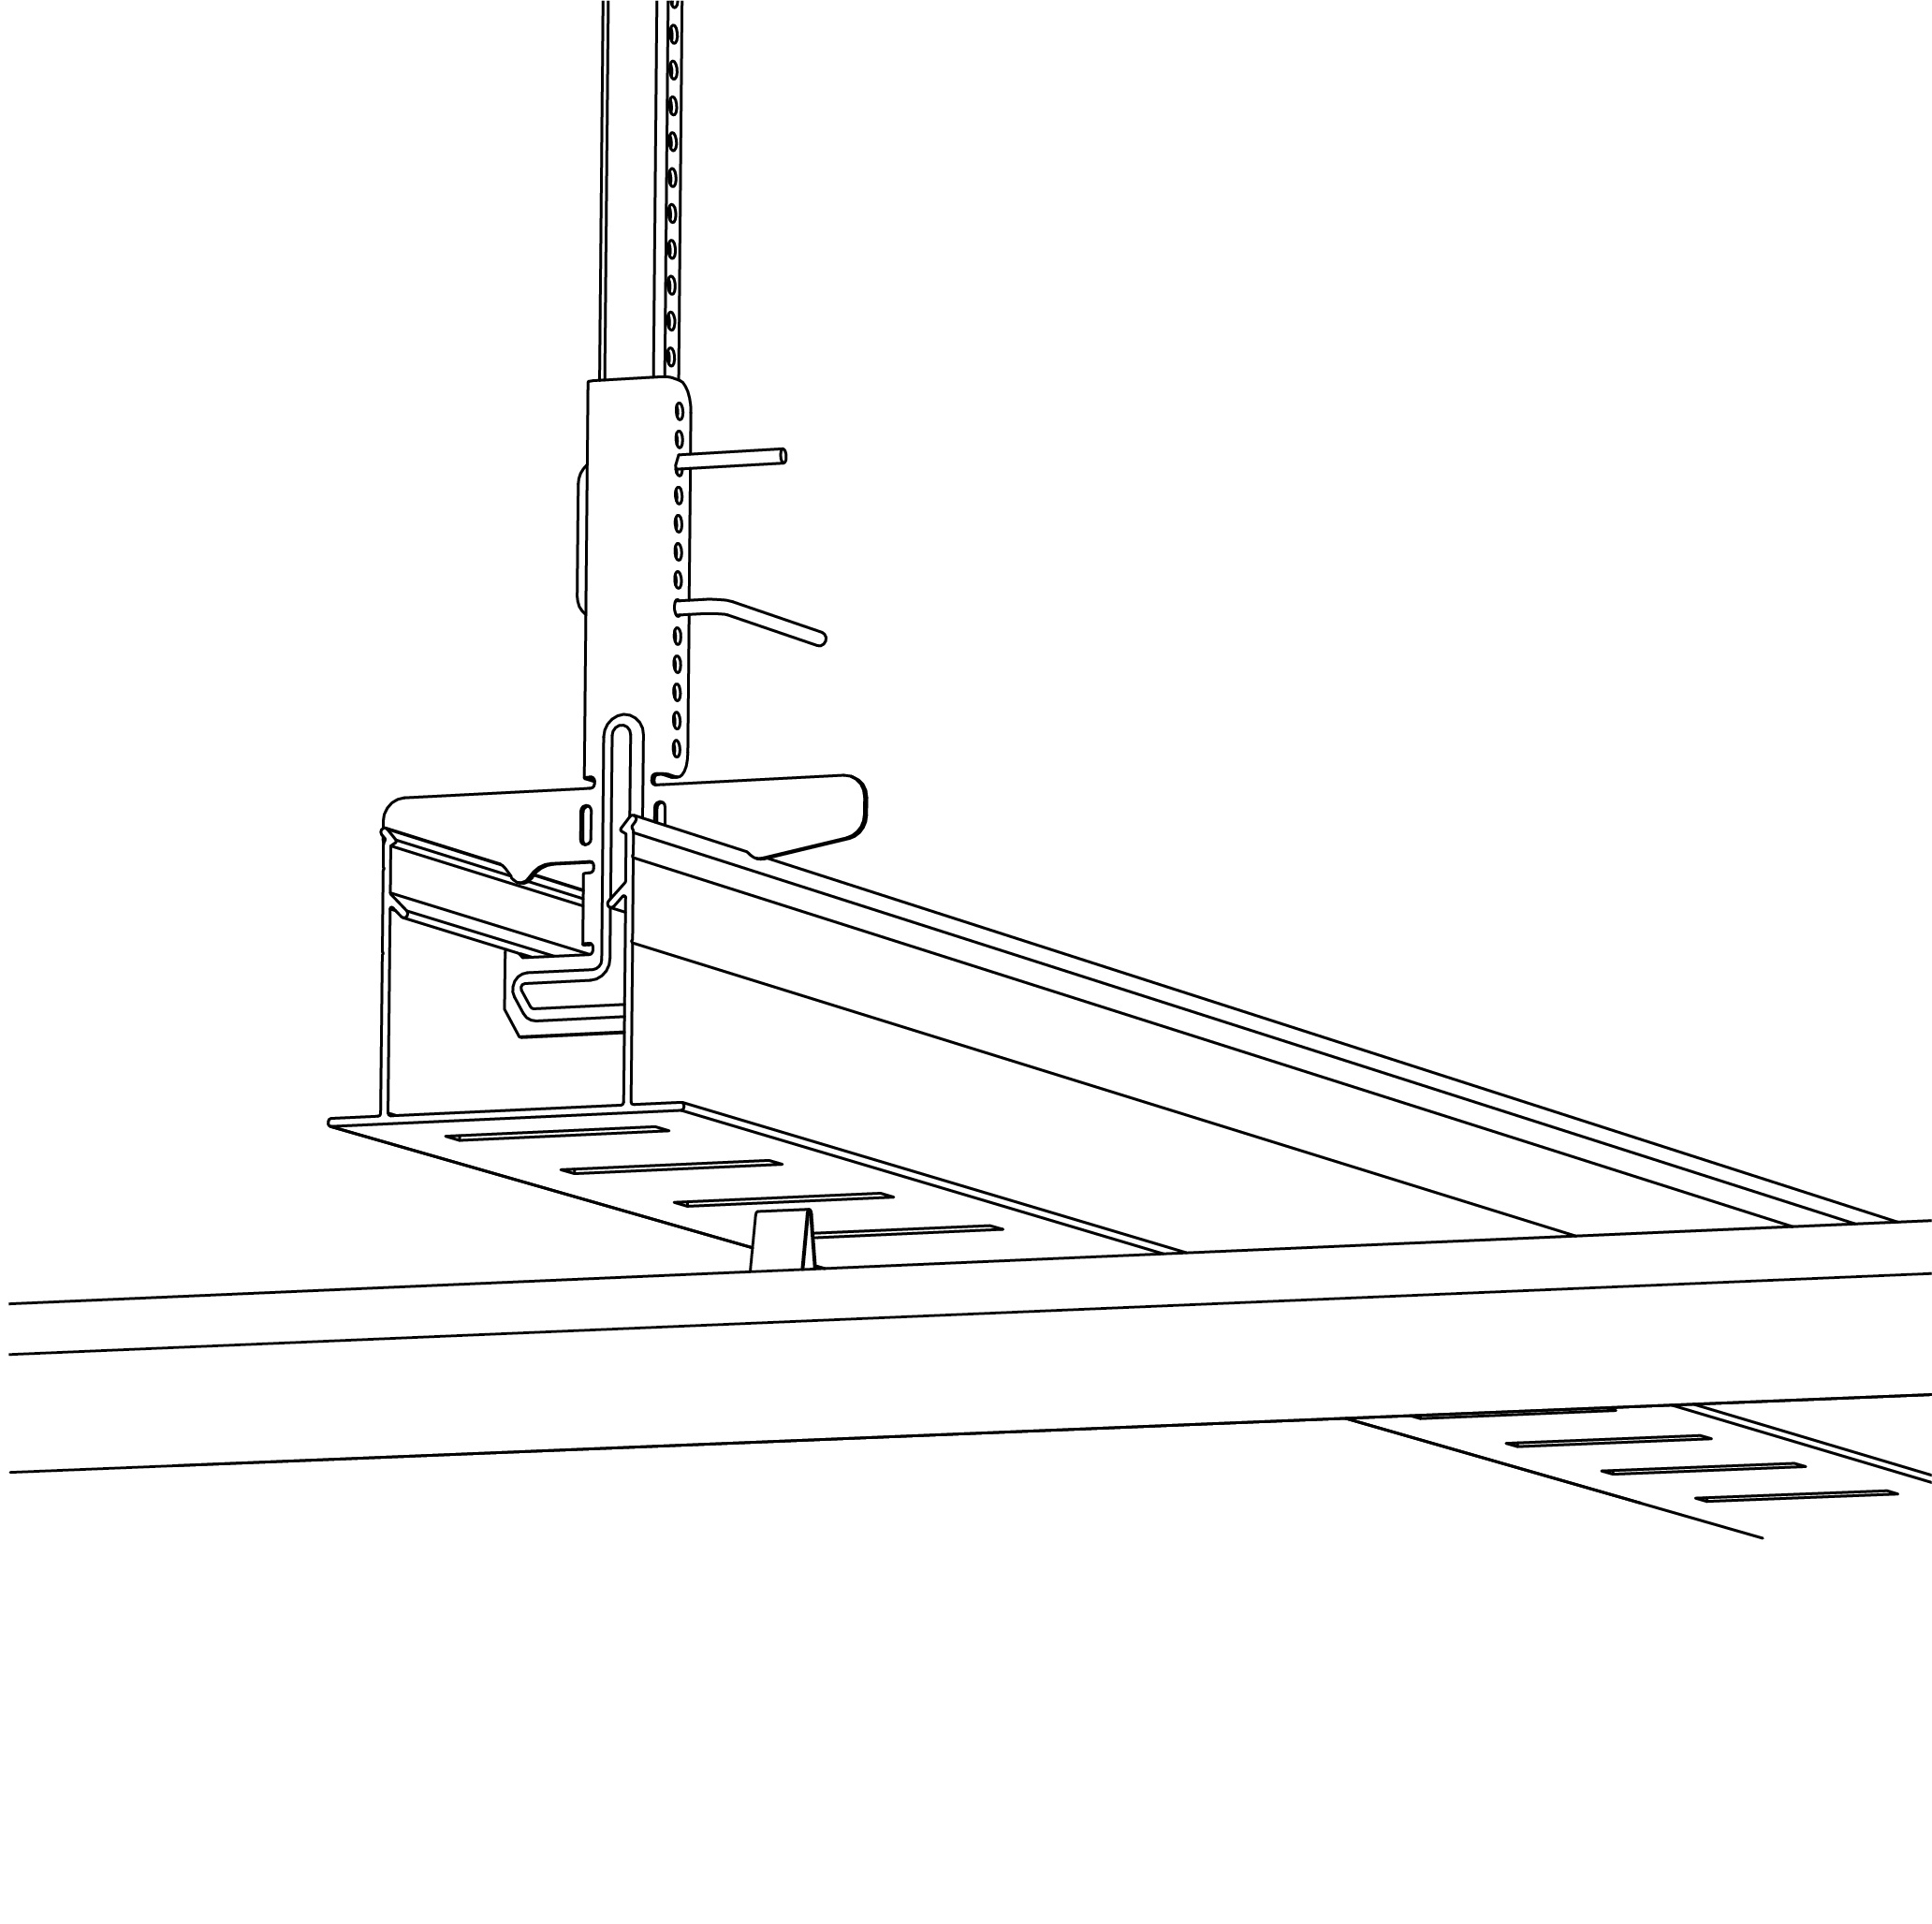
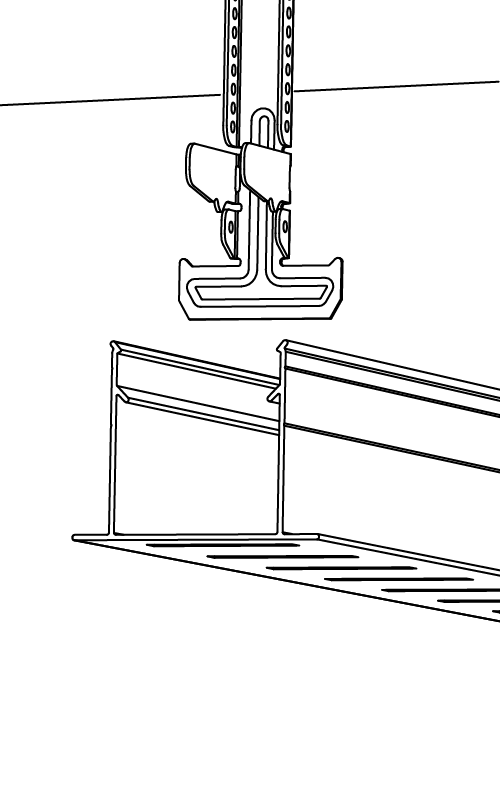
13. Attach the Planks to the BASE-CD by clicking the spring-clips into the rectangular holes.
14. The in-line connection of 2 Planks should be secured by a BASE-CD profile.
15. Optionally use the U-FIX 200 for in-line connections of the Planks. Please note that that the Planks will not remain fully demountable.

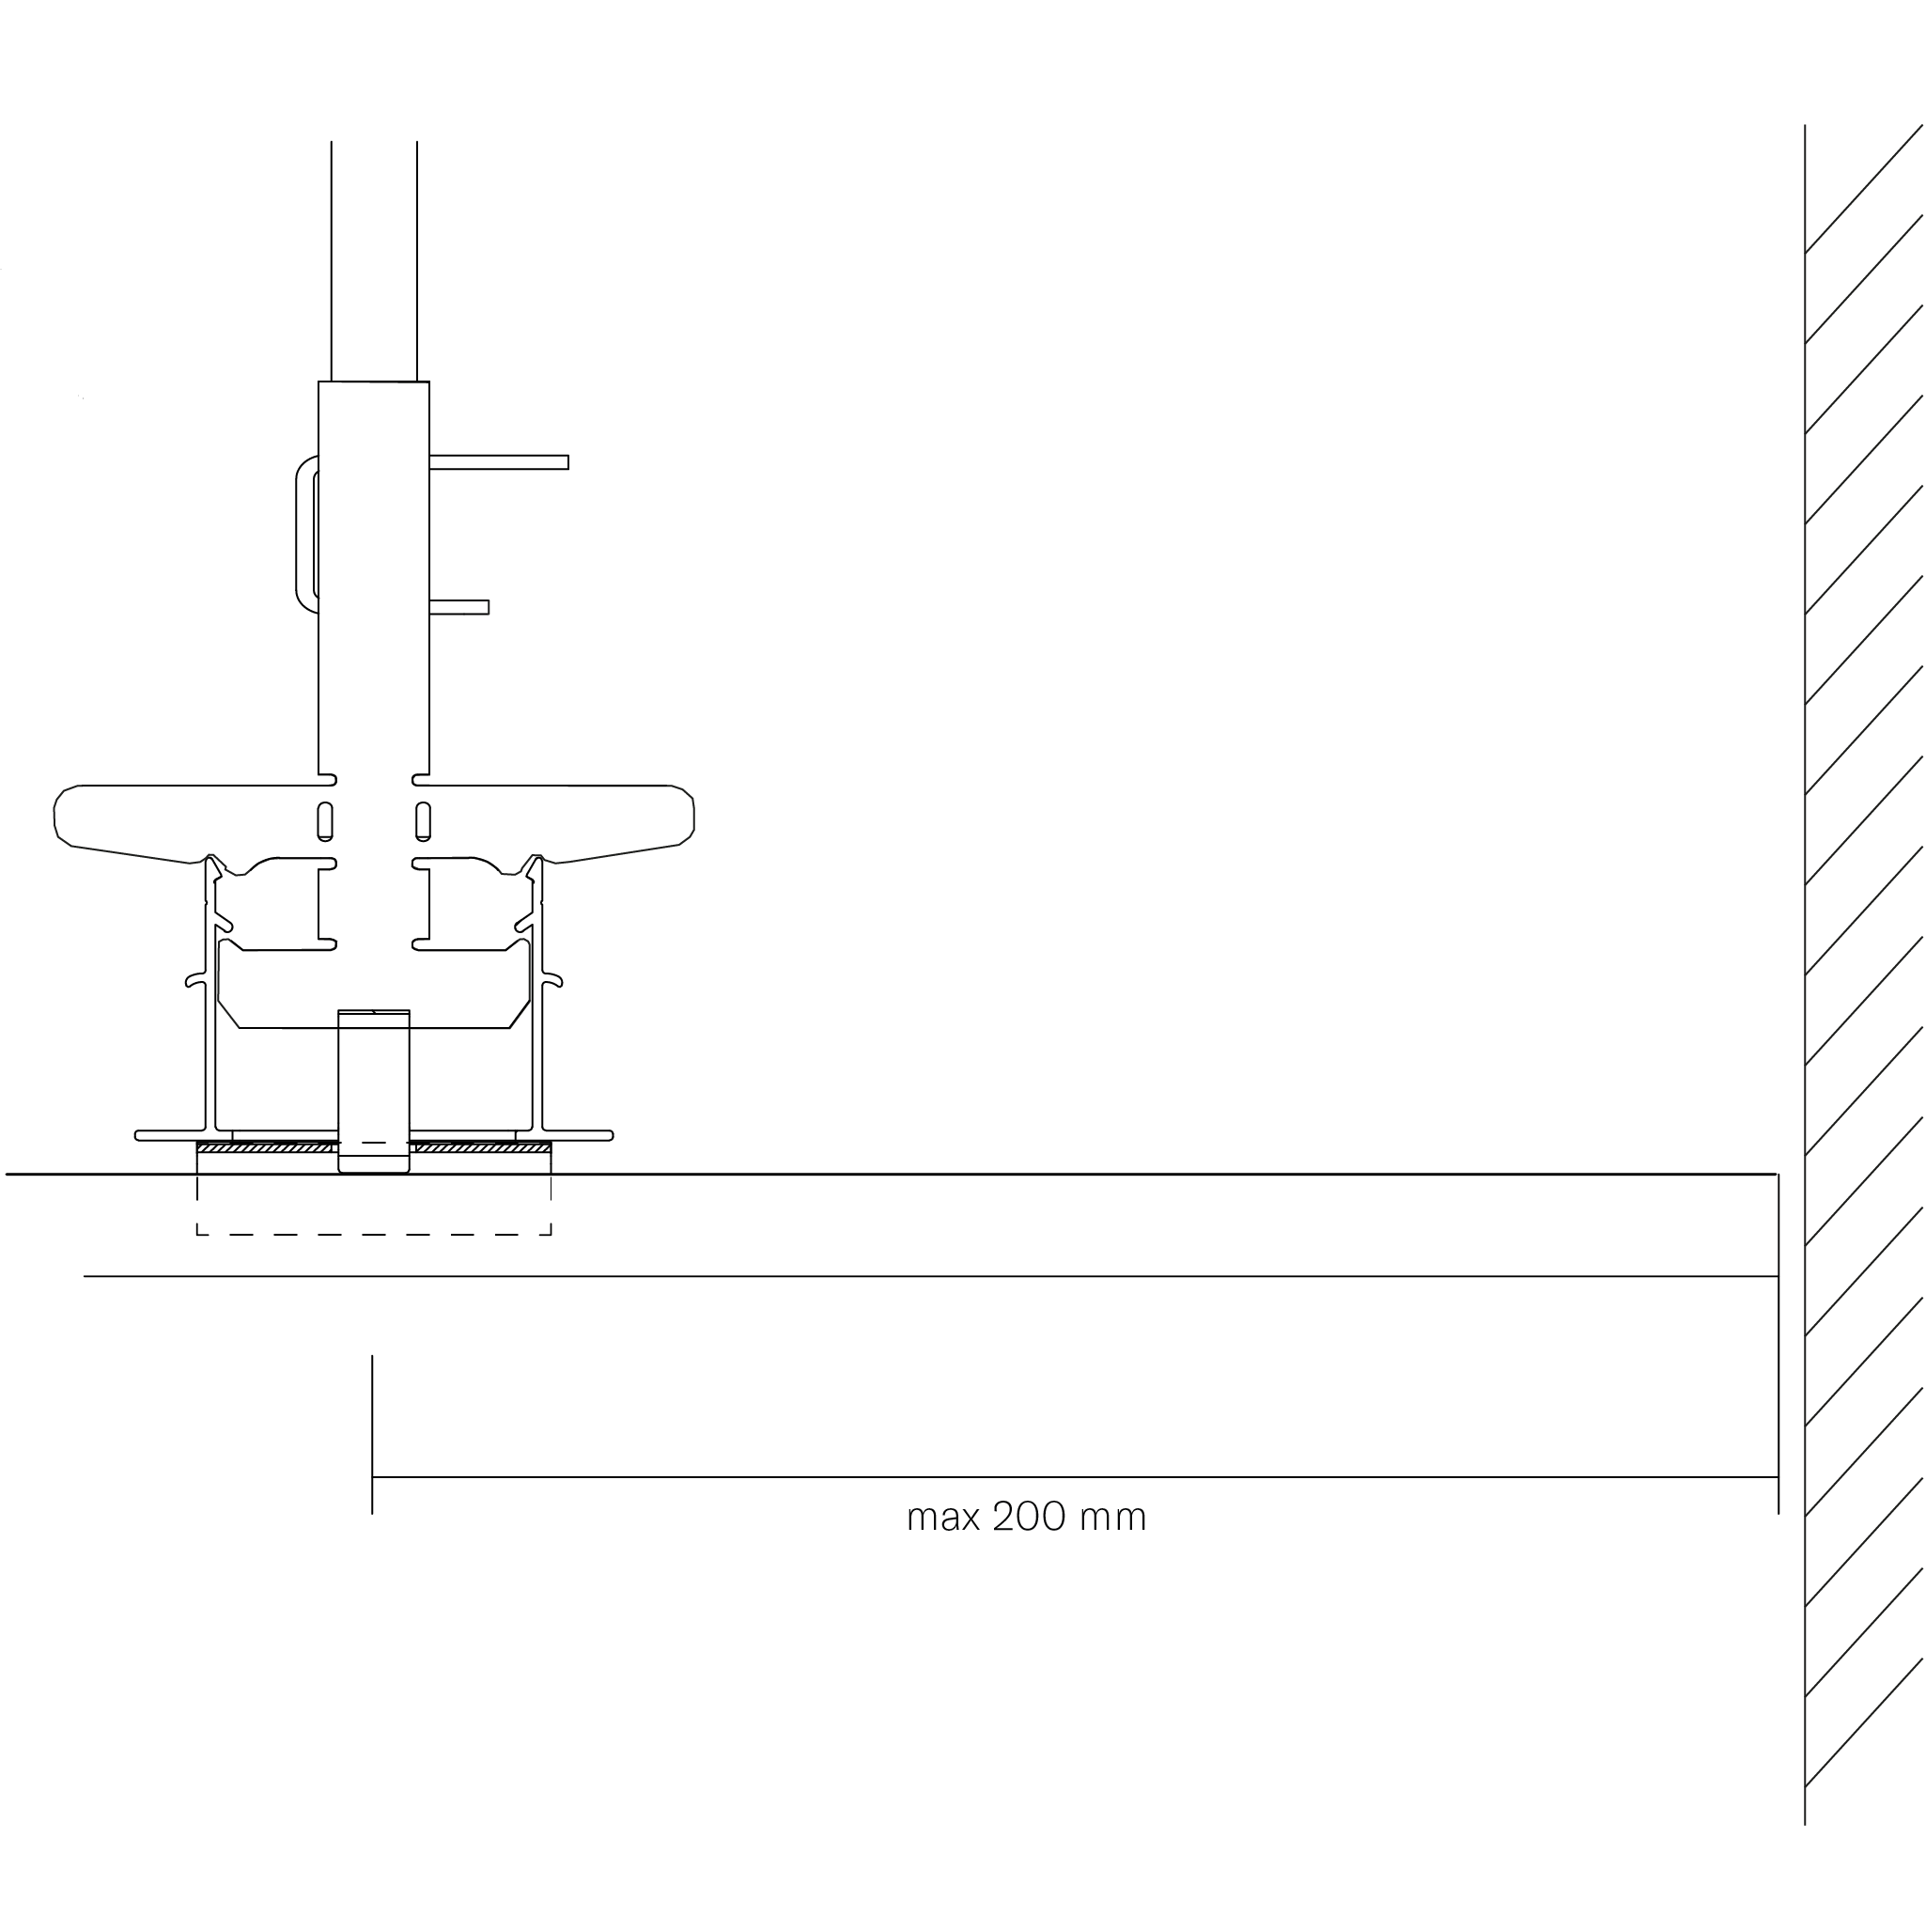
16. The end of a plank must not protrude unsupported more than max 200 mm.
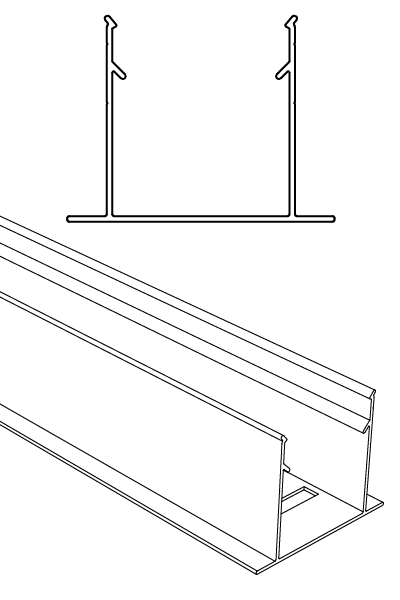
Ceiling carrier. Lenght: 3100mm
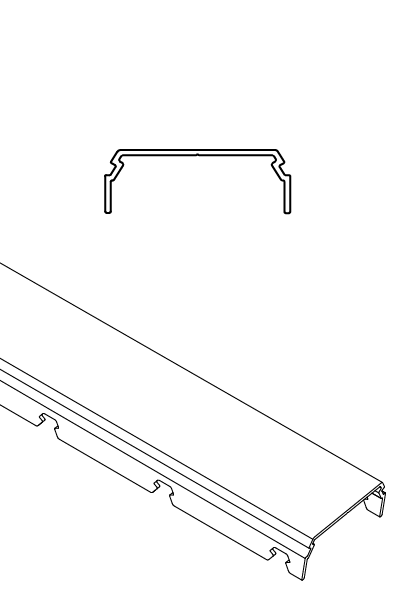
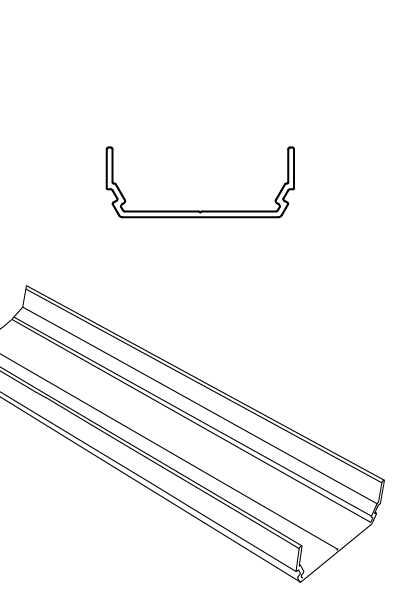
Distance profile, with cuts every 50 mm. Lenght: 3120 mm
3263 Connector. Length 300 mm
Lenght: 50 mm
Lenght: 50 mm
Available in lengths from 200 mm-2000 mm

Adapter to connect the BASE-CD
To secure the Nonius-CD position.

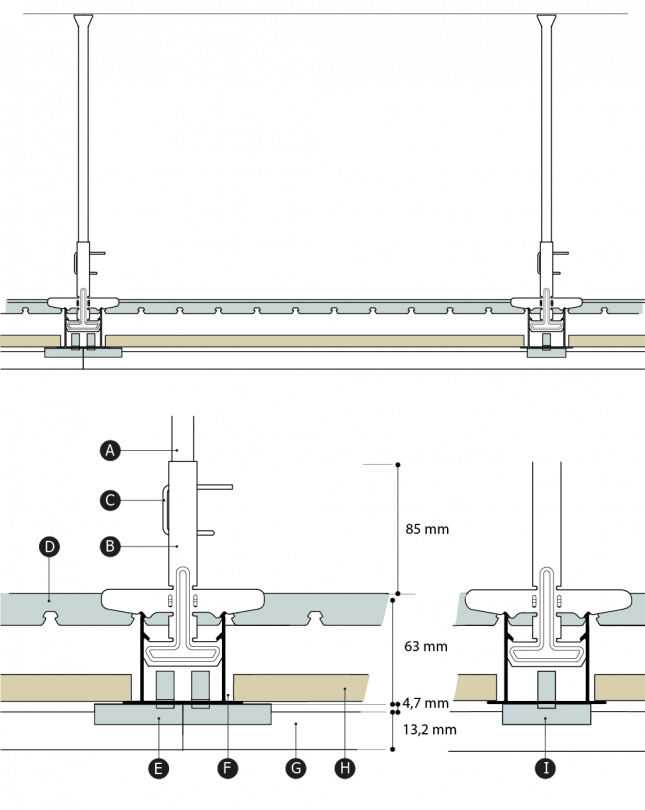
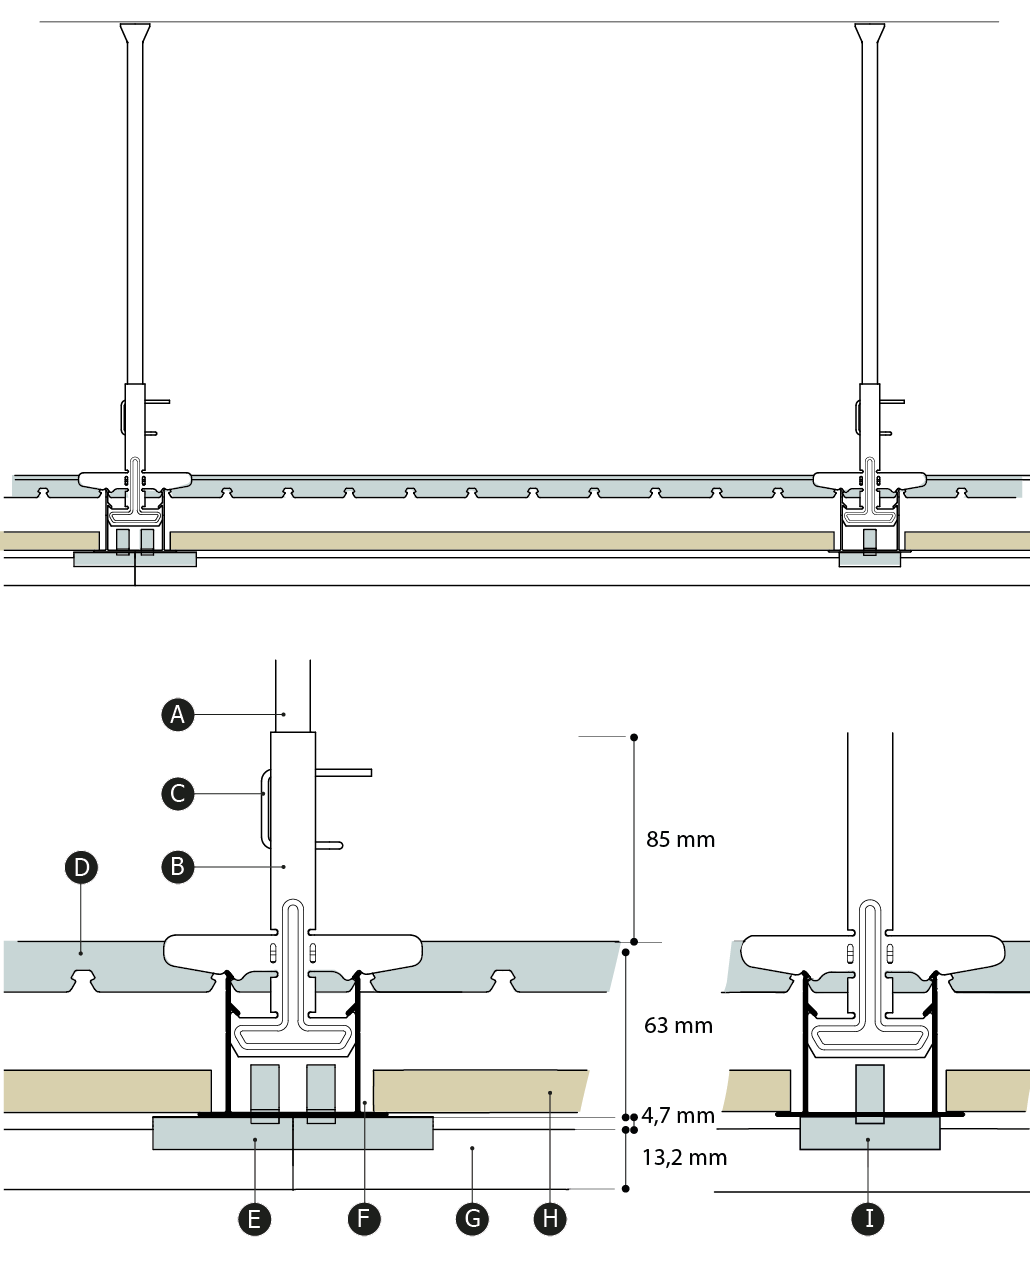
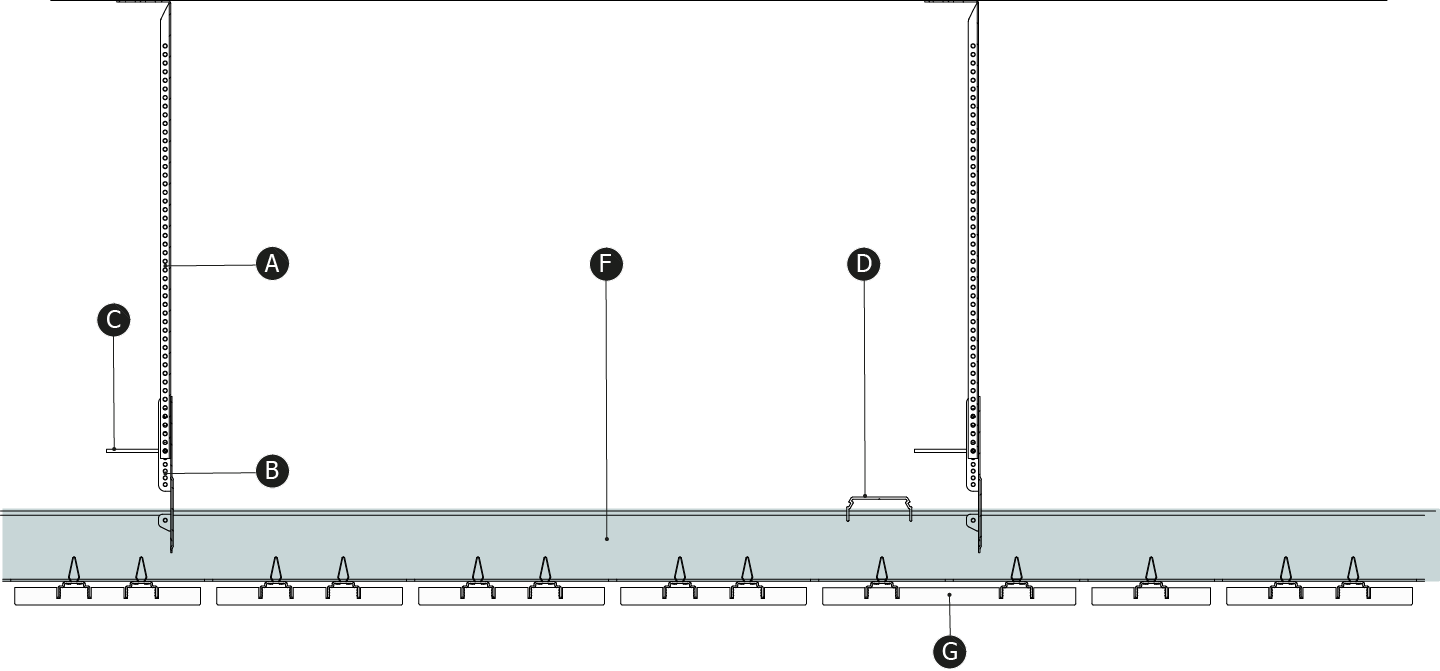
A. Nonius hanger
B. Nonius adapter
C. Nonius locking pin
D. 3262 distance profile
E. U-FIX-CDC
F. BASE-CD
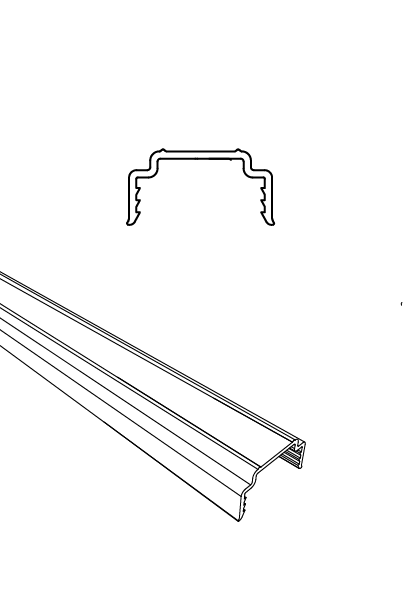
G. Plank
H. Acoustex
I. U-FIX-CD
Wood is a natural product and each veneer is unique. Colour, pattern and structural differences are considered as normal and a part of the décor. Select planks on colour shade and plan your wall or ceiling installation, we recommend mixing varying shades randomly. Wood changes over time when exposed to UV-light.
Only for indoor use and not in wet rooms. Storage, Installation and Use at 18-50 C° and 25-60% air humidity. The humidity in the under laying construc-tion (concrete) should not be higher than 15%. Gustafs solutions are sensitive to humidity and water, therefore they should always be stored dry and in-door.
· Do not transport unsecured planks.
· Do not stack pallets.
· Keep the packaging closed during storage.
· Lift panels flat, vertically and one at the time.
· Avoid exposure to strong and direct sunlight.
Cleanings is done by dry mop or vacuum. Use synthetic cleaning fluid without ammonia for greasy stains, fruit, wine and coffee. Blood is removed with cold water.
Our UV coated and Laminate surfaces are approved for hospital cleaning products containing up to 70% alcohol.
– Avoid exposure to strong and direct sunlight.
– Do not slide products on each other. Lean panels against a wall for short term storage.
– Do not expose visible surfaces to sharp objects during installation.
– Protect both non-installed and installed Planks from impact coming from ladders, trolleys, furniture installation, etc, including all other workers and their tools.