System panelowy – Montaż na ścianie
System paneli Gustafs jest montowany na ścianach za pomocą profili montażowych Capax, dzięki czemu każdy panel jest indywidualnie blokowany ze wszystkich czterech stron. System montażowy Capax jest w pełni zintegrowany z panelami, ukryty, oszczędzający czas i niezawodny.

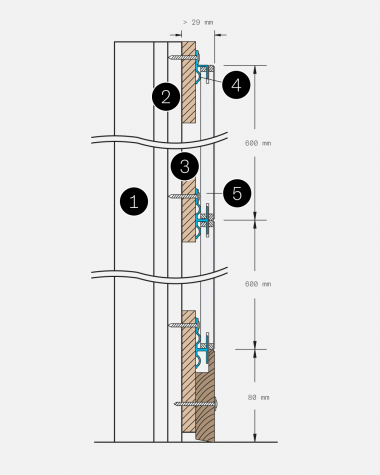
1. Listwa
2. Płyta ze sklejki 12 mm 3
. Płyta
gipsowa 12 mm 4. Profil
Capax 5. panel Gustaw
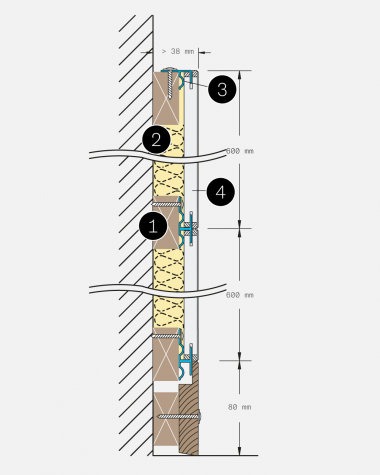
1. Listwa 2. Płyta
gipsowa 2×12 mm 3. Paski
ze sklejki 12 mm 4. Profil
Capax 5. panel Gustaw
1. Łaty
2. Izolacja
3. Profil
Capax 4. panel Gustaw
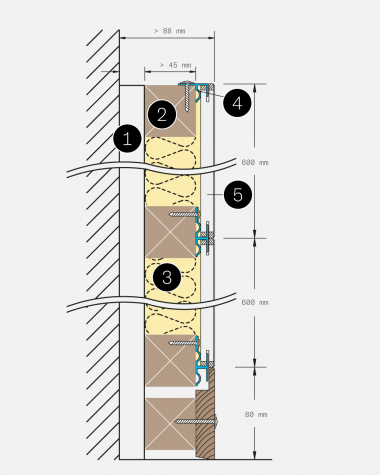
1. Łata
2. Płyty
gipsowe 2 x 12 mm 3. Paski
ze sklejki 12 mm 4. Profil
Capax 5. panel Gustaw
Instalacja dostosowana do potrzeb klienta
Niniejsze instrukcje odnoszą się do naszej standardowej instalacji. W przypadku innych rozwiązań, takich jak zakrzywione ściany, zamknięcia i okładziny drzwiowe, skontaktuj się z naszym wsparciem.
SKONTAKTUJ SIĘ Z POMOCĄ TECHNICZNĄDownloads
downloads. installation