System panelowy – Montaż sufitowy

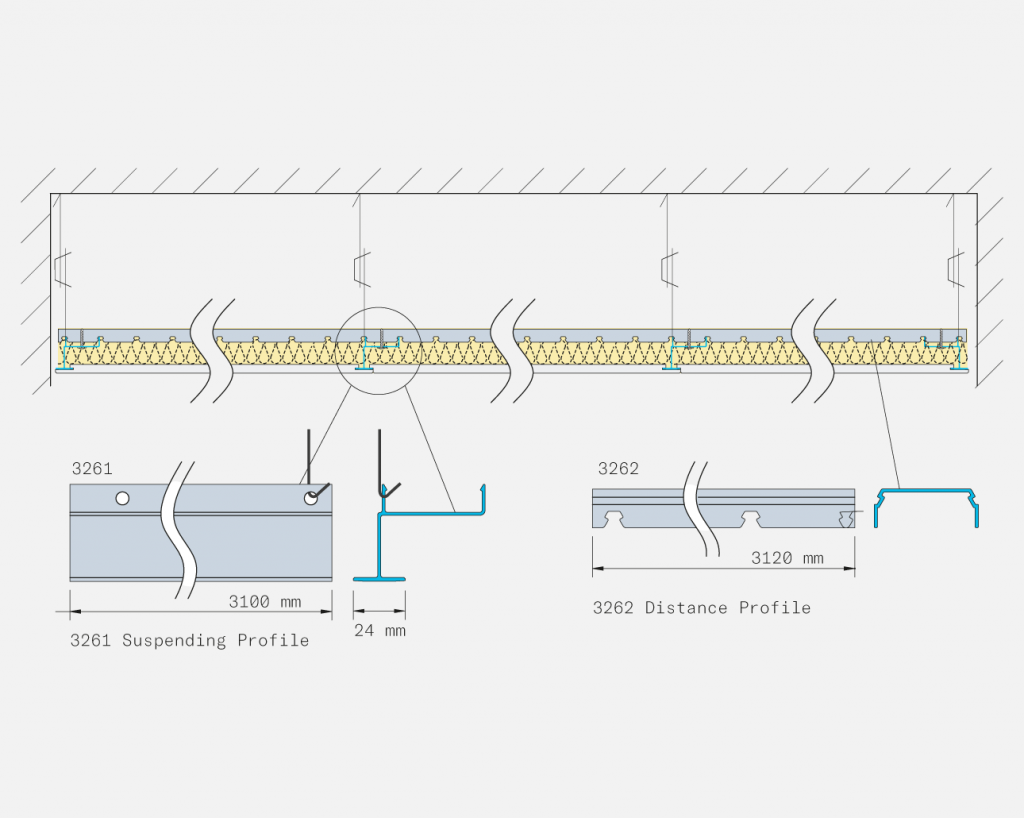
System sufitów podwieszanych Capax składa się z wytrzymałej prowadnicy głównej o profilu T, która podtrzymuje długość panelu. Szerokie boki paneli stykają się ze sobą z precyzją. Główny profil prowadnicy jest blokowany za pomocą profilu dystansowego, tworząc w ten sposób bardzo stabilny system siatki.

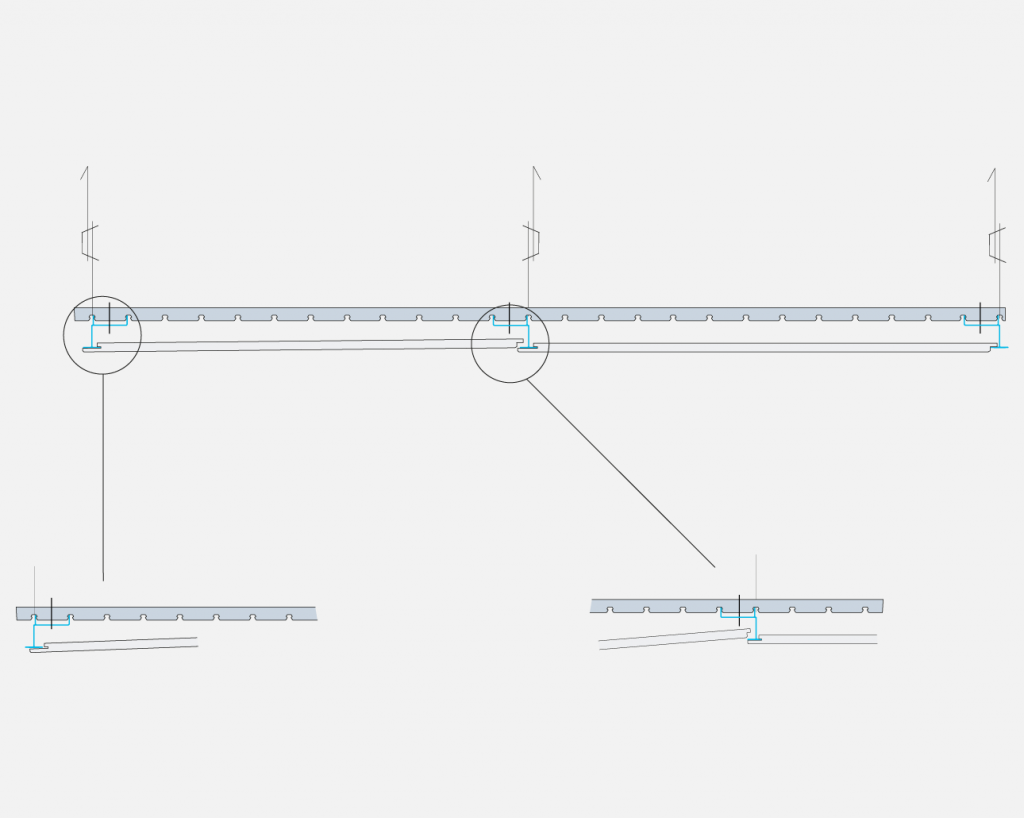
Zawieszenie sufitowe i profile

Rysunki zawieszeń paneli sufitowych i profili

Krawędzie i połączenia

Krawędzie i połączenia do montażu na suficie

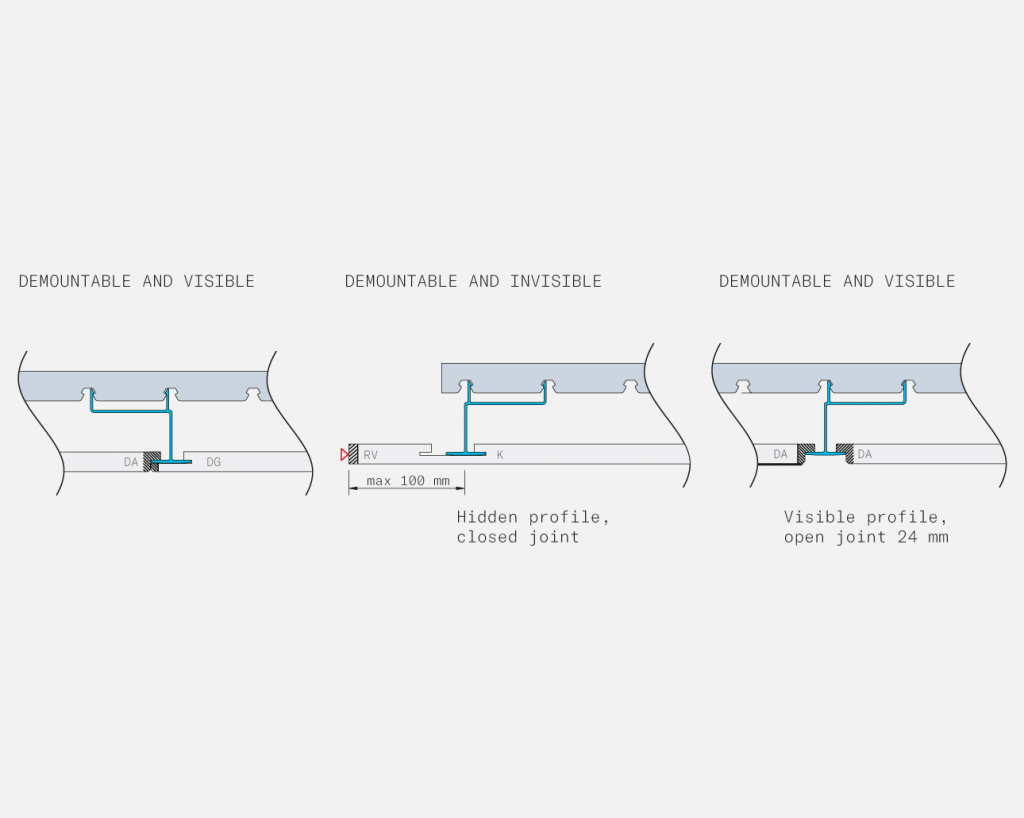
Ukryte i demontowalne

Montaż na suficie podtynkowym i demontowalnym

Rozwiązania specjalne

Indywidualne rozwiązania sufitowe
Niezbędne informacje przed montażem
+

Fire

Please note that the fire classification for perforated panels only is valid if mineral wool insulation is used behind Gustafs Panels. Thickness 45 mm density, 28 kg/m3 and have euroclass A1 or A2 classification.

The construction

The construction is torsionally rigid and self-bearing, lacking the need to fix onto adjacent walls.

The system offers full panel demountability and thereby access to overlying technical installations while maintaining its overall stability and strength.

Capax ceiling profile system is aesthetically appealing because totally hidden.

The system is constructed for a panel width of 600 mm but even allows for a 50 mm variation between 300 and 600 mm.

Storage, installation and use conditions

Only for indoor use and not in wet rooms. Storage, Installation and Use at 18-50 C° and 25-60% humidity. The humidity in the under laying construction (concrete) should not be higher than 15%.

Installation, step by step
+

1. Measure and mark the attachment points for nonius hangers. Then install the hangers at the marked points.
2. Hang the main runner profiles on the nonius hangers and then connect the profiles to each other.
3. Attach the distance profiles crosswise with the main runner profiles. Secure snap lock with selfdrilling.
4. Start installing the panels by attaching the panel edge to the capax profile. You can also saw the panels on site if necessary. Be sure to polish the edges of the panel after cutting.
5. Install the insulation behind the panels and between the profiles, once a panel is in place.
6. Finish the installation by cleaning the panels from dust and dirt

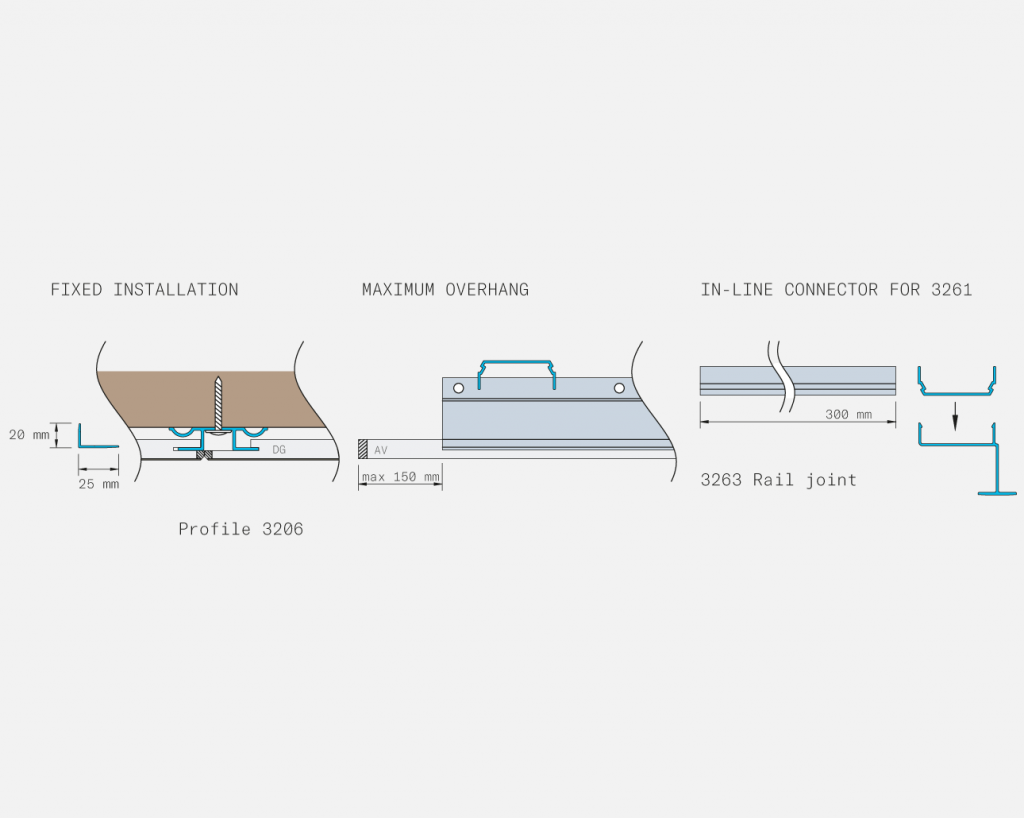
Instalacja dostosowana do potrzeb klienta

Niniejsze instrukcje odnoszą się do naszej standardowej instalacji. Aby uzyskać rozwiązania dostosowane do Twoich potrzeb, skontaktuj się z naszym działem pomocy technicznej.

SKONTAKTUJ SIĘ Z POMOCĄ TECHNICZNĄ
Generic filters
Exact matches only
Search in title
Search in content
Search in excerpt
POPULAR