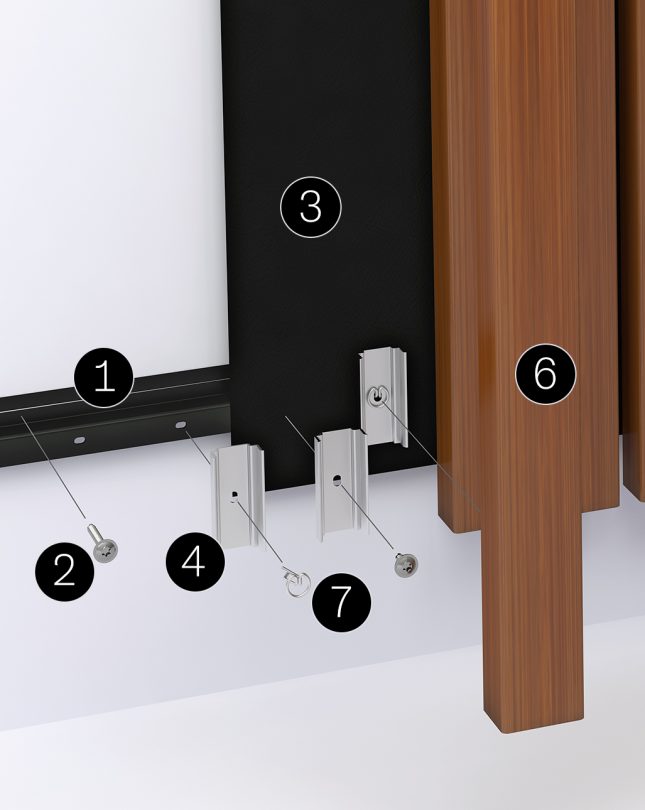
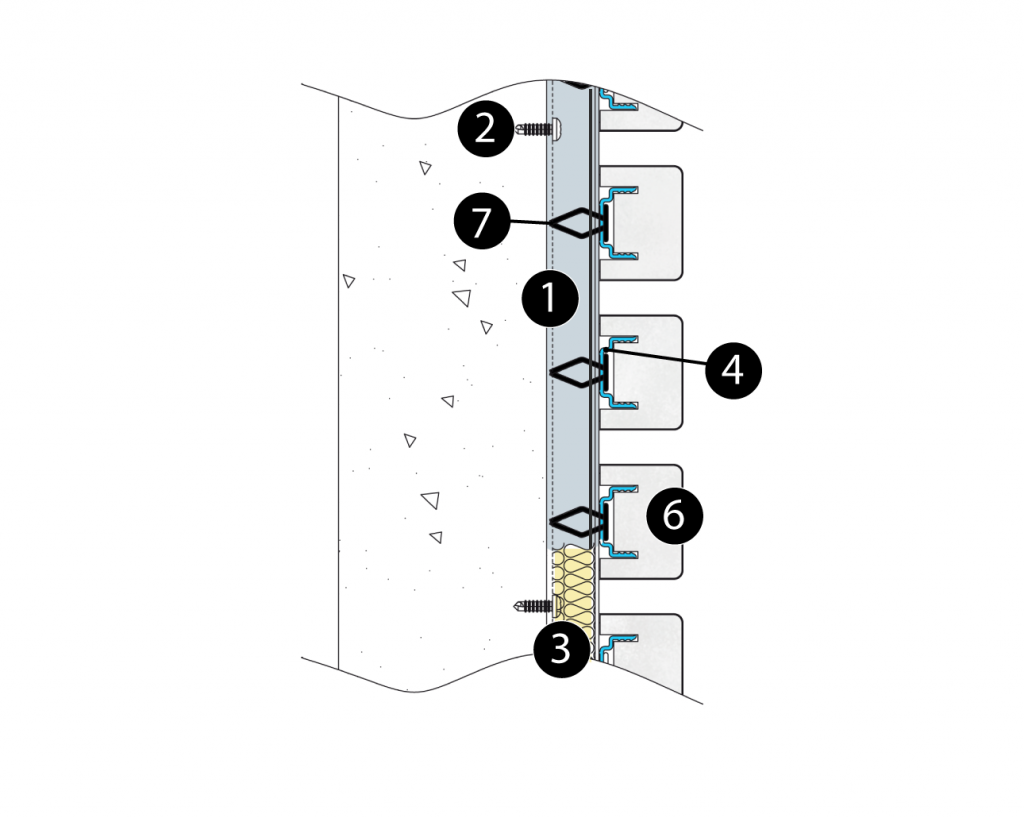
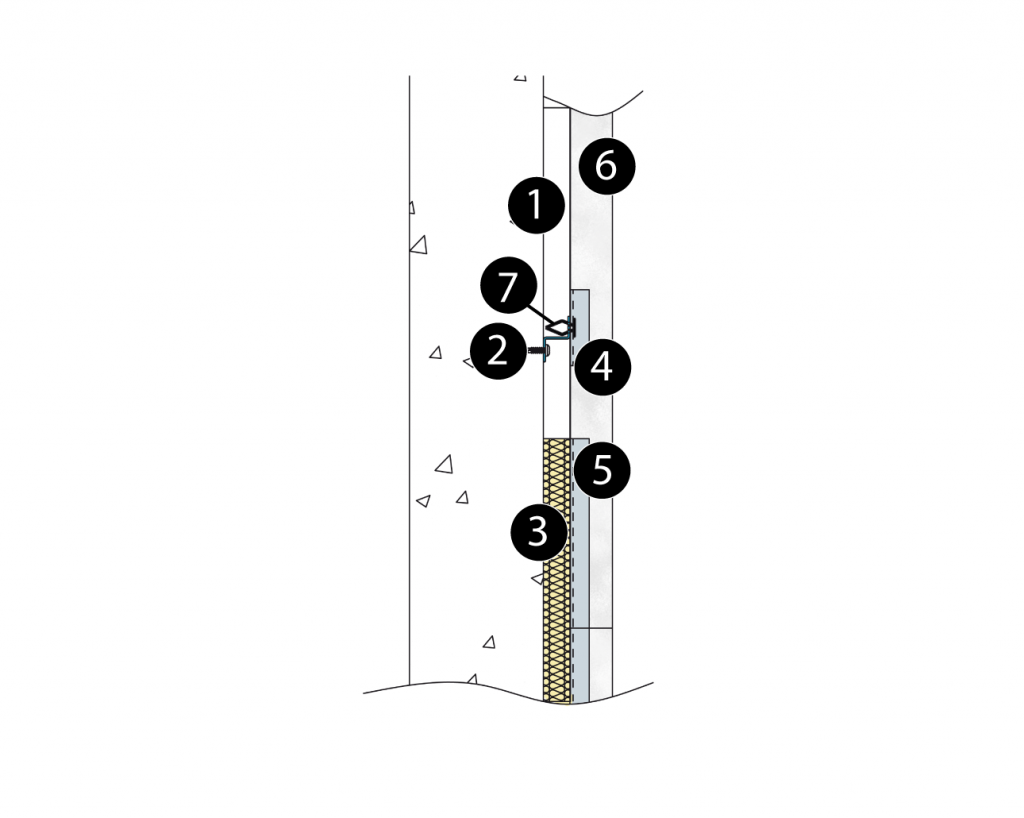
Montaż liniowy żebrowy – ścienny

System instalacyjny Capax dla Linear RIB to przyjazna dla użytkownika aluminiowa kratka, oferująca niezawodność montażu i doskonały efekt wizualny. Do montażu elementów blokujących nie są potrzebne żadne narzędzia. Dostępna jest wersja demontowalna, idealna, gdy wymagany jest dostęp do systemów pomocniczych.

Installation with insulation & Acoustex felt
+

1. Optional: First mount a framework of wooden battens to the wall with the help of a laser-level and spacers.

2. Mount the Capax profile BASE-W (1) every 600 mm.

3. Install the 17 mm insulation material (3). Alternatively 45 mm insulation in combination with 28 mm thick wooden battens.

4. Install the Acoustex felt with some double sided tape to keep it in place during the installation.

5. Attach the Capax U-FIX clips (4) flush to the BASE-W profile (1) with demountable clips or permanent screws. This also holds the Acoustex in place permanently. Depending on the type of Acoustex you might need to hole punch the felt before inserting the demountable clips.

6. Twist the U-FIX clips 90° into a perpendicular position to the BASE-W.

7.Carefully attach the Ribs to the U-FIX clips by using a rubber hammer. Use a fixture, during this installation step G, to align the Ribs. If needed, carefully re-align by hitting the ends of the Ribs with a rubber hammer and using a wooden protection block.

Installation with air gap
+

1. Carefully mount the Capax profile BASE-W (1) every 600 mm with the help of a laser-level and spacers.

2. Attach the Capax U-FIX clips (4) flush to the BASE-W profile (1) with demountable clips or permanent screws.

3. Twist the U-FIX clips 90° into a perpendicular position to the BASE-W.

4. Carefully attach the Ribs to the U-FIX clips by using a rubber hammer. Use a fixture, during this installation step D, to align the Ribs. If needed, carefully re-align by hitting the ends of the Ribs with a rubber hammer and using a wooden protection block.

Instalacje dostosowane do potrzeb klienta

Niniejsze instrukcje odnoszą się do naszej standardowej instalacji. W przypadku innych rozwiązań, takich jak zakrzywione ściany, zamknięcia i okładziny drzwiowe, skontaktuj się z naszym wsparciem.

SKONTAKTUJ SIĘ Z POMOCĄ TECHNICZNĄ

Downloads

download

download
download
Generic filters
Exact matches only
Search in title
Search in content
Search in excerpt
POPULAR